This post is a partnership with Cutting Edge Stencils
Before I launch into my stenciling-turned-brainteaser story, I want to write a few words about why we chose to stencil an accent wall in the first place.
For nearly three years, Andy and I have removed wallpaper from BHH. It is a hot and messy job that leaves wads of smelly, sticky paper stuck to our shoes, the woodwork, and everywhere else when we are not careful. The largest rooms are done, but we still need to remove the paper in four more rooms. Well, let me revise that statement. We will remove the paper in three rooms for sure, but the jury is still out on the downstairs half-bath.
Can we all just take a moment to applaud Dorothy’s bold choice here?

Psychedelic cheetahs and gazelles, oh my! I am told by the neighbors that Dorothy had a lion-shaped soap dispenser that roared when the top was pushed down. We still have the fake-fur-covered zebra print trashcan that she kept in this room. (It is as amazing as it sounds.) Our kids feel attached to this bathroom as-is, and we kind of love all of the reactions we get when we show this bathroom to visitors. It is an ideal conversation starter, and we are not in a hurry to change it right now.
Despite all of the hours we have spent removing wallpaper, I like the look of wallpaper. I have a specific fascination with the designs of Anna Rifle Bond and Rifle Paper. (Rosa Indigo = Perfection) We have a six-degrees-of-separation connection with Rifle Paper, so Anna’s art is always in my design notes when we start a new room.
Sadly, high-quality wallpaper in beautiful prints is very expensive. Every time I get past the thought of spending the money, all those dirty, sweaty wallpaper removal memories come to the forefront. Thus far, we have not been able to compel ourselves to wallpaper anything in BHH aside from the closet in M’s room.
Stencils are a perfect alternative to wallpaper. Modern stencils are laser cut, flexible, and they come in many designs. Cutting Edge Stencils has hundreds of patterns and possibilities. Stenciling mimics wallpaper without the hassle. If we get tired of the pattern in the butler’s pantry, all we have to do is give the wall a light sanding and a couple of coats of fresh paint. That’s it. No steaming and no scraping. Yes, please.
Getting Started
Cutting Edge Stencils saw our original post about decorating the butler’s pantry, and they graciously offered to send us a stencil of our choice. We chose the Japanese Peonies allover design. In addition to the stencil, they sent along a stencil essentials kit which included a foam roller, stencil brush, and a clip-on stencil level.
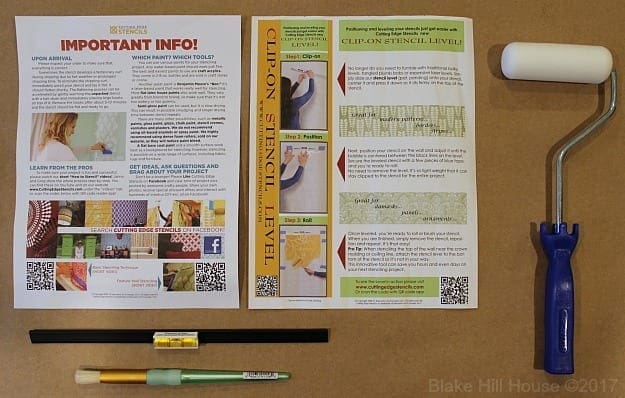
Our package also included necessary instructions and QR barcodes for how-to videos. Cutting Edge Stencils does a fantastic job providing supporting literature and video tutorials. To prepare, I watched a few videos about the process. In addition to videos, all of their instructions are available in PDF form if that is your preference. Their website is very comprehensive. In other words, Cutting Edge Stencils sets all of their customers up for success. What follows is my experience as a mostly type-B person living my life by this motto:
In the beginning, I started by following all of the rules, and I set up my workstation exactly as Cutting Edge Stencils suggests.

I was painting with two colors, so I set up one workstation for each color. The stencil essentials kit provides supplies for one color. I had an additional foam roller, but I did not have another stencil brush. I figured that the design of the brush did not matter too much. (FYI – That screeching sound you are hearing is the sound of the BHH stencil train beginning to come off the tracks. I, of course, did not hear it when I was prepping for the project.) I added a small craft brush to my second set of supplies.
Stenciling
I was anxious to get started when I was faced with my first dilemma. Where to start? The accent wall in this room is only 4′ X 6′. However, it contains a large window, two faucets to work around, and two very narrow sections at the top and bottom.
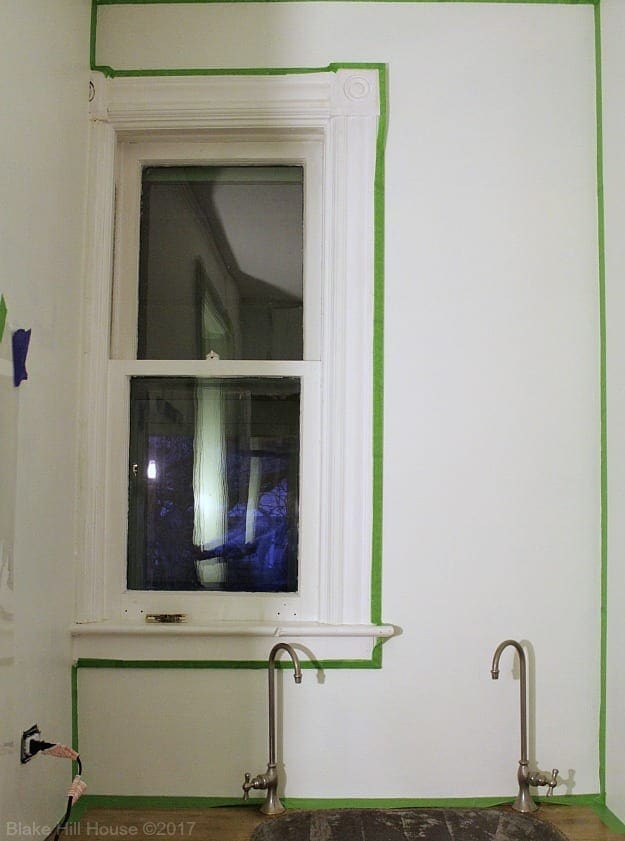
Hmm…
Normal people, who are not over-confidant about their abilities, would refer to the videos on the Cutting Edge website or work out a firm plan on a piece of paper. After all, the first instruction Cutting Edge Stencils gives is make a plan. Make a plan. I did not do that. Surprise. Feel free to discuss my shortcomings behind my back.
I suppose that is not exactly correct. I did give a lot of consideration to where to start. However, when I contemplated all of the pitfalls, I just decided the details would work themselves out in the end. Don’t they always? (Yes, but–)
I opted to start fairly high up on the wall in a spot where I could hang the entire stencil and complete one full design. Starting this way made the most sense to me so I could practice getting the hang of the process with a mostly flat stencil. No part of the accent wall was wide enough to accommodate the full stencil, but the widest part was close.
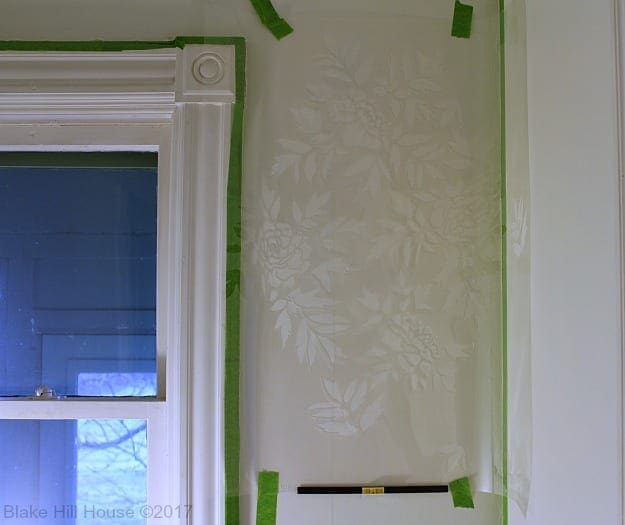
The clip-on stencil level was perfect and much simpler than trying to juggle a regular level and the stencil or having reference marks to paint over later. It was so easy to start on the right foot and keep the pattern level and true on the entire wall.
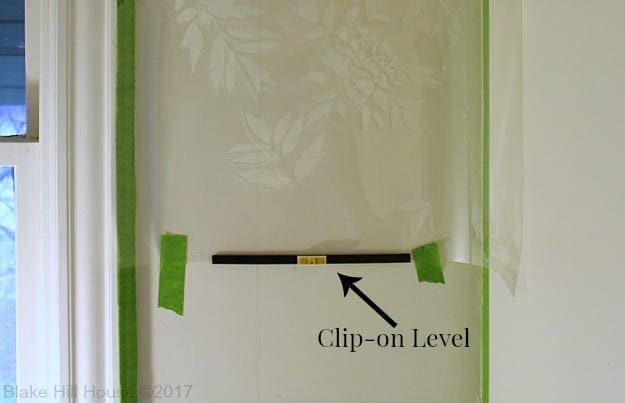
(Note: Per the crystal clear instructions, I was supposed to practice on a pizza box beforehand. I did not. By now, I’m sure you are all wondering what is wrong with me. I do too.)
The first pass on the stencil was the most difficult. The transparent stencil against the white wall was hard to see. The stencil edges cast confusing shadows when it came away from the wall. To prevent that problem, I pressed the stencil to the wall firmly as I rolled on the first layer of paint.
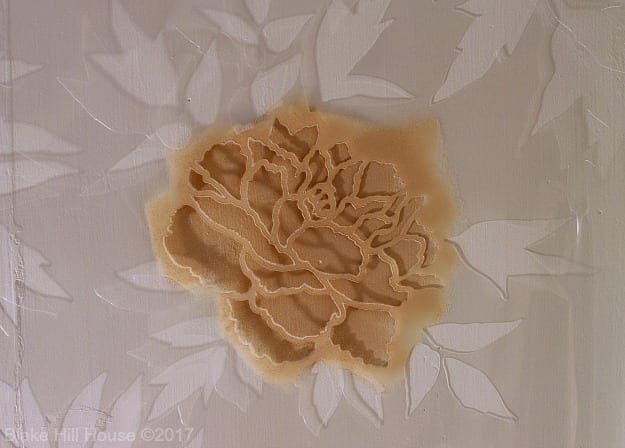
The painting process was so satisfying. I worked on the peonies first. Then, I switched colors for the foliage.
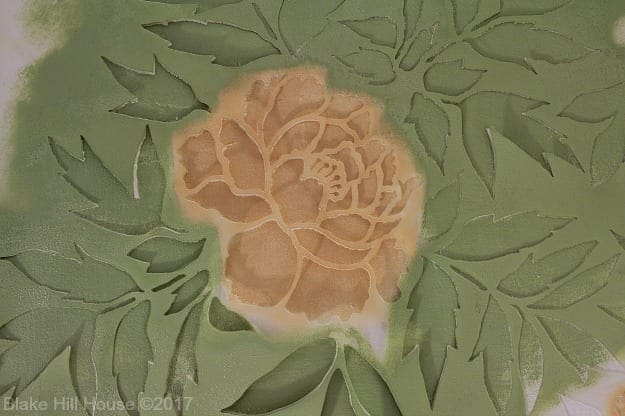
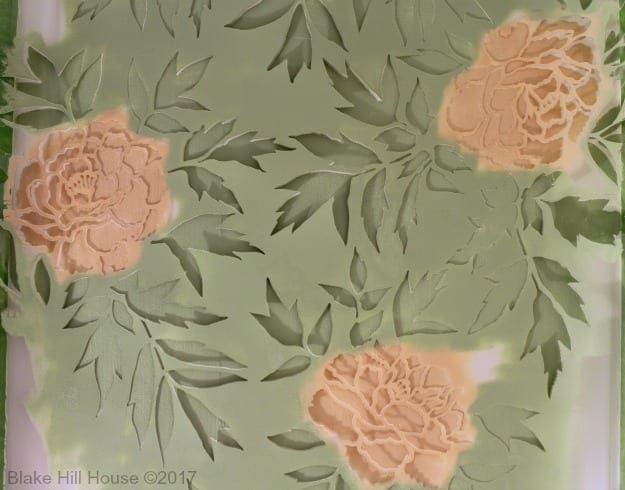
It did not take long to complete the first pattern run. My favorite part was removing the stencil and seeing the completed pattern.
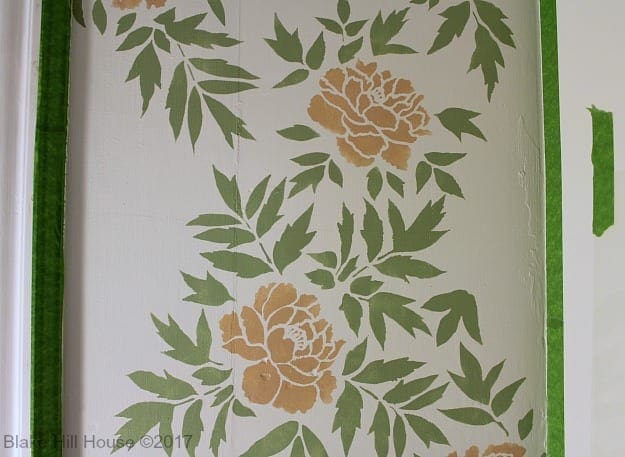
It looked like a beautiful watercolor painting. The print and texture looked exactly how I wanted it to look.
Using the reference pattern shapes on the stencil, I was able to line up the subsequent rows horizontally and vertically.
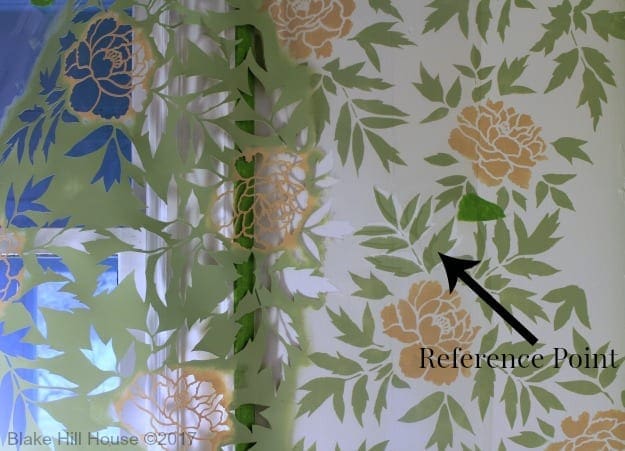
Things were moving right along until I got to the upper corner. When I reached that corner, I realized that my poor planning was catching up with me. I had to practically wad up the entire stencil to get to that tiny section in the upper corner.
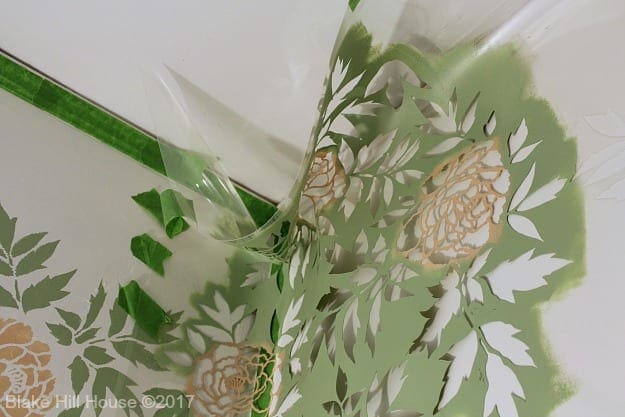
Fortunately, Cutting Edge stencils are extremely flexible, but it was still very awkward to push the stencil into the corner, hold and tape the rest onto the ceiling, and paint. I felt like I did not have enough arms or hands. While I was channeling my inner octopus, I realized that the stencil brush was a necessity not a luxury. My craft brush wasn’t cutting it, and the peonies started to look sloppy.
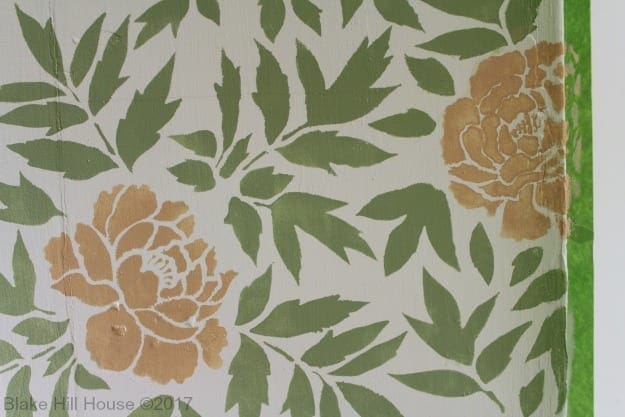
I needed a break and a new brush. I covered up my supplies tightly with plastic, and I took the rest of the day off.
Day 2 – Progress
Now is a good time to mention why I made such a mess of the upper corner and how Cutting Edge Stencils recommends handling that problem. Each of the large wall stencils comes with a free smaller sized matching stencil made for the upper edge near the ceiling. The sole purpose of that stencil is to avoid the problem of the larger stencil flopping over like mine did. The reason I could not use the edge stencil is that I was careless and started too low on the wall. The gap between the top of my first row and the ceiling was too large for the smaller stencil. This was completely my mistake.
Unfortunately, my error created an even bigger problem which I will get to shortly.
Back to day two: Due to scheduling conflicts, I was unable to drive to a proper store to find a second stencil brush. I did manage to find two round sponges.
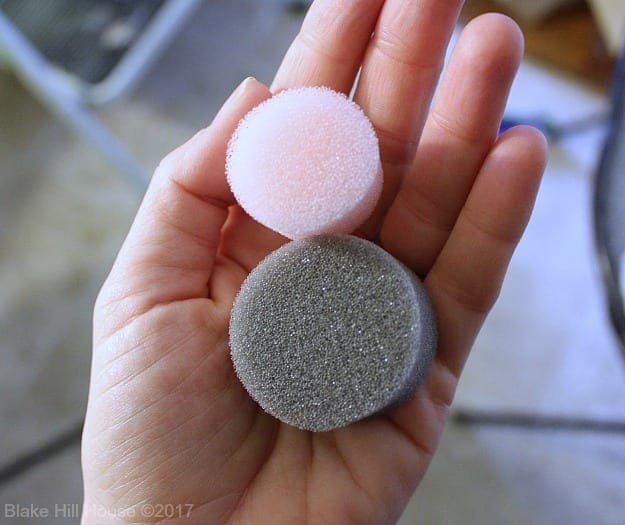
Using the same dabbing motion that I used with the stencil brush, I was able to achieve the same look, and I was back in business. (Note: Although the round sponges were an adequate substitution, a proper stencil brush is the best option. For future projects, I will spend the money for a brush for each color.)

I worked my way down and across leaving the top left corner blank. It was frustrating to work behind the faucets. During this time, I did not take any photos. I was too focused. In a different situation, I would have removed the faucets before stenciling the wall. However, since our plumbing is so old, I avoid handling all plumbing fixtures unless it is absolutely necessary.
Finally, all that remained of the project was the top left corner, and that is precisely when the train came off the track, and my brain had a meltdown.
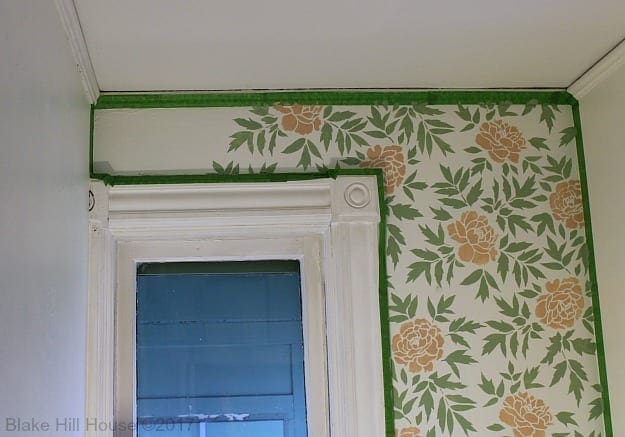
When I tried to line up the stencil, I realized that I had zero reference points on the wall. The upper one was on the ceiling, and the lower and right ones were on the window. The left side was on the left wall. Nothing lined up. I stared at the pattern trying to figure it out. I scoured the stencil looking for other possibilities for lining up the pattern. Nada. Zip. All of the peonies started to look the same. The harder I tried to figure it out, the more my brain revolted.
I could clearly see the diagonal pattern, but I could not make the peonies and the foliage line up in a way that would make the design look seamless. Finally, after over an hour of trying to force my brain to be a team player, I had to walk away. That was the end of day 2.
Day 3 – The Big Finish
On day three, I was determined to finish the project. While staring at the pattern for what seemed like the thousandth time, I finally saw it. The vertical pattern leaped out at me, and IT was the horizontal pattern.
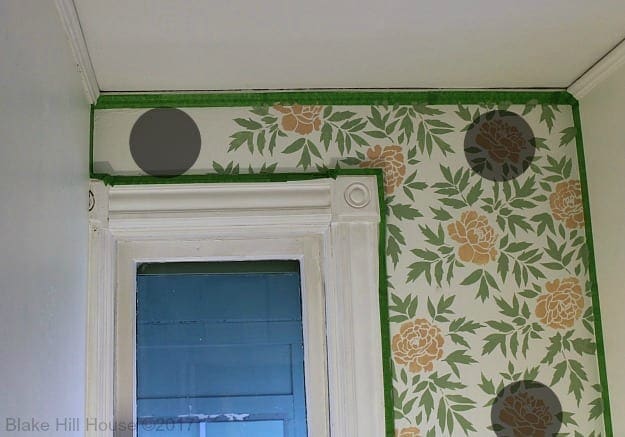
I knew exactly which peony to place in the bare spot, and the train was back on track. I determined the most accurate placement by measuring the distance between the vertical peonies and eyeballing the diagonal pattern to make sure the placement was close to being accurate. The nice thing about an allover pattern is that it does not have to be perfect. The eyes naturally fill in the gaps and settle on the overall design vs. specific errors or details.
With that final piece of the puzzle in place, the rest of stenciling was simple.
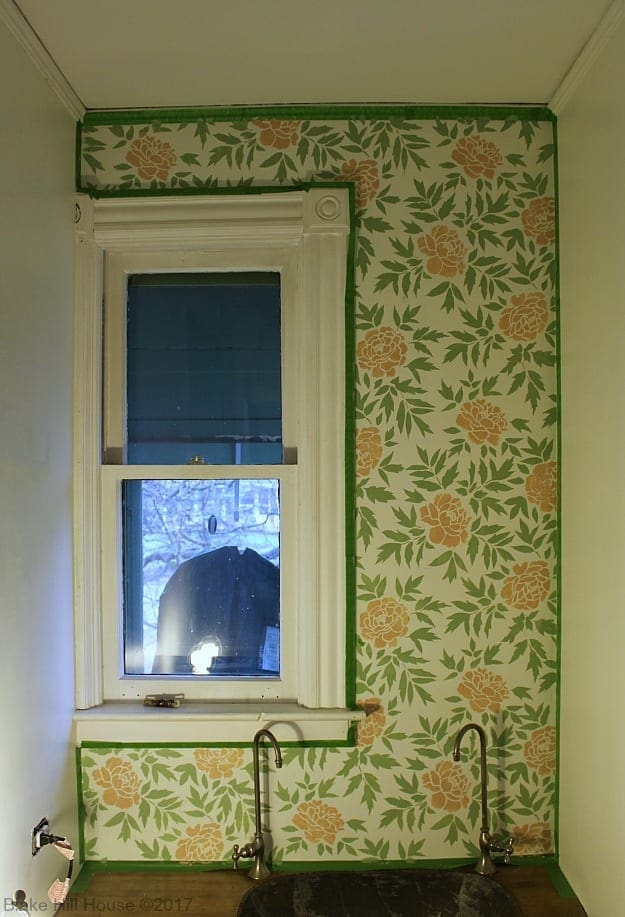
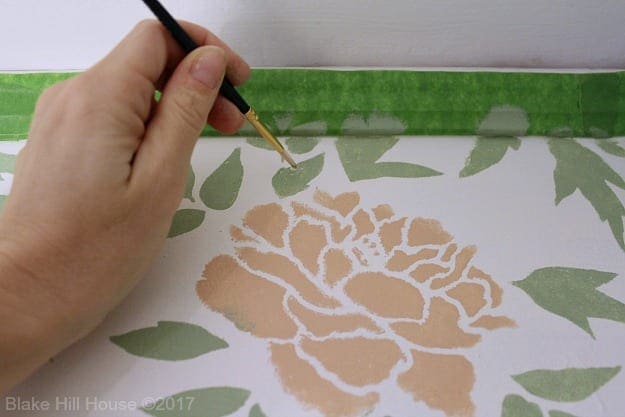
Using each color and a small craft brush, I went over the entire pattern on the wall and tidied up the color bleed and unfinished patterns. With white paint, I widened the spaces between the petals of the sloppy peonies so they matched the nice ones.
Despite all of this self-induced heartache, would I use a stencil again? Absolutely. I became frustrated with my errors, but Andy and I like how this wall looks, and the allover peonies pattern is gorgeous. This accent wall creates just the right amount of visual interest in this small, narrow room.
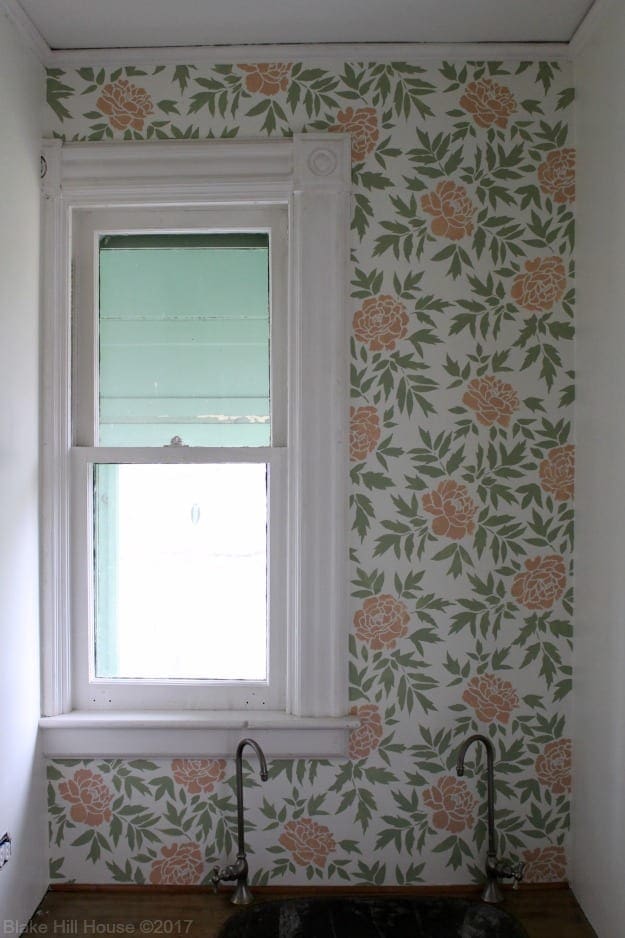
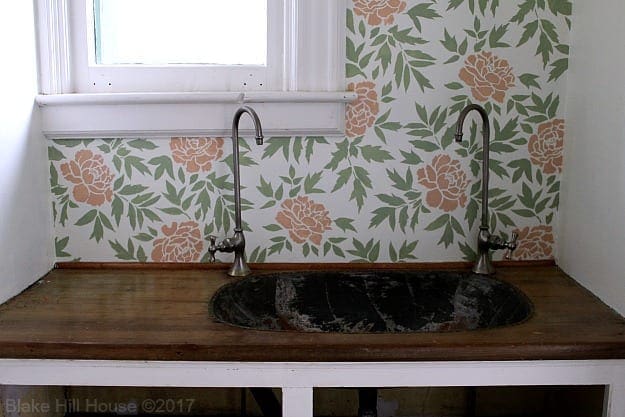
This project took far longer than it needed to, and it was my fault. Now I know that I should have started closer to the top. If I had done that, I could have used the edge stencil to make my life easier. Also, starting closer to the upper-right corner would have eliminated the lack of reference points in the upper-left. Honestly, though, what I should have done was follow the instructions from Cutting Edge Stencils: Make a plan, and practice first. The fact that this project went sideways is entirely on me.
We chose the Japanese Peonies allover design as a nod to our favorite Rifle Paper prints. We chose a simple two-color combo for our stencil, but the sky is the limit for your project. Adding additional colors by hand would add depth and interest to the print. Craft paints are perfect for stencils, so adding other colors does not have to be expensive. Let your creativity run wild, but perhaps not as wild as our downstairs half-bath.
Speaking of your project: We are so excited to offer our first giveaway. It thrills me to be able to use this blog to give something to our readers. You are the reason we write this blog and share it.
Cutting Edge Stencils is offering a free stencil ($50 value) to one of you. It does not matter if your style is modern, traditional, transitional or wholly on trend. Cutting Edge will have something that will suit your taste. If you need help choosing, feel free to ask me. I can be the tie-breaker if you need one.
Please enter via the Rafflecopter widget below. The only requirement for eligibility is that you visit the Cutting Edge Stencils website and comment on this blog post (here) with your favorite design. You may also follow us on social media for more entries, but that is entirely up to you. The giveaway will be live through Monday morning on February 6. Feel free to share this with your friends. The more, the merrier! Thank you for participating.
Now, we would love to have your feedback on the accent wall. Yay or nay? I am also prepared to get an earful about my inability to follow directions. I can take it.

This post is a collaboration with Cutting Edge Stencils. They provided our beautiful stencil and some supplies. All opinions are our own. We believe that Blake Hill House is a treasure worth saving. Thank you for supporting the sponsors that support our mission of restoration, preservation, and the sensible renovation of our old house.




52 Comments
Chad
Well I have no room to talk when it comes to screwing up by not following basic instructions.
But I say yes to that crazy wallpaper! I believe in decorating bathrooms with humor, and it’s not overpowering since you’re only in here for 5 minutes a day. Also it looks like it’s in great shape. Run with it, just like Dorothy did.
Stacy
Ha ha! It’s a tiny room with big character. 🙂
Sarah P.
I really like the pearls all over stencil!
Stacy
That is really pretty! I like the gray on white that they show as well.
Brandi
You did a lovely job!
I am in love with the “four little chicks” stencil kit! Oh my goodness it is adorable!
Stacy
That stencil is so cute! It would look perfect in your house. I hope your renovation is going smoothly! 🙂
Christine
Your stenciling experience sounds like something I would also do. There are directions for a reason, but those are for other people, right? After you’ve muddled your way through it, you don’t need those directions anymore!
Your accent wall is gorgeous. I love the color choices! I think stenciling is a great compromise for areas where you want pattern but without the hassle/expense of quality wallpaper. We’ve been mulling over wallpaper in a couple of our rooms, but I’m leaning more towards stenciling as well. Wallpaper is so much harder to change.
I really love the Acacia Allover stencil.
Stacy
😀 Yes! Directions are for other people. LOL
Thank you for your comment on the accent wall. Stenciling will definitely be easier to change. The Acacia allover stencil is pretty! It reminds me of feathers. I love the bold colors featured on the Cutting Edge site too.
Adrienne N
Great job!!!! Looks incredible and you did a beautiful job!!
All of Cutting Edge stencils are GORGEOUS but my favorite would be the Alhambra tile allover stencil!!! I have some amazing plans for it!!thanks so much
Stacy
Alhambra reminds me of Moroccan tiles. I love it! I’m considering a painted floor in our sunroom, and this stencil would be a great choice for that. Good find!
Brianne Sieberg
This is quite the story, but the result is stunning! It does remind me of a Rifle Paper print, though I’m not sure I’d be able to narrow down a favorite. It’s been fun watching you transform your historical home with so much respect to the past. Also – that bathroom? Please do not ever change it.
Ame Jo
I’m with you, Brianne, that awesome bathroom needs to be preserved.
Stacy
Thank you! That bathroom is the last item on a to-do list that will never get shorter. It’s pretty safe. 🙂
Ame Jo
It turned out beautifully! Personally, I think having a mostly type-B personality is worth having the occasional wing-it-induced-mishap. And really, learning from mistakes on the job has the potential to be very rewarding! (Yes, I also frequently wing it. :-p )
Going to enter now!
Stacy
I must think it is worth it too because I just keep doing the same thing over and over. 🙂
Ame Jo
They have so many amazing designs – and the all over harlequin would have made my kitchen project MUCH faster (I did consider stenciling for that, actually, and decided that just painting would be cheaper – that was NOT the case). But I have picked a favorite! And it is…
OCTOPUS!
I’m going to be doing a glossy black stenciled design on flat black walls in the future, and I’m thinking it needs to be Octopus. I really hope I win!
Stacy
That octopus stencil is so YOU. I know you would do something really neat with it.
Ame Jo Hughes
Thanks! In an ironic twist, I spent the years between ages 23 – 38ish being horrifically terrified of octopi due to a very vivid nightmare I had while pregnant. I finally got over it!
Stacy
Yikes!
SH
Kudos to Cutting Edge for having a product that allows success for type-B folks! And to you for persisting until done. The pattern and colors look right at home.
Stacy
Thank you! 🙂
Sarah
Haha. I enjoyed every bit of this. I’m still laughing. I want to do this now!!!!! And I would choose the Japanese peonies stencil! It turned out BEAUTIFULLY!!!!! I love it!
Stacy
Ha! I’m so glad. 🙂 I like it when people laugh
atwith me. 😀 I’m glad you chose the peonies too.SallyKT
I recently discovered your blog and I am having fun catching up on all your past posts. Your wall turned out great and I also would have to choose the Japanese Peonies as my favorite!
Stacy
Thank you, Sally! I’m glad you found the blog. The Japanese Peonies seems to be a popular choice. 🙂
Cathy
What kind of paint did you use for the stencil? And I like it!
Stacy
Hi Cathy, I used Sherwin Williams samples. Lowe’s can mix them up in little half-pint sample sizes. The sheen is always satin for samples. Cutting Edge Stencils recommends latex or water-based paints only. It’s the consistency of the paint that is the most important. If it is too runny, it will seep behind the stencil. If it is too thick, it won’t spread well with the foam roller. I used the SW paint straight out of the pot. For stenciling, so little paint is needed. If I were to add accent colors to the flowers and foliage, I would use craft paint and a fine brush.
anna
i like the LARGE PEAR TREE STENCIL
Stacy
That is very pretty, Anna. There is room for a lot of creativity with that one. Thanks for entering. Good luck!
Jenny
Love the stencil (and the exotic bathroom actually–wow! I only wish that you had the soap dispenser haha)! I sympathize on the stencil planning–I probably would have done the same exact thing, aka wing it and regret it (a little).
Stacy
Thanks, Jenny. It is funny that you wish we had a soap dispenser. Last night, Andy said, “We have to find one of those again.” 😀 I guess I’m on the hunt for one! (People who wing it, Unite!)
Joyce
I love how it turned out! What a great color scheme
Stacy
Thank you, Joyce!
Deb Cochran-yoder
Awesome job on the wall!! I hope to do a wall in our laundry rom this Spring and the bathroom floor using the Alhambra tile stencil. Have done much smaller stencil projects and am looking forward to the future ones!
Stacy
Thank you, Deb. 🙂 I think the Alhambra would look great on a floor. I’m thinking about using it for that purpose too.
Edye
I like the birch forest all over stencil!
Stacy
I like that! SW makes a paint color called Agreeable Gray. We used it in the Dining Room here at BHH. It might make a nice background color for the white birch.
Heather
Excellent work. It looks beautiful. I must admit your experience sounds much like my first (and only) time stenciling. I attempted a small entryway with lots of corners. I didn’t have a ‘plan’ and in the end finished the lower corners by hand painting the design to hopefully blend in (it does not – at all.) Fortunately most people don’t crouch down to look at the horror. I would love to try again with the Alhambra Tile. Using a big open wall with few corners… and having a plan.
Stacy
I’m definitely laughing with you. I momentarily wondered if I could just free-hand that top, left corner. The answer was a big NOPE. 😀 I am glad you are willing to give stenciling another try. 🙂
Pat
I despise wallpaper too. Spent way too many hours as a kid scraping it off the walls of our old home, that will scar you into the great beyond I tell ya! But I’m loving how the stenciling looks, you did a great job despite all the mistakes and headaches it gave you. That has given me a new appreciation of wall décor. Thanks…
Stacy
It is such a crummy job. The Deer Forest pattern is so sweet! I have not seen it before now. Everyone is finding such cute designs.
Pat
PS. I like the Deer Forest stencil!
Brandi
I LOVE how your stencil turned out – it makes the room even more special! I had a really hard time choosing a favourite from the website, but I think I would use Jardin All Over stencil in my home.
Stacy
Thank you, Brandi! Jardin could be so subtle and classy. It could work in many different types of rooms. Good find!
Heather Coleman
I love the clip on level. Beads all over is maybe my favorite stencil, but with a wall that likely is not going to be perfect (patched plaster), I’m not sure it is the best choice for me– I’ll have to look more later!
Stacy
The clip-on level is genius. I think it is patent pending too. It made life so much easier. Beads allover is pretty! I think it could work. You would just have to press the stencil firmly to the wall and make sure you don’t squeeze out your foam roller by applying too much pressure when you roll it over the design. The Butler’s Pantry wall has some lumps and bumps too.
Meg
I love the Tropical Dreams stencil. Not sure my house in upstate NY could pull it off but it would be fun feeling like I was on a perpetual vacation!
Stacy
Tropical Dreams is so pretty! I completely understand about upstate NY. Winter is still firmly planted here. Maybe it would work in a spa-type bathroom. 😀
Andrea Matters
Oh, it turned out beautifully! Congratulations, and I look forward to seeing the completed pantry.
Stacy
Thank you, Andrea!
Heather S
I really love the DALMATIAN SPOTS ALLOVER <3
Stacy
Super cute! I love their photo with the pink chair too.