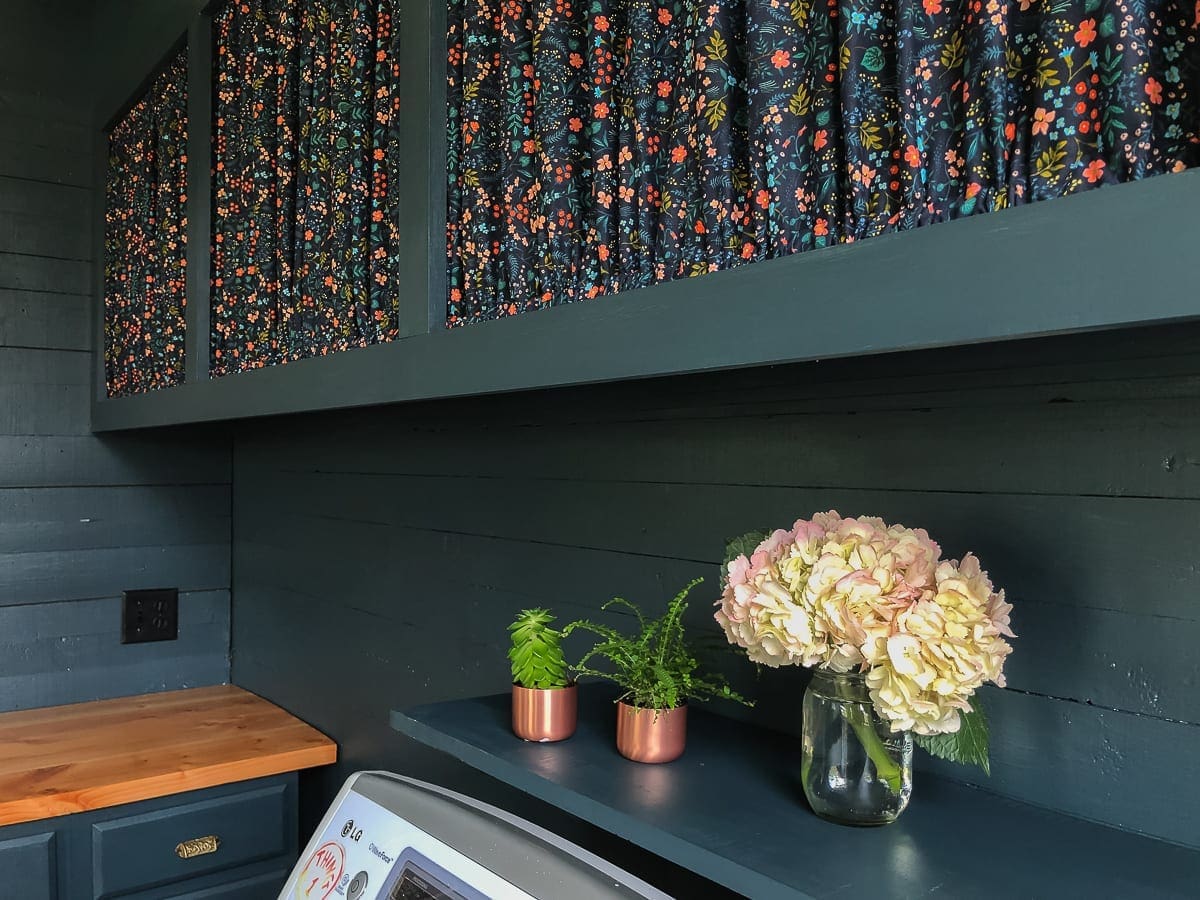
Of all of the projects from the Blank Slate Laundry/Office reveal, the one that garners the most questions is the curtains. How do they open? What kind of fabric did you use? How do you keep them in place? This project was so simple that I wanted to share how to make curtains for cabinet doors so you can too. Even if you do not sew, this project is for you. It’s just a bunch of rectangles. Trust me. You’ve got this.

Supply List
- Fabric – I chose this print from Rifle Paper Co.’s Wildwood line.
- Scissors (Fabric scissors are best.)
- Thread or Iron-on Hem Tape (regular or heavy-duty–depending on your material)
- Iron & Ironing Board
- Tension Rods (I used these.)
- Sewing Gauge (optional, but helpful)
How To Make Curtains For Cabinet Doors

Buying Fabric
The first step is to decide how much fabric to buy. Measure the height and width of the interior of your cabinet. For my project, I had four openings of equal distance. Since the laundry room wall is ten feet wide, I measured the height exactly, but I simply divided 120″ (ten feet) by four to determine the width of each cabinet.
Make sure the fabric you buy, which is measured in yards, will accommodate the height without having to sew two pieces together. This is rarely an issue unless the cabinets are pantry or closet height. Most fabric is at least 44-55″ from selvage to selvage. Determine how much yardage to buy based on 1.5 to two times more than the width of your cabinet to allow for a full gather. Also, add enough for the hem and casings. More on that below.
Terminology for beginners:
- Hem – the edge of fabric that is turned under and sewn or fused with iron-on tape. The hem makes the project look finished, and it prevents the raw edge of the material from fraying or unraveling.
- Casing – a small pocket or channel that holds the curtain rod.

If you are anything like me, your brain might be putting up a fight trying to understand what all of these numbers and measurements mean. Let’s use my project as an example.

- Cabinet height – 24 1/4″ (interior measurement from top to bottom shelf directly behind the cabinet frame) PLUS 4 inches extra to allow for the curtain rod casing. (Remember, fabric is most often 45-55″ selvage to selvage, so no special accommodations are necessary.)
- Cabinet width – 30″ times four cabinets equals 120″ divided by 36 to convert to yards equals 3.33 yards.
- Amount to order – six yards which is slightly less than double to allow for a nice full gather. Six yards is also enough to account for hems–approximately six inches. (We will get to that later.)
Cut The Panels

With sharp fabric scissors, cut the fabric according to the dimensions of your cabinet. Remember to include the extra for seams and casings and the additional material to gather. Do not include the selvage in any of the measurements unless you are adept at sewing and know how to hide it. Feel free to cut it off before or after you cut the panels.

Again, let’s use one of my cabinets as the example.
- Cabinet height (24 1/4″) – Using my curtain rod as a guide, I determined that the casings should be 1 1/2″ plus 1/2″ turned under. So, two inches extra on the top and bottom since I wanted a curtain rod on both. Note: This measurement should be as exact as possible, or your curtains will hang too loosely and look saggy.
- Cabinet width (30″) – This measurement is more flexible. Gathers hide flaws and hemming this kind of project does not require 100% accuracy. Remember to add 1.5 to 2 times the cabinet width. Then, allow for 3/4″ or so for each hem. My curtains are two panels each, so four total hems (left and right side of each panel) which equal six extra inches. The extra amount for gathers was 20″ which fell between 1.5 and two times greater than my cabinet width. Here’s the math: 30+ 6+20=56.
- The final rectangles – 28 1/4″ by 56″ cut vertically in half to make two panels
I know that is a whole lot to digest, so here is the TLDR version:
Measure the interior cabinet height exactly and add extra the amount for two casings with a turned-under edge to that number. The fabric width should be 1.5 to 2 times the cabinet width. Add enough for a 3/4″ hem on the side of each panel. In our case, two panels equal four hems.
Are you with me?
Making the Curtains
With the measuring and cutting behind you, this part will feel like a breeze. Start by hemming the sides of each panel with a sewing machine or iron-on hem tape. Remember that you planned for a 3/4″ seam allowance, but the overall width is a flexible measurement since the curtains are gathered.
To sew: Turn the raw edge under, then turn it again, so the raw edge is no longer visible. Press the hem with a hot iron. Sew close to the tucked edge using a straight stitch.
For iron-on hem tape: Follow the package directions to determine the placement.

Making the casings requires a little more care since we want the curtains to hang taut from top to bottom. Based on the prior measurements, we allowed two inches for each casing. Start by turning under 1/2″ on the top and bottom just like you did for the first step of the hem. Press with a hot iron. Next, fold the edge you ironed 1 1/2″ to make the casings on the top and bottom and press lightly. The raw edge will be hidden, just like the hem. A seam gauge is handy for this part.
Now, measure the overall height of your curtain panel to make sure it still matches your exact cabinet height. In our case, 24 1/4″. Adjust your casings, larger or smaller as needed. Once the overall panel height is correct, press the casings firmly then stitch or fuse them with hem tape.
Hanging the Curtains
Adjust the tension rods according to the package directions. They will be slightly longer than the cabinet width. Then, push the rods through the casings, and install the curtains in the cabinets right behind the frame.

The rods will show when the panels are open, but they will be hidden when the curtains are closed.

Why Curtains?
When I began planning this project, everything in the laundry/office started to feel heavy, the original shiplap, the countertops, the cabinets–all wood. Using curtains instead of cabinet doors added softness to the room. We use this storage for beach towels and that weird-shaped sweater rack that fits in the dryer. Two of the cabinets are empty. If we needed full access to the cabinets regularly, I probably would have used only a top curtain rod and left the bottom of the curtains free. The two-rod version looks cleaner overall, but access is a little trickier.
This DIY is fully customizable according to your project. Knowing how to make curtains for cabinet doors is just a framework for your creativity. Also, the no-sew option makes it a perfect project for beginners. Remember, we are only working with rectangles, and there’s nothing scary about a rectangle.
Do you have any questions? Can I clarify anything? I know that the measurement part was a bit of a head-scratcher, but I believe in you. You can do this.
-Stacy


8 Comments
Sherrill Necessary
Curtains. What a lovely choice to close the cabinets. They do soften the feel of the room. Another way to measure for curtains, especially if the fabric has directionality, is to use “lengths.” That is, using your measurements, each of the four cabinets needs one length, 24 1/4” plus casing. Cut the 45” with in half for the opening. Finish the edges as you did. No waste!
Stacy
Thank you, thank you, thank you for describing this more succinctly than I did. 😀 I appreciate your wisdom and experience.
Fortunately, this fabric was multi-directional, but you brought up an excellent point.
Barbara H.
I would paint the tension rods too either with the cabinet color or spray paint in a close color so they don’t glare out at you in case you want to leave the curtains open. You did a great job on this room.
Stacy
Great idea! Thanks, Barbara.
T
Have to say, not super intuitive for a beginner – trying this right now and it’s struggle city – not sure what you mean by “turning 1/2 inch under” and then “1 1/2 inch up”… as a true beginner it’s all Greek to me (and my extremely frustrated husband) but appreciate you making this blog post regardless as we have new closets that need fabric sort of like this (but glass in front)… Be well!
Stacy
Hi, I really appreciate the feedback. I changed a little bit of the wording in the section you quoted, and I hope it will be helpful. I will also try to add a short video to this tutorial at some point because like many people I am a visual learner.
This is the new wording: “Start by turning under 1/2″ on the top and bottom just like you did for the first step of the hem. Press with a hot iron. Next, fold the edge you ironed 1 1/2″ to make the casings on the top and bottom and press lightly. The raw edge will be hidden, just like the hem. A seam gauge is handy for this part.”
You are welcome to send me an e-mail diy@blakehillhouse, and I will help you as much as I can. I want your project to be a success. If you are on Instagram, I’m also happy to send you some personal video help via DM.
Jordan
Hi Stacy! I’m wondering is the curtains a pain in the butt to open and close? I have extra cabinets in my kitchen that aren’t use too often but more often then laundry room ones and I’m debating this option. I love the look. You did a great job!
Stacy
Hi Jordan, Thank you for your message. The curtains are not a pain to open, but I have a suggestion for you after using ours for almost two years. If I were to do this again, I would add a bit of super stretchy elastic cord or something very narrow in the hemmed seams of the middle split. After two years, the woven fabric has stretched a little. It’s not a big deal, but it takes a bit of extra fussing to make the curtains look good when we close them.