Welcome back to the One Room Challenge. Week two has been an exercise in feeling my feelings–mostly frustration channeled into determination. In case you missed it, I’m salvaging a guest bath remodel started by the contractor that I hired last fall.
Last week, I outlined the how and why of the guest bath project, and this week has been all about demo.
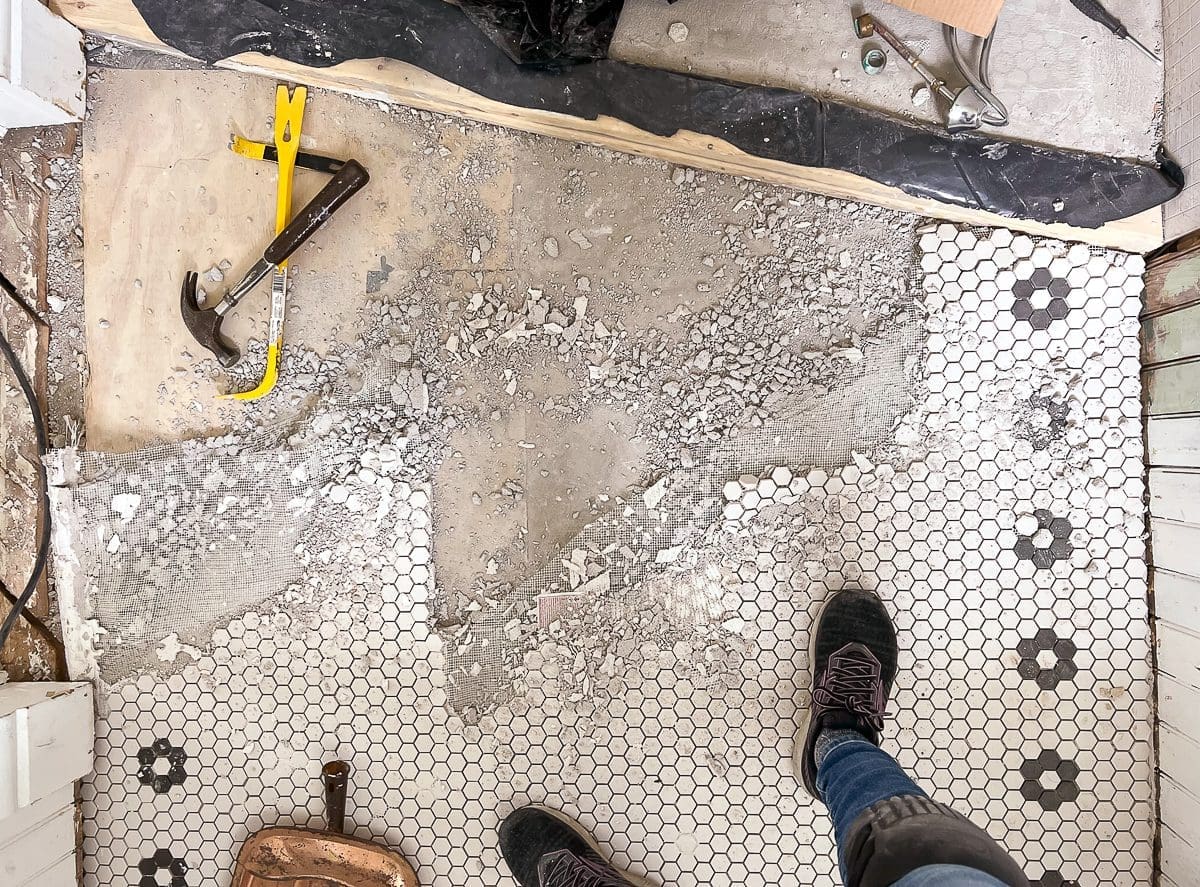
Few things feel more wasteful than pulling up brand new tile. The amount of guilt I had as I peeled up the flooring knowing that I would not reuse it, was immense. Although it is possible to remove thinset by soaking used tile in a hot bath of soapy water for several days, scraping is still required, and these are 1-inch hex tiles. So, I could easily spend the next six weeks on that task alone. I will offer the tile to my BuyNothing Facebook group. Hopefully, someone who is not in a time crunch or has a smaller project will take it off my hands.

During demo, I uncovered several major issues with the floor underneath. Although I had noticed some of the problems before the tile went down, I never expected that the contractor would simply leave the floor in that state. Say it with me, friends; Tile is only as good as the floor underneath it. A bad floor = bad tile.
Problems Galore
First, I found several pieces of cement backer board that were not even adhered to the subfloor. The contractor used chunks of cement board to fill gaps instead of cutting the Hardibacker the correct size. Piecing is an acceptable solution as long as those sections are secured to the subfloor and the cracks are closed with mesh tape and thinset.

Also, right where the curb of the shower met the floor, sections of cement board were missing altogether. The contractor’s solution was to glob on loads of thinset to fill the voids. Some of the gaps were nearly one inch deep. Where the shower curb meets the floor is one of the most vulnerable places for leaks, and he didn’t even bother to waterproof it properly.

The contractor used about four large pieces of cement board to cover the entire floor, and he did not tape/thinset any of the gaps. Near the shower, I saw evidence that he covered a crack, but it appears he used duct tape vs. tape specific to waterproofing and tile work.
I set a level down on the floor just for kicks. Everything pitched back towards the corner by the toilet.

There were also low spots and high spots, which I documented on video, but not in photos.
Another Big Decision
Before I deal with the sloping subfloor, I have to decide whether or not to demo the shower pan. The first shower pan was a mess, and the contractor and I agreed that he should tear it out and redo the work. You read that correctly. He poured the shower pan twice, but to be fair, that was his suggestion. So, he knew none of this was his best work. The current shower pan looks ok but based on everything else, I think it might be in our best interest to remove it and start fresh…again. Rebuilding and waterproofing will probably take most of my time over the next couple of weeks.
Hopefully, this will all be a distant memory at the end of the One Room Challenge, but right now, it is a nightmare.

Be sure to head on over to the One Room Challenge blog to read all of the week two updates.
Thanks for being here!


8 Comments
Emily R
You got this! I’m so sorry you are in this predicament, but just remember how much BETTER this bathroom will be with your care and attention.
Stacy
Thanks, Emily. I’ll keep reminding myself how much better it will be–short-term pain for long-term gain.
Katie
You can do it, Stacy!! It’s always so discouraging to see things that need to get redone… again, and again. But I know you can do this to a much higher standard.
I mean… duct tape!?
Stacy
Duct tape! Ugh. Thanks for the support, Katie.
Barbara
I’m so sorry that you need to deal with this! I’m glad for the house that you’re so dedicated to making this right.
Stacy
Thanks, Barbara. I just couldn’t leave this mess.
Wendy
Ugh! Based on his other work, I think you’ve got to redo the shower pan.
Stacy
Nothing has been salvageable so far.