I should be painting the teen’s bedroom.
This week we have had a mini vacation of sorts. A. is still in California, and M. and S. went to sleepover camp. It was just O. and I at home. We have been referring to home as Camp Only Child for O. He and I went to the aquarium and the zoo, just the two of us. It has been a really good opportunity to have one-on-one time.
As you can imagine, having three less children in the house did increase my amount of free time to complete tasks. I can be pretty driven, so I made myself scale back this week so I would be completely available to O. The last thing I wanted was to look back at this week and realize that he and I did not do anything because I worked on the house full time.
Despite the scaled back routine, I could have done a little painting in the teen’s room, but I was not in the mood. Repairing a white room with white adhesive, white caulk and patch and then priming in white is starting to feel pretty tedious. As restful as a white room sounds, my brain needed more.
Before I slacked-off on the teen’s room, I primed one of the windows to see how much time it would truly take. It was faster than I expected. Based on that test, I determined that the entire room could be primed and painted in three days, and we would be on schedule to have the room done before A. gets back from California. That meant, I had time to paint this chair:

***
We have a nice, sturdy butcher block table that served as our first family table before our tribe grew to six people. Andy and I knew it was time for an upgrade when we could no longer fit our family and the food at the table at the same time. Now we use it as an art and project table.
The table did not originally come with chairs since I picked it up at a yard sale before Andy and I moved into our first house in Utah, nearly 20 years ago (20 years!? I just did the math on that.). We bought cheap chairs, and they did not last. We replaced the chairs with more cheap chairs, and they did not last either. Go figure. Now, I am trying to bring our total household chair count up to ten so we will have extra chairs when we entertain guests. In the absence of guests, the chairs will be used at the butcher block project table.
Since none of our new-to-us chairs will match, we decided to get colorful. I fully expect that they will get splashed with inadvertent paintbrush strokes during the kids’ creativity, and that is fine with me. I don’t want anything at the project table that is so expensive or beautiful that it cannot take a bit of a beating. Life happens. People are more important than things.
The new chair came from a yard sale. The seat fabric was torn, the chair was a little wobbly, and the veneer on the sides had been scraped up pretty badly.

First, I removed the seat which was attached by four screws.

Then, I sprayed the chair frame with the hose, and left it in the sun to dry. The finish was still kind of sticky to the touch, so I washed it again with tsp-substitute. After the seat was removed, the chair was no longer wobbly. No additional repair was needed.
Next, I carelessly brushed primer on it. The finish was oil-based, so I used an oil-based primer. While that was drying, I worked on the seat. I thought that I could salvage the padding on the seat, but when I removed the torn fabric, I found that the padding was just too dusty and dirty to reuse. In my sewing supplies, I found some small pieces of quilt batting to pad the seat. Not everyone has quilt batting laying around, so I also suggest using layers of bath towel or old mattress covers for padding.
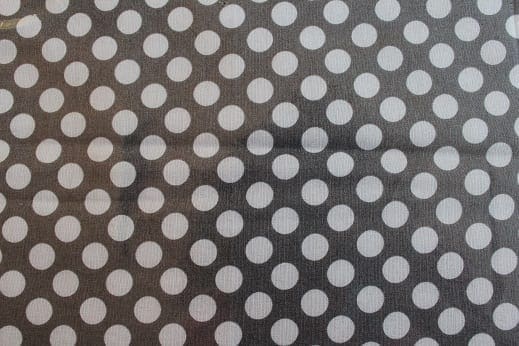
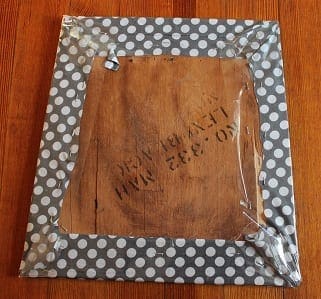
I covered the chair with fabric and clear vinyl. I opted to use vinyl because the fabric I chose was not upholstery fabric. It would not hold up over time. Also, though I expect the chair to get some love in the form of art mistakes, I wanted to be able to wipe off the seat if necessary.

I cut the quilt batting the same size as the seat. I used three layers. I cut the vinyl and fabric larger, and I attached it all with a heavy-duty staple gun.

After the primer dried, I painted the chair with spray paint. I opted for spray paint instead of a brush because of all the grooves and details in the wood. I was not sure I could do a very good job on those with a brush.

The chair took two full layers of paint, and some touch up work. After it dried, I reassembled it and sat back and marveled that I was able to complete something 100%.


Total cost:: $15 ($4-chair, $5.50-fabric and vinyl, $5.50-spray paint)
I have enough leftover vinyl for an additional chair if I find one. I also have some spray paint and fabric left for a very small project.
Now, I will paint the bedroom. I promise!


7 Comments
Heather Howard
You’re lucky that NY sells oil based primer…Calif. stopped carrying it for environmental reasons so we’re stuck with inferior primer. Perhaps next time A. can smuggle some oil based primer in 🙂
stacyfg@gmail.com
Really?! They don’t lock up their spray paint in NY either. Guess huffing isn’t a big problem here. 🙂
Kelly
Normally I have an aversion to painting wood but that came out really, really cute!
stacyfg@gmail.com
Thank you! Yeah, I’m not a big fan either if the wood is in good condition or meant to be used as a more grown-up piece of furniture. I definitely hesitated with this one.
Jan Elizabeth
The chair turned out great, and will be perfect as an art chair. That was a good idea to use the vinyl. FYI, in case you didn’t know, it’s much cheaper to buy a mattress topper and cut it up for projects like this than foam. I know you used batting, but thought I would mention it! 🙂
Vanessa
You may not be able to get oil paint in California but it’s available in Oregon and Nevada! Worth a trip for us on our last house in California.
Stacy
Oil paint really is good stuff.