Hello, week three anxiety. I’ve been expecting you. Week three of the One Room Challenge is typically when I start getting antsy about finishing on time. The problem is that I am still destroying things when I feel as if I should be putting it all back together by now. It is my typical method of operation, yet I question myself every. single. time. I participate in the challenge.

Even so, there are some positive updates this week.
New Electrical Wiring
BHH is moving into the 20th Century. (That’s not a typo.) We are getting a new light switch. Until now, we used a pull chain with our overhead light, and the sconces turn on with knob switches. It has not been ideal. Picture yourself entering this bathroom in the dark. Now, start swinging your hands wildly as if you’re fending off a swarm of bees. You’ll locate the pull chain eventually. That’s our life.
During this mini-renovation, we won’t be re-wiring for the sconces, but a light switch for the overhead light will feel like one of life’s little luxuries.
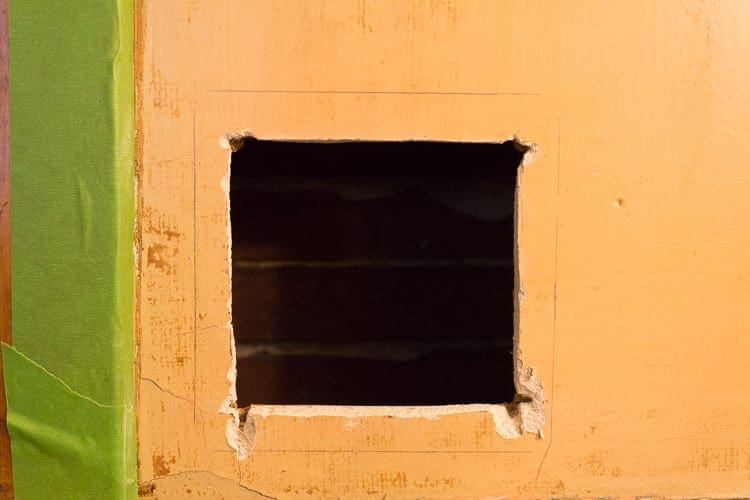
It would be irresponsible to write this portion of the post as a tutorial since we are just learning how to do it ourselves. My standard warning is to hire an electrician if you plan to mess with the electrical wiring at all and know the safety codes–especially in an old house. All I can report is that retrofitting a room for more modern electricity requires cutting a hole or three.
Wainscoting Restoration Continues
People who are into restoration often wax poetic about stripping paint off woodwork. Their commentary goes something like this:
With a little bit of paint stripper, some scrapers, and dental tools, I was able to channel my inner craftsman and lovingly restore the painted woodwork back to its original state. It turns out that it was solid oak, in mint condition. Who paints over that?
Here’s the truth: It’s a terrible job. The gel stripper drips everywhere, and the gooey paint smears back into the cracks over and over again. It is hard to keep the tools clean, and the process takes hundreds of rags or paper towels. Stripping paint off wood is not a quick job no matter how it is described.
The truth hurts.
I listen to music and podcasts to pass the time. Little-by-little, it is coming together.
Built-In Storage
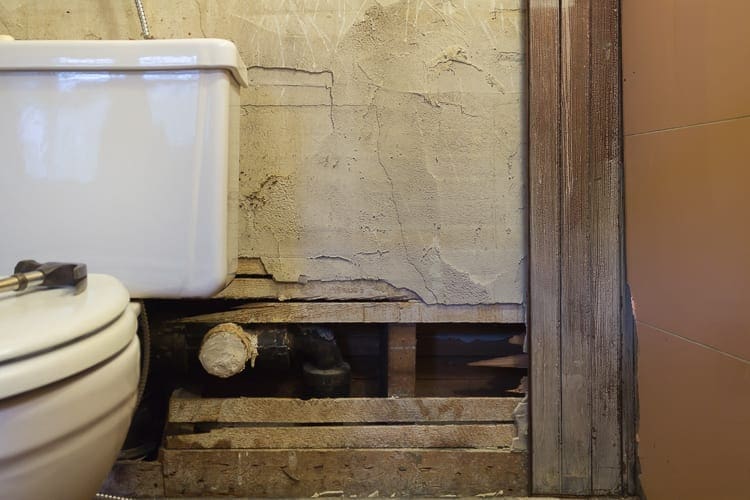
Unfortunately, my plan to add some built-in storage is a bust. If you followed my IG story this week, you already know this. After some exploration, I found that there is both a pipe and a critical stud blocking my plans. Even though there are workarounds for both issues, it’s just too much to take on right now. Guess a trip to IKEA for some cabinet storage is back on my to-do list. At least that means I get to go to Canada.
The Vinyl Flooring is Outta Here!
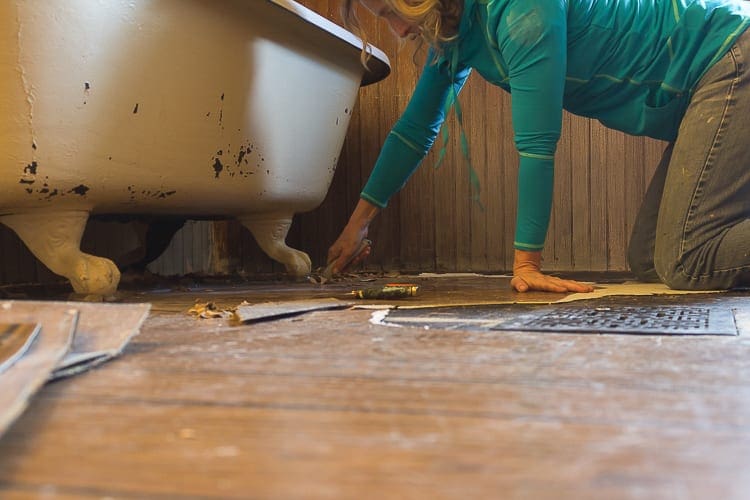
Thankfully, this is one job that is going more smoothly than expected. Some sections of the vinyl flooring were already loose, and the rest is coming up quickly enough with a handheld scraper. (I’m using this one.)
Since the tub and toilet stay, I am using a utility knife to cut the vinyl out around the water lines, claw feet, and the toilet base. In a perfect world, the room would be empty for this task. However, since the ORC is just phase one of a future overhaul, I’m making the best of the situation and taking the lazy way out. If we’re not pleased with the look at the end, I will consider removing and resetting the toilet and the tub.
Once I finish pulling up the vinyl, I will use adhesive remover to soften and get rid of the old glue.
Everything Else
With so many tasks in progress, some of them do not fit neatly under one heading. Here is everything else. First, I did hire someone to skim coat the upper portion of the plaster walls. He is currently on vacation in Florida, and since it is October instead of February, and we have not had any snow yet, there’s a good chance he will come back instead of moving there permanently. He is scheduled to work on October 23.
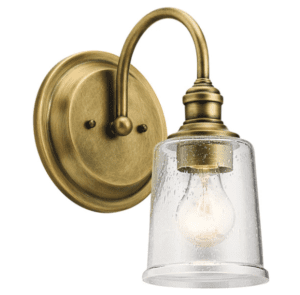
Next, since this post is so full of work-in-progress, I want to share something pretty to clear your palate. I finally decided on all of the lighting, and here’s a sneak peek:
There will be a dedicated lighting post soon, and I will give you all the details then. One sconce has already arrived, and it is gorgeous. The brass looks velvety and perfectly aged right out of the box.
Last, here are some paint colors I have been considering. The sweet little soap dish was a vintage find from Hepburn House on Etsy. Audrey finds such unique items for her shop.
I’m not 100% sure which green I am choosing yet, but there’s an informal vote happening over on Instagram. Feel free to weigh in here or there.
Until next week, please take a look at all the progress from the featured designers and the other guest participants too. I am following along with many of them very closely, and their rooms are starting to come together. There is a whole lot of talent this season.
The Scary Bathroom is still scary, but we are starting to picture how it is going to look at the end of week six, and it’s going to be ok.

PS: It has come to my attention that some people are having trouble leaving a comment on this post. I recently activated my SSL certificate, and that might be why. If you have trouble, would you mind dropping an e-mail to di*@************se.com to let me know? Then, I can troubleshoot the problem. Thanks!
The Scary Bathroom: Week 1 | Week 2
PPS: If you are interested in our past ORC projects, here are the links:
Kitchen Pantry | Street Side Front Porch | Library | Breakfast Nook (featured in This Old House magazine! | Dining Room







9 Comments
Alisha
Slow & steady! It’s making progress and that’s super exciting! Plus, you really can’t beat having a light switch (swarm of bees, lol)! My pick is Billiard Green- it looks lovely with the brass, wood, and white! You can do this!
Stacy
Thank you, Alisha. Billiard green is pretty! My problem is that I like all of them. 🙂
B Lord
We just finished painting our house Pure White, Shamrock, and Tricorn Black. It looks good!
Stacy
That sounds so beautiful! You are the second person that recommended Shamrock. I will have to pick up a paint chip in that color.
Chad
I tried CitriStrip but had much better results with SoyGel. Still a goopy mess (unless I could take things outside and hose them) but it worked faster and caused less fuzzing on the wood under it all. And you may not have any wood that had originally been unpainted, but it’s WAY harder to strip and the only thing that I could get to work was a combination of the heat gun and the superscary toxic stuff.
Stacy
I forgot about SoyGel! Thank you for the recommendation. I used that a long time ago, but since it is not available at the hardware stores that I frequent, it slipped my mind. A quick google search shows that I might be able to find it locally at Walmart.
Chad
I bought it online in 2.5 gallon containers. I used a lot more of it than expected. When I bought my upstairs doors I loved the reeded details in the panels. I’m back to that place again now but there was some hate in the middle when I was working on them.
Stacy
There is definitely some hate in my heart right now. 🙂
Devyn
Go Stacy! Progress is progress.
I like the green on the left third up from the bottom, but I can’t make out the name of the color. Sorry the bigger sink won’t work out, but you still have an amazing one to work with. Glad to see the cartoon wood floor go bye-bye, as I am sure you are as well.