This week on the blog, we are heading back upstairs to M’s bedroom to talk about painting stripes with Frog Tape. It finally feels like this room project is really happening. We may wrap this renovation up, after all. I know that many people complete their DIY projects much faster than we do. Our limited time to complete tasks might make this blog frustratingly slow, but we do what we can when we can. I was actually much more efficient when my kids were little. They ate and slept on the same schedule. We attended the same events. No one drove a car (Ack! I might die from worry over this one.). Now, my days are a chaotic mess of juggling car-sharing, facilitating big kid responsibilities, part-time teaching, homeschooling, my own running training, and of course, DIY tasks where they fit. So yeah, our life is no HGTV show, wrapped up in thirty minutes to one hour. Our day-to-day looks more like a blooper reel anyway.
After weeks of prep, sanding, clean-up, sanding, clean-up, and prep, the walls were finished enough for primer. We used our favorite latex low-VOC primer by Kilz. It is easy to work with and clean up is a breeze. We typically use this primer on a bare wall or wood project. Over previously painted woodwork, we use the Kilz oil-based, odorless primer. Oil-based primer is more durable, but it is also harder to use. Old homes such as ours often have at least one layer of oil-based paint somewhere. It is ok to paint over it with latex paint, BUT you must paint latex over an oil-based primer otherwise, your new beautiful latex paint job will flake and peel off the layers underneath. We are currently dealing with this in a variety of areas in the house. We think BHH got a nice coat of paint before it was put on the market, but proper prep was not considered at that time. That project was all about making the house show better, but it was just putting lipstick on a pig. (I have never used that idiom in my writing before. It feels right. I like it.)
Once the primer was on the walls, I caulked every seam around the woodwork except around the baseboards. I will do that when we reattach the ceiling molding. Caulk makes all the difference. I originally learned this trick from our contractor friend who worked on our house in California. Closing the gaps makes everything look nearly brand new again.

We followed the primer with a high-quality white paint by Behr. The color is Moonrise. I had a gallon of this in the basement. It was a previous “oops” purchase when I was working on the downstairs hall. It was a happy accident that it worked in this room, and we did not have to buy new paint.

I have to say that I am a big fan of white walls. They look so crisp and clean after removing layers of wallpaper and grime.


I would have been happy to stop painting at this point, but the big girl had her heart set on orange stripes, so orange stripes was what she would get.
Figuring out where the stripes would go proved to be problematic. The task required math, some eye-balling, many mistakes and a whole lot of time. The first step was to measure the wall height. We measured down to the baseboard, not the floor. We knew we wanted the horizontal stripes to be wide, so we played around with some widths that divided evenly into our wall height. After a few false starts, we settled on 13-inch stripes. Using a pencil and a level, we marked our first line on the longest wall. We started there in order to make sure that the longest wall had the most exact measurements since it is the most visible wall from the hall and once we enter the room. It did not take long to figure out that the wall was not square, and our wide stripe was getting wider towards the right side of the room. Visually, the line looked perfect, but that discrepancy made the window look crooked. After some discussion, Andy and I determined that we needed to make gradual corrections to our line that would compensate for the slope and make the window look straight again. Placing the first strip of Frog Tape took nearly 45 minutes.
While making our first line, we made such mistakes as bad math, measuring mistakes (measure twice people!) and getting our thumb in the way while making pencil lines.

Making adjustments for the slope, we completed the first wall.

We were already over an hour into the project, and we had a new thought. Because we had compensated for the slope, the difference was made up mostly near the baseboards and the ceiling. We already knew the ceiling was a little wavy. I was concerned that if we chose to paint the stripes by the baseboard and ceiling bright orange, all of that waviness and inconsistency would stand out. It would be a glaring issue. After conferring with M., we agreed that painting the middle stripes orange would be the safest solution and the most visually attractive.
That was all well and good, but it meant reversing all of our tape lines. We had taped over the pencil lines for white and under for orange. All of them had to be moved. Once we had the tape corrected, we could move forward. As we worked our way around the room, we discovered that 13-inch stripes were just a suggestion. The four doors were crooked. The walls were not uniform, and both windows were crooked too. We had good success with measuring, eye-balling, making adjustments, and keeping the three center stripes that would be orange as even as possible. We measured in order to trick the eye vs. keeping our measurements perfect.
Taping the room took five hours. Andy wanted to quit several times, and I pulled out all of my compassionate phrases such as, “No” and “We are all tired here.” and “We are never going to get this done if you don’t help.” Fortunately, I was spared Andy’s motivational speech about the difference between a manager and leader. He knows when to keep silent. I could learn from that.

Once the Frog tape was pressed firmly in place, I wiped over it with a damp sponge. Dampening the tape activates the seal so the paint lines stay crisp and do not bleed under the tape.

Frog tape is the best on the market. It was thrilled that we still had some in the basement once we knew we would be painting stripes.
I will never stop singing its praises as a DIYer and homeowner unless we find out that it causes cancer, which it probably does because everything causes cancer. Until then, I will stay blissfully ignorant and use it as often as necessary.
After all of that taping heartache, painting was a breeze. The color M. chose was Navel by Sherwin Williams.


M. helped me put on the second coat. She was up way past her bedtime, but she was so excited and cute, jumping up and down and clapping. She loved the stripes. Seeing her reaction was worth every minute that Andy and I spent swearing at the crooked walls.
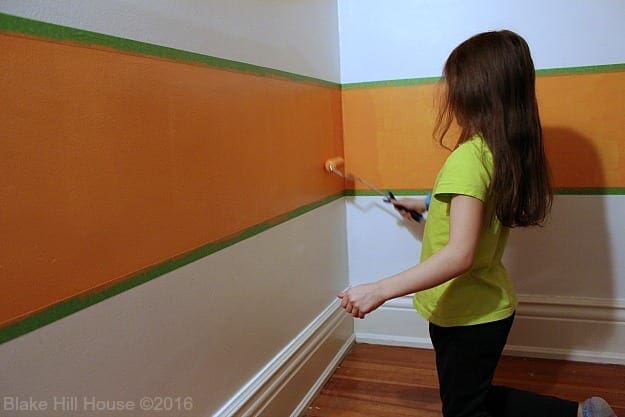
After the second coat, M. and I pulled off the tape while the paint was still wet. We did that to minimize the possbility that the tape would pull off the paint once it was dry.
M’s vision matched her reality, and we were done.
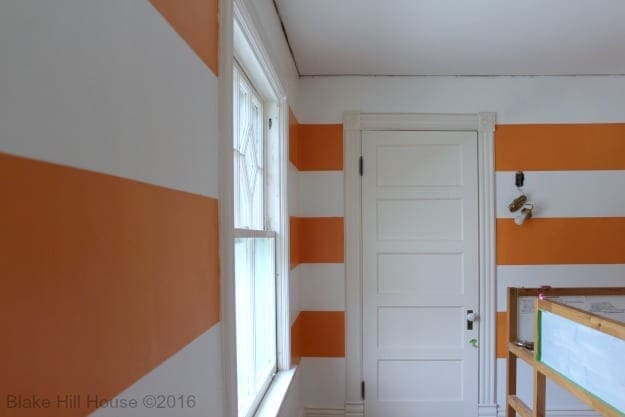

She absolutely loves it, and Andy and I are pretty proud too.

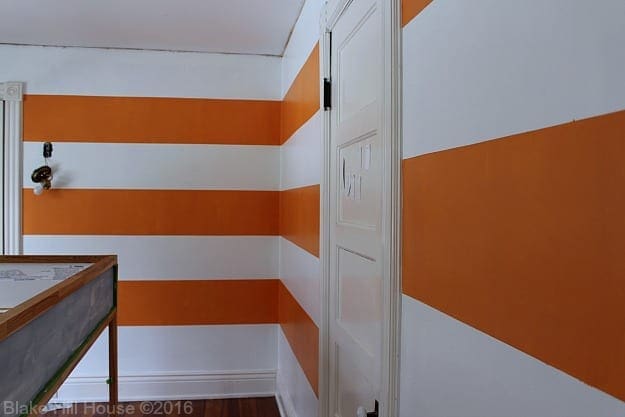
The paint did bleed under the tape in a few spots in the corners, and I plan to go over those places with a small art brush. Overall, painting stripes with Frog tape was a win. The tape prevented a lot of secondary touch-up work.
This weekend will be all about the details which will include fixing those dangling light fixtures. We are nearly done, and M. could not be more excited or happy.

This post contains affiliate links.
P.S. Here is a cute little graphic to pin if you are so inclined.


12 Comments
Marti
That looks great! Very sharp and well placed/spaced. Lucky girl!
Stacy
Thank you, Marti. 🙂
Jamie
It looks like all the hard work and planning definitely paid off! The stripes look so great and that shade of orange is so vibrant and fun. I bet that M will smile every time she walks into this room!
Stacy
Thank you! She just loves it.
Ame Hughes
It looks AMAZING! You know I love those stripes, and M picked such a fab color!
I, too, am a big fan of frog tape. I have taken to using it on my drawing boards, because it’s about half the price of drafting tape, too. You’re totally inspiring me to finish my kitchen walls, which will require a massive amount of measuring and tape (diamonds – because I’m a masochist).
How’s the doll apartment coming?
Stacy
I need to see more pictures from your house. 🙂 Diamond shapes? *thud* Once we had the vertical lines, I teased Andy that we would be doing squares. He was not amused. 🙂 The doll apartment is coming along. We are collecting supplies, and it should come together once we move the bed into place.
Julia at Home on 129 Acres
I’ve never heard of the damp wipe technique before. Any time I use tape I’ve painted my base coat over the tape to seal the edges.
And I like that your reno timeframes are real. Real life is different than professional blogging life–and definitely different from HGTV life!
Stacy
The damp wipe works like a charm with Frog tape. I’m not sure it if works with the blue painter’s tape, but that is because I gave up on blue tape a long time ago. I was painting O’s room lime green with the paint sprayer, and the blue tape kept falling off the wall. I’ve never been so frustrated. Painting the base coat over the tape seems like a great solution too.
I’m glad you can appreciate our slow and steady progress. I am most definitely not a professional blogger. 🙂 I was thinking about all the jobs I do here, and “personal assistant” is probably the closest match. 😀
Kelly
So glad to see your house mentioned on Old House Dreams. That is a favorite blog of mine. I hope it brings you more traffic. Your blog deserves it!
The room looks so fun!!
Stacy
Thank you so much, Kelly. It was such a great surprise. 🙂
carolyn mcafee
LOL ‘everything causes cancer’. Well, sort of not laughing because it’s partially true! 🙁
The stripes look wonderful and I love the color! I just used that color in an office space… great minds!
Stacy
Thank you, Carolyn! We love orange around here. I bet it looks great in your office.