During the laundry/office renovation, I posted this question on Instagram: What would you like to read about more in-depth? While the volume of responses wasn’t huge, most people who answered wanted to know about painting unfinished cabinets.
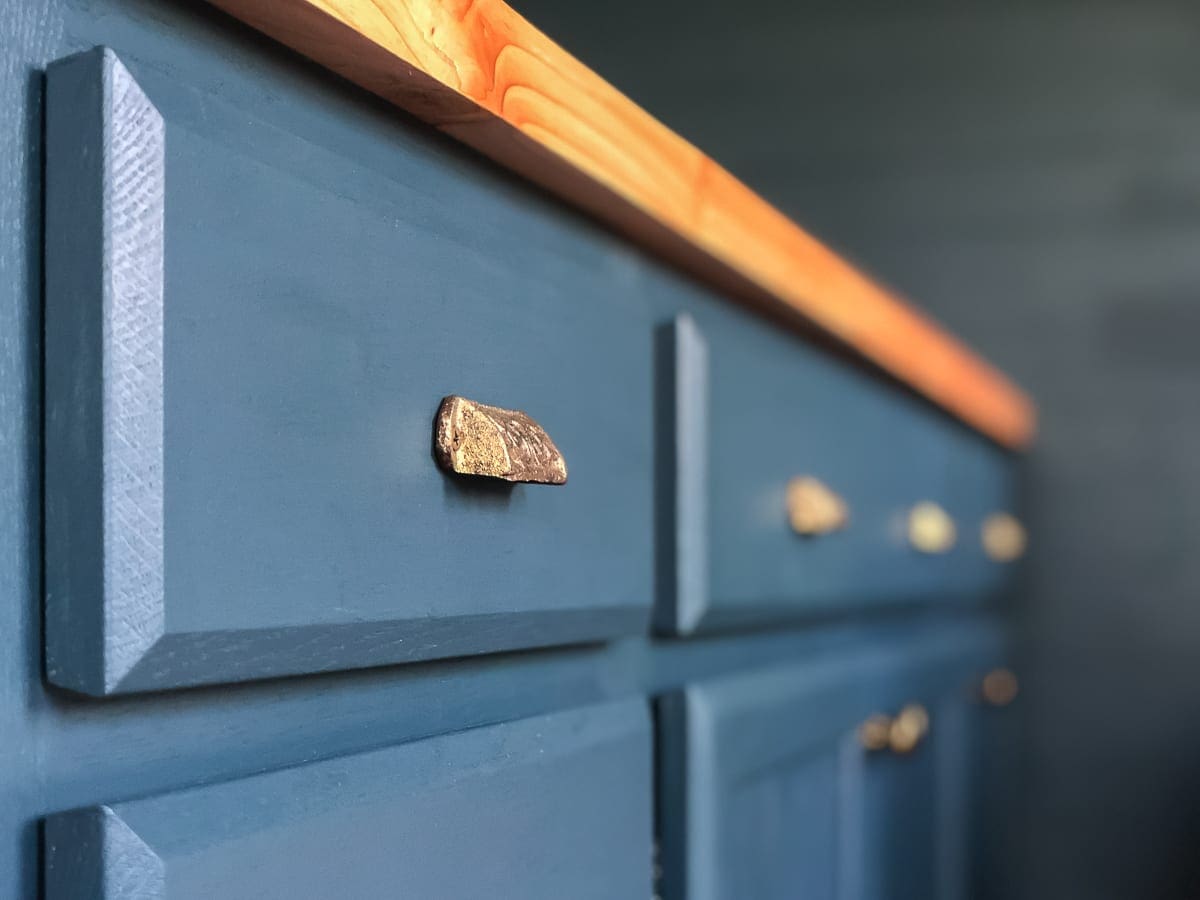
So many of you were really into this color too. It is Mount Etna by Sherwin-Williams, a vibrant chameleon-level shade of green, blue, or black. Whatever color you want it to be is what you see.

Today’s post is a handy how-to guide. Painting cabinets is an easy way to customize a project, and following the right steps will yield professional-looking and long-lasting results. I’m all about doing projects right the first time.
This post contains affiliate links.
Supply List
For this project, I used:
- Compact Detail Sander and sanding sheets
- Sanding Sponges (medium to extra fine – Here is a well-priced multi-pack.)
- Water-based primer (Oil-based primer is an option too.)
- Sherwin-Williams Emerald Urethane Trim Enamel in Mount Etna
- Paintbrushes – This one is my favorite.
- Project Source cabinets from Lowe’s.
Painting Unfinished Cabinets: The Short Version
- Remove the doors and drawers.
- Sand the frames, drawers, and doors until they are smooth
- Prime
- Sand lightly to knock down the raised grain. Touch up the bare spots, and sand them after the primer is dry.
- Paint first coat
- Sand lightly
- Paint second coat
- Sand gently and touch up paint as necessary. For dark shades, a third coat might be necessary.
- Add hardware and bumper pads or soft-close hinges and slides.
- After installation, add the side panels and paint them to match.
Painting Unfinished Cabinets: The Long Version

Step 1: Sand
Remove all of the doors and drawers.
The Project Source cabinets are quite a solid value for the price. However, I needed to sand them pretty aggressively before priming them. The pre-sanded texture was rough to the touch.
Using the detail sander with an 80-grit pad, I knocked down the roughness and imperfections quickly on the frames, drawer fronts, and doors. I followed that pass with a quick allover swipe of a 120-grit and then a 220-grit pad for the smoothest finish.

Step 2: Prime
Before I began priming, I had to decide how much of the cabinet to paint. Since these cabinets were going in my laundry room/office, I opted to only paint the cabinet frame and the exterior doors and drawer fronts. For a higher-end project or look, I would have painted the interior doors and backs of the drawers too. There’s no wrong answer here. However, whatever you choose, stay consistent, and keep a sharp line between the unfinished and finished sections.
For dark colors, feel free to use a tinted primer. I did not since I already had untinted on hand.
Step 3: Sand Again

Once the primer was dry, I could see the raised grain again, so I knocked it down by hand with a sanding sponge. For the toughest spots, I used medium grit, but for most, fine grit worked well.

I dabbed a little more primer on the edges where I went back to bare wood with the sanding sponge. After it dried, I lightly sanded it again.
Step 4: Paint
With a steady hand and a high-quality brush, I painted the cabinet frames first, carefully keeping the paint off the inside. I didn’t worry too much about the sides because I planned to add end panels after the install.
Note: If you feel like you should tape first, I highly recommend FrogTape which adheres well and maintains a crisp line.

Next, I painted the cabinet doors and drawer fronts and let everything dry thoroughly. After the first coat, I sanded with a fine-grit sponge again.
Although the Project Source cabinets from Lowe’s are constructed quite well, the grain of the low-grade wood kept popping from the moisture of the primer and paint. Grain popping is normal for unfinished wood, but higher-quality wood often requires less aggressive sanding between coats.
Note: I cannot ever remember having to sand so many times between coats. For a bare wood project, sanding after the first coat of primer or paint is always necessary. A light touch after the second coat might be. My experience with the Project Source cabinets was unusual.


Next, I applied a second coat of paint. The second coat was the charm. Finally, the color was smooth and uniform, and the grain did not pop again.

Painting Unfinished Cabinets: The Final Touches
Once the cabinets dried thoroughly, I added drawer pulls that I found on eBay and coordinating knobs. The replica drawer pulls were too brown for my taste, so I tapped them lightly with a brush and gold paint.


Finally, since the doors and drawers of the Project Source cabinets do not have soft close hinges or drawer slides, I added small felt bumper pads to all four corners of the drawers and the opening edges of the cabinet doors. (Available in rubber or felt.)
For high-use areas like a kitchen or bath, I would probably swap out the existing hinges and slides for the soft close version. In our laundry, the bumpers are sufficient.
After I installed the cabinets, I added the side panels and painted them to match. The countertops were made with 2X8 Douglas Fir boards, glued and sanded, but that is a tutorial for another day.


Nearly three months later, the new still hasn’t worn off for me. I love that we have storage in the laundry/office now, and seeing this room finished makes me so happy.
If you have any questions, please drop them in the comments.

PS: Here’s a pretty pin so you can save this post for later.


16 Comments
Devyn
They look great!…. Nice tutorial…. Sanding between coats is something I believe is not stressed enough.
I must add that this post caused me to remember the nightmare of priming and painting nearly 200 individual pieces of wood before assembling our kitchen cabinets a few years ago (only to sell our home and leave the dream kitchen behind).
If you are only doing a few cabinets, DIY is the best option to go, but when we finally get to the kitchen in our new (old) house, I am setting up a spray booth, no more hand painting of what will surely be another 200 or so pieces. .
Stacy
Thanks, Devyn. I agree with you about spraying when you have a ton of pieces. We sprayed our kitchen cabinets at our house in California. Spraying was such a time saver.
PS: I love your NYC kitchen too!
Ashley Swartz
Hello! Thank you very much for this detailed tutorial! I am tackling painting the Project Source cabinets this weekend.
How long did you allow for the paint to dry between the first and second coats? And then how long did you allow the second coat to dry before sanding and reattaching doors and drawers?
Thank you!
Stacy
Hi Ashley, Thank you for your comment. I am glad that the tutorial is useful. I used latex paint for these cabinets. The side of your can of paint should have the minimum drying time required between coats. Honestly, I’m pretty sure it was six to 24 hours here because I don’t have a ton of time to work on projects each day. The amount of time you wait is most important after you apply the final coat. You can carefully reattach drawers and doors after about 24 hours, but the paint is still fragile. Most latex formulas take about two weeks to cure fully, although they dry much faster. You can still use the cabinets, but I’d be careful about bumps and dings.
Please let me know if you have any additional questions. I am happy to answer them.
Diane
Hello! I’m about to do some cabinets for my dining room, which I’m turning into my baking area. With the sanding after the color coats does it even out the brush strokes? I’ve always had a problem with how brushes leave obvious strokes when you paint with them. When I painted my laundry room doors I rolled them, but that left the texture from the roller.
Rachel
I’m using project source cabinets for a project I’m doing and using your method to paint them. Thank you for sharing! I was wondering though, the cabinets don’t come with any shelving inside. Did you add shelving? What was your solution?
Stacy
Hi Rachel, Thank you for your comment. The uppers do come with one shelf, but you’re right, the lowers are empty. That is strange! For my laundry room, I did not need shelves. However, you could use a pinhole jig to drill holes and make shelves out of MDF or plywood. Here’s a link Pin Hole Jig I have one that’s made my Kreg, but it has a little lip on it that might not work with the cabinet face. The one I linked is different.
Sydnie
Thanks so much for your tutorial! Just started on some much needing cabinets in my laundry room!
Stacy
You’re welcome! Good luck with your project. 🙂
Tracey
Thank you for the tutorial! I am painting my raw wood cabinets this weekend and use your guide as reference. Did you do anything to seal the raw wood that you did not paint (inside drawers and cabinets)?
Stacy
Hi Tracey,
I’m glad the tutorial helped! The inside boxes of these stock cabinets and drawers actually have a laminated finish that looks like wood. So, I didn’t seal or paint that part. However, I did paint the backs of the drawer fronts and the cabinet doors since they are natural wood. Good luck with your project!
Abbey
Hi I’m doing similar project using project source cabinets. What specific primer did you use
Stacy
Hi Abbey,
I believe I used Kilz all-purpose water-based primer for this project. I’ve also used Zinsser Bulls Eye 1-2-3 with great success on bare wood projects. If you want to go with a higher-end primer, I love Fresh Start by Ben Moore.
Mike
Nice post……….
Tracy
I’m so thankful I read this before I painted the same cabinets I got from Lowe’s. I’m having the exact experience with needing to sand so much. I was prepared with all of the supplies and not unexpectedly disappointed when I had to sand again and again.
Stacy
I’m so glad the post was helpful! Thanks for the feedback.