Welcome back. We have reached the halfway point of the One Room Challenge™. The time has passed by in a blink. For those of you just joining us today, you will find our first two posts here:
Week 1
Week 2

Last week, I mentioned feeling like I had imposter syndrome. This week, I am completely over that because I am far too busy with the work needed to finish by week 6. I have to stay focused on the goal and not my insecurities. The timing is going to be tight. This weekend we have an obligation that will prevent us from working on the pantry at all. Um, that is not good.
The ORC Featured Designers continue to impress, and the other guest participants like me get much of my blog reading attention. I enjoy catching up on everyone’s progress.
***
This week is all about the beautiful hardware in the pantry. In last week’s video, I talked about the fact that we have Eastlake* hardware all over Blake Hill House. I absolutely love it. We have door hinges, knobs, window pulls, cabinet locks and drawer pulls. I adore it so much that we are putting replica hardware in our new kitchen. I found some wonderful choices at House of Antique Hardware.
*The Eastlake Movement was an architectural and design reform movement that started in the late 19th century and continued into the early 20th century. The movement was started by Charles Eastlake, who was a writer and architect. The style was most popular in Victorian architecture.
The first step was to remove all the hardware including the window pulls, window latch and hasp. I collected all of the screws and separated them according to the hardware they belonged to.
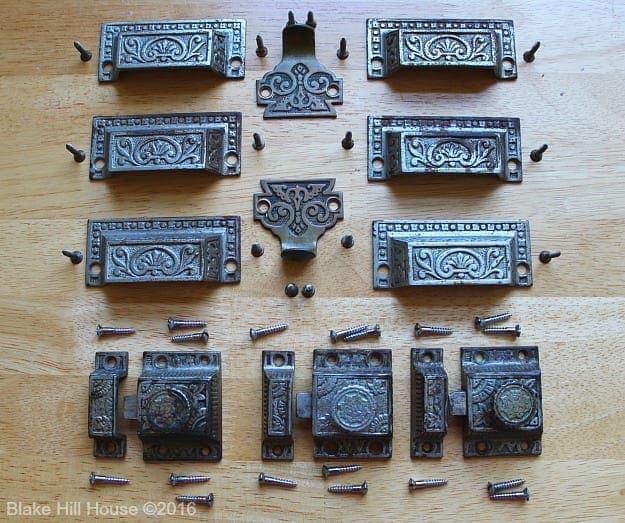
All of the hardware was a filthy mess.
For my first attempt at cleaning, I dumped all the pieces in hot, sudsy water and scrubbed them with a toothbrush. It did not take me long to figure out that I was not making any progress. In addition to a lot of grime, the hardware seemed to have some sort of coating that I could scrape with my fingernail, but it had adhered too tightly to scrub off with the toothbrush. I think that it may have been old wax or even a light layer of lacquer.
Since I made very little progress in the sink, I decided to use the crockpot method of cleaning to see if it would make the job a little easier.
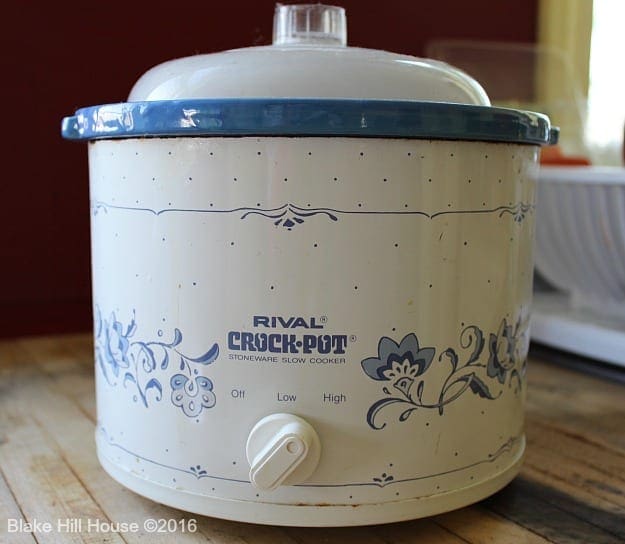
I covered the hardware with water and added a squirt of dish soap. Then, I turned the crockpot on high and let it “cook” for a few hours. When I removed the hardware, I initially had disappointing results. I gave it all a second scrub in the sink with a Scotch-Brite sponge. The scrubby portion of the sponge removed a lot of the grime, but there was still a great deal of oxidation and dullness on each piece.
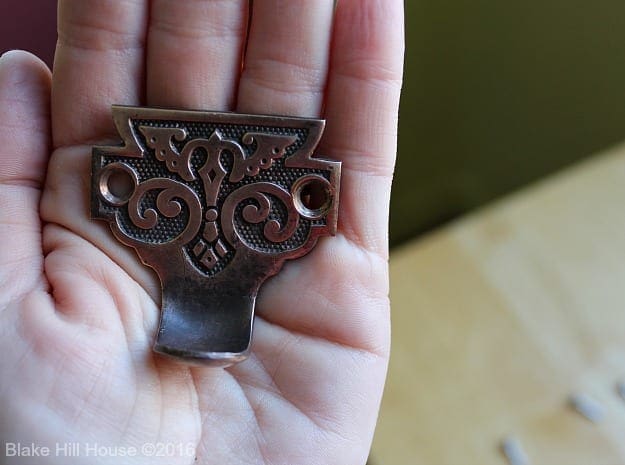
I made a little video about the process of restoring the hardware, but I am sort of disappointed in the quality. I thought it was uploading in HD, but I am not sure it did. Ugh. Learning this video thing is driving me crazy. I hope you will take a peek anyway. The clear blog photos support the video content, and in the video, I describe the process of restoration more in-depth.
If you just watched the video, you will know that I followed up the cleaning process with Naval Jelly which is a rust dissolver. I tested the product on one piece first to make sure that it was not going to damage the antique hardware. Once I completed that trial run, and I determined that it was going to work well, I coated the remaining pieces using a cheap plastic paintbrush. I waited about 10 minutes for the Naval Jelly to do its job.
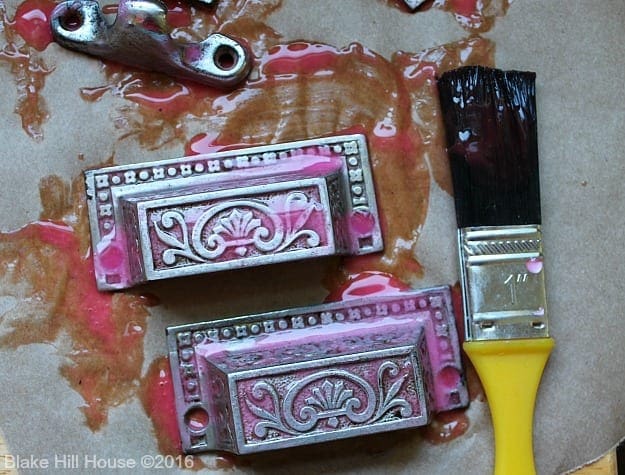
The rust and oxidation came off easily as I scrubbed each piece of hardware with a metal brush. Then, I had to decide just how new and shiny I wanted it to look. People’s tastes differ when it comes to restoration. Some people want everything to be clean and look like new. Others enjoy the patina of old hardware, and their end goal is only to improve the physical cleanliness of each piece. I fall somewhere in between. I want a little shine, and I definitely want it clean. It is worth noting that every scrub with steel wool or a brush does wear down the metal design and the metal plating. If you use too heavy of a hand, the end result might be a shiny metal piece of hardware, but it may come at the expense of damaging the design and plating. My advice is to brush softly and carefully when you start. You can always be more aggressive if you are not getting the results that you want.
Once my scrubbing had created the desired effect, I dried each piece of hardware thoroughly. Remember that moisture + air = rust. No one wants to do a job like this twice so keep everything dry. I applied a coat of wax to the clean, dry hardware. When the wax had dried to a haze, I buffed each piece of hardware with 0000 steel wool.
Now, I was happy.
The freshly cleaned and polished hardware:
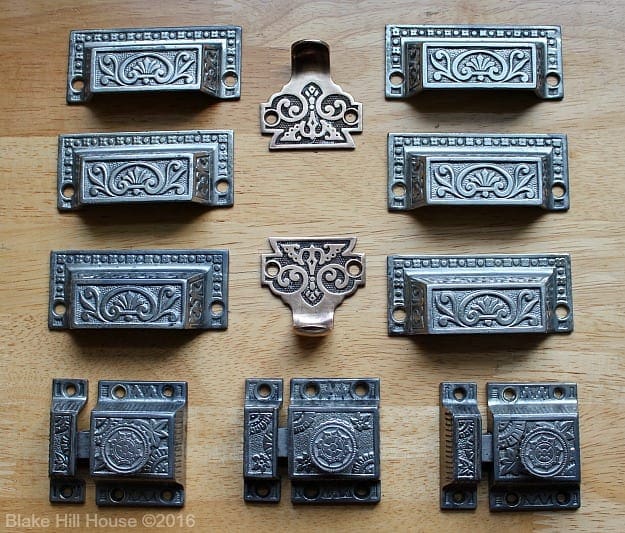
It looks like a million bucks. I was most surprised by the difference in the window pulls. They look brand new. It is also clear that they are plated with a different kind of metal, likely copper. However, the fact that the copper did not rub off more during the restoration process makes me wonder if these are replica pulls or the real deal. I’m not sure.
This process took several hours. As I mentioned on Instagram, a sense of reverence surrounds a task like this one. My hands touched and cared for the same hardware that a craftsman carefully placed on the cabinetry over 125 years ago. That is a pretty neat feeling. What did the craftsmen think when they were building Blake Hill House? Did they think about who might live in the house over the years? Could they even imagine a life 125+ years in the future? I certainly do wonder.
See you next week!

This post is also linked at Decor To Adore: Thoughts of Home on Thursday
This post contains affiliate links.



10 Comments
Ame Hughes
What a fantastic job! That hardware looks amazing.
What kind of furniture wax did you use?
Stacy
Thank you, Ame. I used a regular paste wax by S.C. Johnson. It can be used on wood, leather, metal, etc… There’s a link for it at the bottom of the post. (It is an affiliate link, FYI. No need to click on it if that’s not the way you roll. 🙂 )
Jemma
These turned out beautiful and thank you for the mini-tutorial.
Looking forward to seeing what is happening next week with the pantry.
Thank you so much for joining us at TOHOT.
Also we are hosting a garden party on Monday and if you have any gardening posts to share, please drop by!
Jemma
Stacy
Thank you, Jemma. 🙂 Thanks for hosting the link-up. I wish I had garden photos. We are just now thawing out around here. It will be a few more weeks.
Stacey
The hardware is beautiful! I’m so glad you took the time and effort to restore something so special.
Stacy
Thank you, Stacey!
Laura Ingalls Gunn
Stacy your hardware is gorgeous. What an absolute delight this post is!!! Thank you so very much for joining the gathering at Thoughts of Home on Thursday.
Stacy
Thank you, Laura. Thank you too, for hosting the link-up. 🙂
Meg | Hello Farmhouse
I love Eastlake style. How wonderful that your home still has these treasures and that you’re restoring them! Can’t wait to see your renovated pantry!
Stacy
Thank you, Meg. I’m looking forward to reading more of your blog. 🙂