Six years ago, during the purchase process, two inspectors pored over BHH with a fine-toothed comb. The list of their findings was long, but there were no deal-breakers. I distinctly remember one of the inspectors telling me, All this house really needs is money and time. Truth. A complete chimney rebuild made the list. However, after we closed the deal, during triage, the immediate needs were a new roof, exterior paint, and an electrical panel. We eventually solicited bids for a new chimney, but we could not afford it, so we tabled the project.
Three Fireplaces, One Chimney
The main reason why the project is so expensive is that this one chimney serves three fireplaces, each right above the other, for three floors.
Our bedroom fireplace:

The fireplace in the living room:

And the scariest basement fireplace you will ever see (Cue the nightmares):

How Does That Work?
The fireboxes decrease in size from the basement up. Also, there are three separate flues that start out stacked one behind the other, and then they jog out to either side of the center flue. The ash dumps for the living room and bedroom fireplaces empty into the basement fireplace. Three 8″X8″ clay flue liners stick out of the top of the single chimney.
If you are unclear about what all of this means, this website has an excellent illustration of the anatomy of a single chimney. Picture that times three. Also, for more fascinating information about ash dumps, be sure to listen to the Ash Dump Archaeology episode of the True Tales From Old Houses podcast.
Rebuilding The Chimney: Finally.
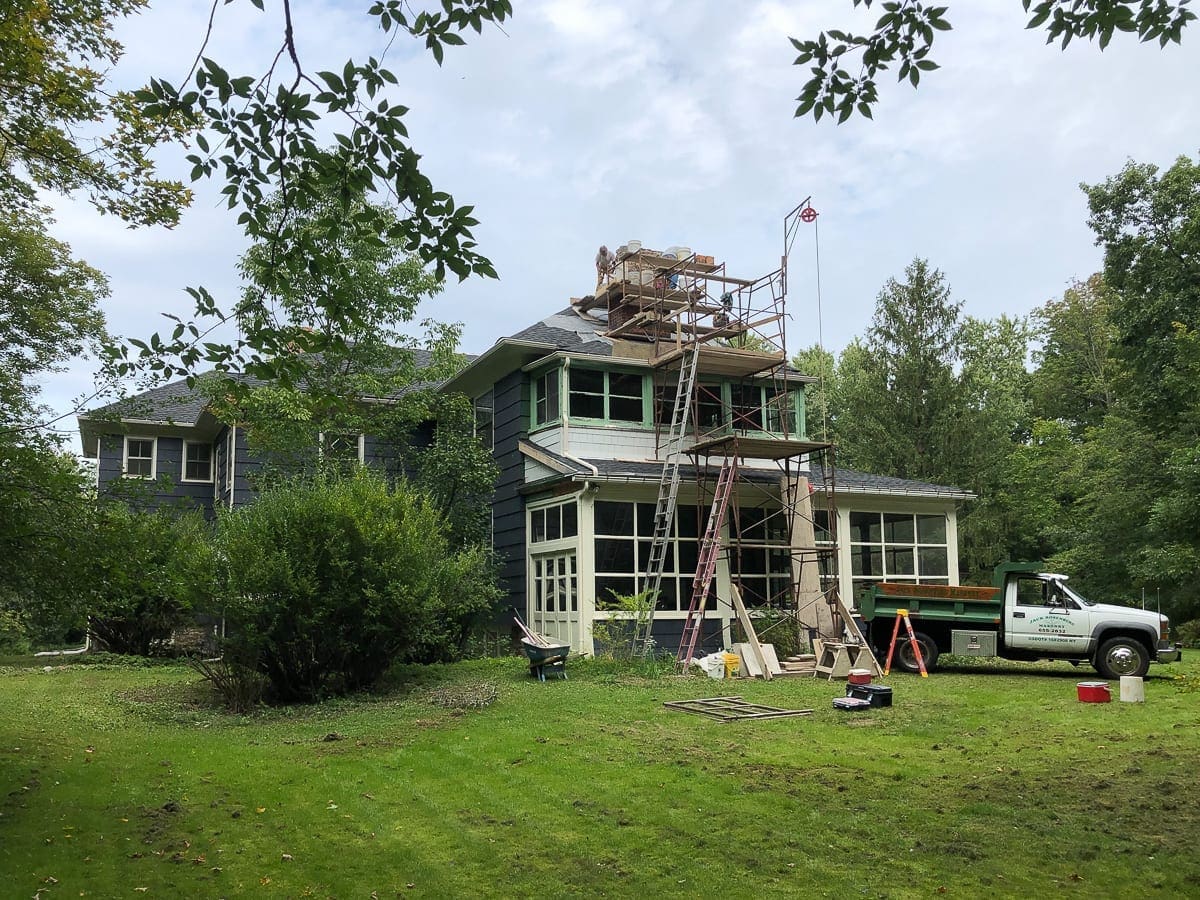
After five years in BHH and two years of saving, this project is in progress. We shelled out big bucks to hire one of the best masons in the area. He and his crew started last Monday.

The crew spent the entire first day setting the scaffolding.

Four work days later, the old chimney is mostly dismantled.

I am so fascinated by their progress.
The Process of Rebuilding a Chimney
In list form:
- Set up scaffolding
- Cover and protect the roof and windows
- Take existing chimney down to the roof line
- Keep three brick flue openings intact with 8X8 clay liners
- Build new chimney back to the proper height
- Install flashing
- Pour a new 4″ thick concrete cap
- Seal everything
For the new chimney, we chose Old Mystic tumbled red bricks. They are not quite as beautifully imperfect as our historic bricks, but they are a good compromise. Our mason, Jack, tried to save the old bricks for me so I could use them somewhere else, but he was only able to salvage about twenty. He will put some of them back into the new chimney too.
The entire process should take about two weeks. When they are finished, I will try to climb up on the roof to take some proper photos. Between now and completion, there will be regular updates over on Instagram.
We are getting closer than ever to cozy winter fires at BHH. What a happy thought.


10 Comments
Amy S
Whoa, this is an intense project! Have your fireplaces been unusable since you’ve moved in?
I’m also completely fascinated by your terrifying basement fireplace. It looks like t was once a playroom, but Dorothy didn’t have children, correct?
Stacy
We have not used the fireplaces at all since we moved in.
I’m also confused about the basement fireplace. I believe it was probably a playroom for the owner before Dorothy. However, it must have been an awful one. On rare occasions, water does seep into that room.
SH
Still mystified how one chimney serves 3 fireplaces, but fascinated by it all. Hope weather holds out for you. And it’s been 5 years so time for refresh in the master bedroom. You’ve earned it.
Stacy
I’ll try to draw a picture of it on IG stories sometime soon. We still haven’t touched our bedroom. 😀
Ryan
Poor chimneys are so often left to moulder. Our primary chimney (only one fireplace) was looking a little gappy and after we needed a porch column rebuilt we had the chimney rebuilt at the same time. (pro tip: do not tie a rope around a brick pillar and then clip the end to your dogs collar. He will see something exciting, lunge after it and pull that rope clean through your brick mortar. Luckily this was a decorative column and not a support column but seeing the top tumble down the stairs was a shocking moment)
Luckily our mason was able to reuse all of the existing brick because our house brick is an uncommon color and finish. The process was very much the same though although unfortunately he recommended that we don’t use our fireplace because the flue will heat up the mantle and there’s a risk of fire.
I’m glad you’re getting your chimney back in working order, or at least preventing collapse (I have neighbors that have just removed damaged chimneys). Was the kitchen in the basement originally?
Stacy
Oh my gosh! I can just picture a dog doing that. Millie is so gentle, but our last dog would have pulled the whole house down without even a thought. LOL
I’m not sure if we will build fires or not. I’m leaning toward gas logs instead.
SM
Stacy- I am truly fascinated! This is my favorite project for BHH thus far! I can’t wait to see the finished product! Xo
Stacy
I’ll show you in person! 🙂
Eve Mitchell
It’s good to know that chimney rebuilding takes scaffolding and concrete. My mother lives in a house from the 1930s, and it had a lovely chimney that is now falling apart. I’m hoping that I can call a chimney repair company to fix it for her birthday.
Stacy
Hi Eve,
Good luck with the chimney project at your mother’s house. What a nice birthday gift. Hopefully, you’ll be able to find a good mason to do the job.