Andy and I got a great start on the bedroom ORC over the weekend. Do not let his self-deprecating post from last week lead you to believe that he is nothing more than a beer-drinking, couch-surfing, football-watching slacker. That is not the case. BHH could not function without him. It is true that I end up doing most of the scheduling and a lot of the labor around here, but that is due to the fact that I am actually here in the house since I work at home, and I have flexibility in my schedule.
This room repair is going along much more smoothly than the first room. We are not fumbling with unfamiliar tools and technique this time around. We can actually see the project as it will unfold instead of considering each step a complete mystery. We find ourselves falling into an easy work routine based on our strengths.
This bedroom, aside from the ceiling is actually in far worse shape than the teen’s room. Once the wallpaper was removed, it was apparent that the plaster was a complete mess. In the teen’s room, two walls needed a lot of repair. In this room, all four walls are full of cracks. The good news is that there is only one window, and it is in proper, working order. That really reduces the workload. Repairing and painting windows is time consuming.
Last week, in stolen 15-minute increments, I slathered paint stripper on the window woodwork, and scraped it off as it was ready. Saturday, I was able to finish all of the window work by carefully wet sanding. The windows, baseboards and doors contain lead paint, so I carefully followed protocol for its removal. We will not be removing paint from the baseboards or the doors. We will encapsulate it in new paint.
Once the window prep was complete, and the room was thoroughly cleaned, we began to repair the plaster. We drilled all of the holes on Saturday, and we did the adhesive and anchor screws on Sunday. Plaster is quite easy to fix, but it takes some patience since it always looks worse before it looks better.
The general idea is that the plaster cracks occur when the plaster separates from the wood lathe behind it. This happens over time, and the plaster damage to our room was accelerated by water damage from a prior roof leak. Many people slather patch over the cracks instead of doing a thorough repair. It is our understanding that simply patching cracks will cause them to reappear over time, and the sagging plaster will continue to cause new cracks to form.
Phase I of complete plaster crack repair involves these steps:
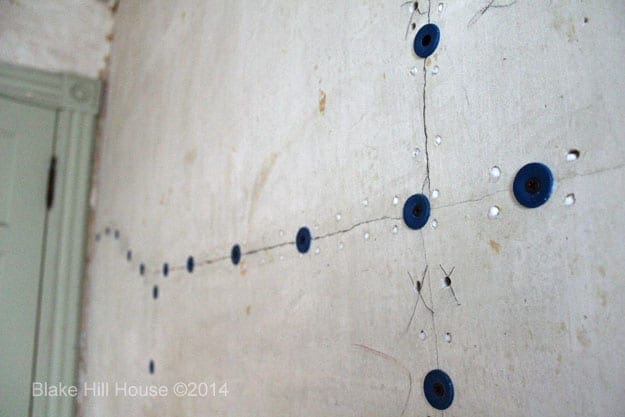
- Using a masonry bit, drill holes on either side of the crack every few inches. The masonry bit will go through the plaster, and it will stop on the lathe. That is a proper hole. If your drill goes all the way through, you have hit a void between the lathe. Mark that hole with an X. You will not use that hole later.
- Squeeze adhesive that is approved for plaster into each of the holes that you drilled. Skip the holes with the X.
- Place drywall screws with plastic caps directly into the crack every 12 inches or less. As the screws go in, they will draw the plaster back towards the lathe, and the adhesive will adhere it back to the lathe.
- Small bits of adhesive may squeeze out of the holes as the plaster is secured against the lathe. Wipe off the excess immediately, so your wall is not covered with dried knobs of glue later.
- Leave the drywall screws with plastic caps in place until the adhesive is thoroughly dry.
Here is a close-up of a crack at the end of phase I. Notice the holes in the void, marked with an X. They are not filled with adhesive:
Last time, we let the adhesive dry for a very long time due to damp weather. Now that it is cold, the air is a lot drier, and we should not have to wait as long. I intend to remove the screws later this week, and we will do the finish work on the walls next weekend.
This is how the room looks after our first full weekend of work:
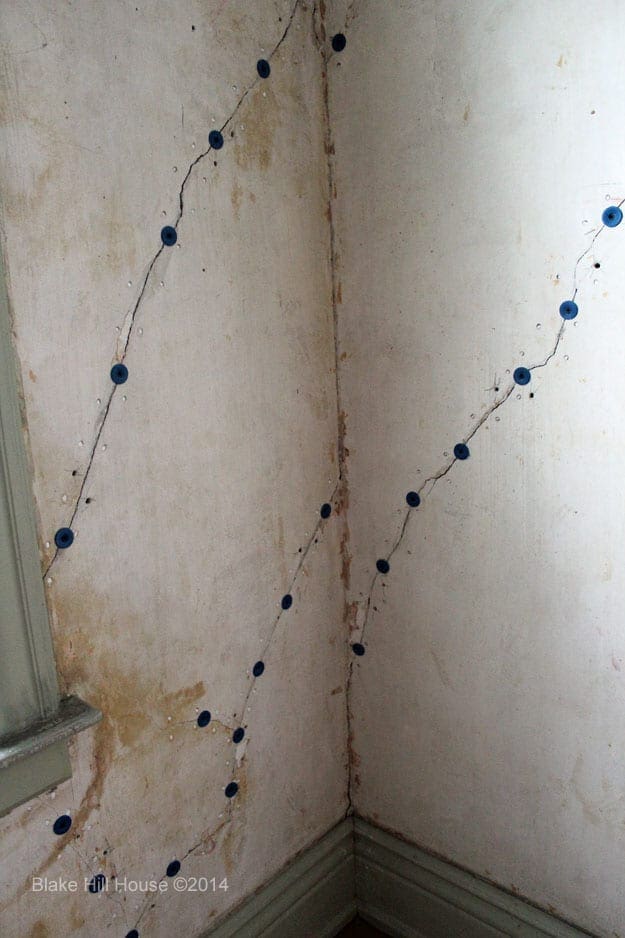
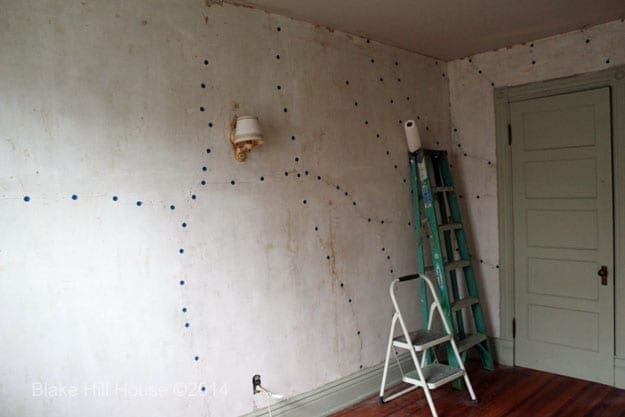
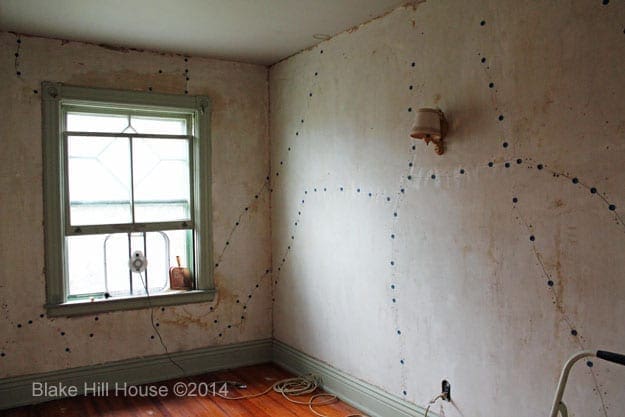
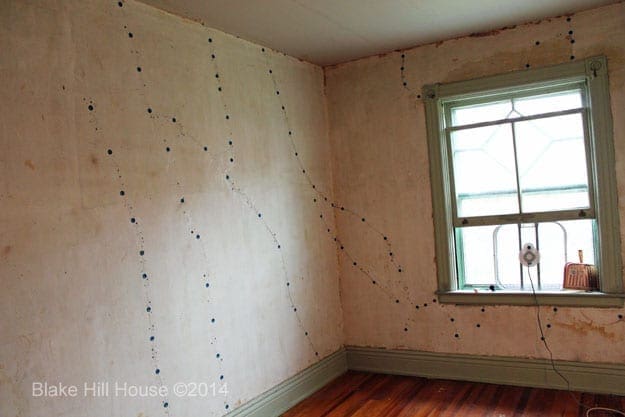
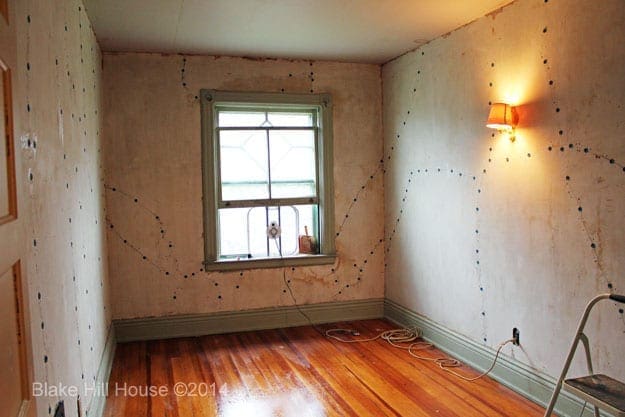
It is a complete disaster, but the end result is going to be very satisfying.




4 Comments
Ame
WOW! You are the DIY renovation queen – that’s a lot of work you got done in one weekend.
PS: The floor in these pics looks fantastic.
stacyfg@gmail.com
Thank you! It is amazing what we can get done when we apply ourselves. The floors in the whole house are in remarkably good condition. This one looks particularly shiny because I mopped it as I left the room. I am trying to keep the work space very clean.
Stef
Thanks for the explanation! I was abstractly familiar with plaster screws but have never used them myself. I never knew if you left them in place and mudded (?) over top, or took them out. Super interesting!
stacyfg@gmail.com
You’re welcome. The next phase is definitely more fun.