When blogging, it is not my intention to take so long to write about each project. I realize that as a reader it can get very boring to read a long, drawn out project post. Nothing happens by “the magic of television” in real life though. Real life is fraught with the daily landmines of schedules and unforeseen circumstances. I am still learning the best way to journal each project and streamline the process of photo editing and blogging. Because I am a novice in the DIY blog genre, please bear with me as I learn. On the right sidebar of this blog, there are various ways to subscribe to the blog content. So, if you do not want to check back here for updates because you feel the post schedule is too irratic at this time, you are welcome follow Blake Hill House with the blog service of your choice, and you will receive notifications of new posts without even having to think about it. With that bit of housekeeping out of the way, I will get back to business. I warn you, this will be a long post, so grab your coffee.
With everything demolished, it was time to figure out how to put it all back together. First, I had to step back and look at the entire project. The more I looked, the more issues I found that I wanted to address before winter. I made this quick, labeled image to show an overview of the whole project.

- Repair and Paint: I decided to address all of the exterior repairs and painting on the little room (right side) that leads to the basement. The windows needed re-glazing, and the surfaces needed fresh paint to cover bare wood and fragile siding shingles. In the winter, the snow accumulates in front of that window and on the roof, so I felt it was important to make those areas as weatherproof as possible.
- Seal and Paint: Between each sections of the porch there were gaps and separation cracks. The snow would be able to seep into them and create the perfect environment for rot and mildew.
- Remove Carpet and Stain Stairs: Since the area would already be torn up and the hand rails were removed, it was a good time to make the stairs more attractive. This is not the main entrance that we use, but it is the entrance that is seen from the street. I wanted it to look nice.
With the project plan in place, It was time to get started. The first step was to remove the rotted section of the porch floor. I pried off the decorative detail underneath and set it aside for later. Then, I used a fine-toothed hacksaw to cut out the bad wood until I reached decent floorboards. The removed portion measured 12″X12″.
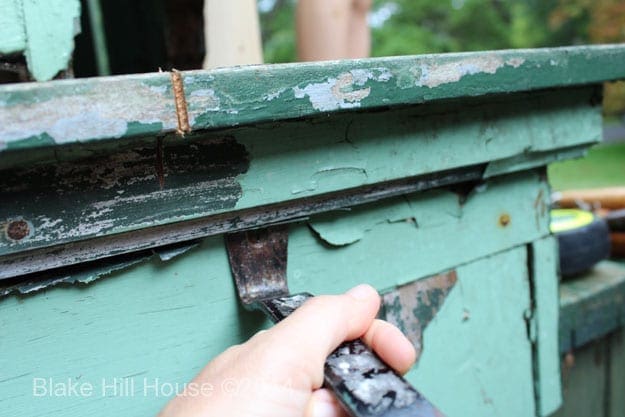
The porch frame support underneath was completely sound, but I found that the wood frame on the top side that supports the floorboards needed to be filled with wood filler due to rot. Rather than try to fill it in and shape the filler into a frame with flat sides, I built two new frames out of cedar. Cedar is more historically appropriate, and it is known for its resistance to rot and pests.
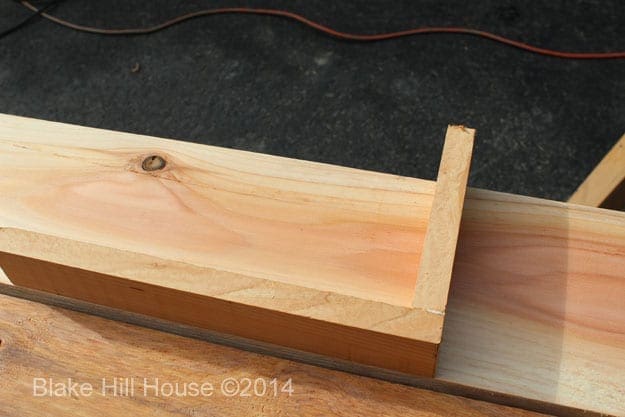
I glued the frame pieces together at a 90 degree angle, and fitted them to the rotted section on on the inside and the outside of the porch floor frame.
Once they were in place, I leveled them with shims and filled in the small gaps with wood filler. I also had to plane a small section off of the top left to make it perfectly level for the new floorboards.
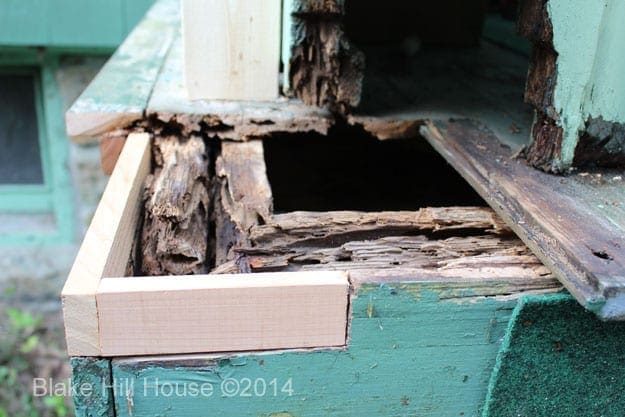

The frames and filler took about 48 hours to dry. I removed the shims and nailed everything into place with finishing nails. Then it was time to fill in the frame.
There are many choices for this particular issue, but I chose Durham’s Water Putty because it was inexpensive, and it was recommended in several online forums. Some of the feedback on Durham’s stated that it sometimes popped out or bulged out of shape after a season or two, but I felt confident using it in this situation since any expansion would be contained by the pressure of the pillar and the floorboards on the top and the solid frame on the sides. The product is very much like Plaster of Paris prior to drying. The mixing process is the same, and the consistency is similar. Durham’s dries much harder, and any mistakes are difficult to fix once it dries. That is why it is durable enough to be used to shape windowsills or even decorative gingerbread trim on a Victorian.
The application here at BHH was much more simple. I just needed to fill the trough I had created with the new frame. I poured the Durham’s into the frame in small increments, letting it dry in between. I wanted to make sure it would dry thoroughly, and I could make any corrections if necessary.

After that was done, I left it all to dry for about two weeks. I kept it loosely covered in plastic to protect it from rain. It wasn’t necessary to let it dry that long, but I had other obligations, and I figured it certainly would not hurt it. During those two weeks, I tried to find tongue-and-groove floorboards to no avail.
First, I shopped at all the big box stores. They all had pieces that were the proper width, but I needed 3/4″ thick, and everything available was 1″ thick. Next, I checked the smaller chain stores and finally the flooring stores that catered to clients with old homes. Some of them could order an entire porch floor’s worth of tongue and groove, but none of them had a small amount for the 12″X12″ section that I needed. I fretted about historical accuracy for a few days. I was convinced that the difference in wood would be noticed if I did not use tongue and groove. I carried a rotten floorboard around in a baggie in my purse in hopes that I might stumble upon someone who might know a source.
Finally, I just decided to get over it and use wood that was not tongue and groove. I chose cedar of the proper thickness. When it was all said and done, only a 12″ strip would been seen from the front, and the rest of the new floorboards would be covered with the porch pillar base.
With the hacksaw, I cut off the tongue portion of the adjacent porch floor section, and I cut my new floorboards to the proper length and width with a circular saw. I primed both sides of the new boards, and placed them. I made sure everything was still level. Once the new floorboards were secured with finishing nails, I filled in the small cracks with wood putty. The dry wood putty was sanded, and the floor was ready to paint and support the new porch pillar base.
Sadly, I did not take any photos of that particular step. I am not sure how I missed it. I think that I was so deep into the work that I forgot to document it at all. I will chalk it up to being a novice. At the very least, the lack of pictures makes this post a bit shorter.
With the porch floor repaired, it was time to recreate the porch pillar, and I turned to the Cake Boss for inspiration. Let me explain.
My children are slightly obsessed with the Carlo’s Bakery and Cake Boss. We discovered the show on Netflix, and we were doing a bit of binge watching on the weekends.
During one of the episodes the solution to the pillar project hit me. I am not a woodworker, but I have made a tiered cake. The portion of the pillar that needed to be replaced was the same shape as a cake. Wood putty was like icing, and paint was comparable to the smoothness of fondant. I just needed to create an inedible cake made out of wood products. I could do that! The very next day, with renewed enthusiasm and inspiration from Carlos Bakery, I returned to work.
From the rotted pillar, I had salvaged the round section, but it broke into two pieces:

The pillar base was completely gone, and the pillar above was missing a chunk. I needed to make a new base and figure out how to make a round pillar without a giant lathe.
The base was pretty straightforward. Based on the measurements of the intact pillar base on the opposite side, it was a 10″X10″ square stacked on an 11″X11″ square stacked on a 10″X10″ square. All of the edges were beveled 1/2 inch. The design was easy to figure out, but the execution was going to be tough. All we own is a circular saw and a jigsaw. I really needed a table saw to make perfect squares and properly beveled edges.
As luck would have it, my neighbor’s curiosity was piqued by my project. He came over to visit, and he told me that he was a woodworker. What luck! I told him my plan, and explained the dilemma. He said he would be happy to cut the wood for me. In a couple of hours, he had the pieces cut and returned to me. I am so thankful that he came by just when I needed help. It is funny how life works out like that sometimes.
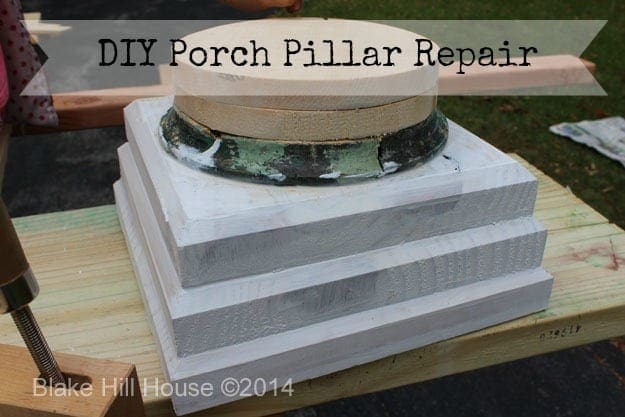
I primed the bottoms of the wood, glued and nailed them together, and then filled in the cracks with caulk. It was starting to look like a cake all right.

I stabilized the soft wood of the decorative circle with wood filler and let that dry.

Then, I applied wood glue to the top for the decorative circle.

I glued the decorative circle onto the pillar base making sure it was properly centered, and held it flat with a board and an overturned hammer. Creative woodworking FTW. A clamp held it a little too tightly to the pillar base, and the edges pressed upwards so it was no longer level. This cobbled-together solution prevented that issue. The “cake” was coming together quite nicely.

Drying the pillar base took about 24 hours. While I was waiting, I sanded and painted the porch floor. I chose a deep chestnut brown.

The porch floor took about a day to dry really well. The pillar base dried first, so my helper slapped a layer of primer on the outside of it while I worked on the windows.

Two of the windows needed re-glazing. I removed all of the old glazing and spread on a light layer of 50/50 turpentine and boiled linseed oil. One of the forum members at wavyglass.org named this mixture “blopentine.” The purpose of blopentine is to condition old, dry wood, and to kill any remaining mildew or bugs that might be in the wood. Once the blopentine was dry, I primed that section with an oil-based primer. I also used frog tape to create a sharp line for the new glazing.
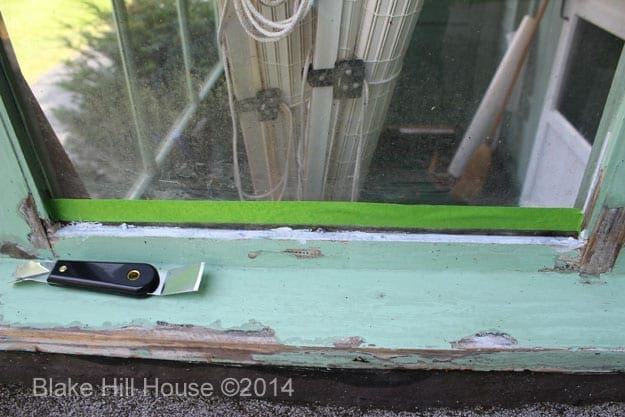
I used Dap brand window glazing putty. Again, I had read mixed reviews about this product regarding its ease of use, not necessarily its performance. It worked fine for me, and since it is the only product I have ever used, I don’t know any better.
Glazing is quite easy, but it takes some patience to get a professional-looking finish. Glazing putty looks very much like clay. Basically, you warm it in your hand and make a long snake that spans the length of the pane of glass that you are trying to secure. Then, you press it flat by drawing your glazing tool firmly along your snake. It makes the glazing fit against the wood and the windowpane much the way a piece of crown moulding would fit against a wall and a ceiling joint. The complicated part occurs when your tool drags in the glazing putty. Then, you end up with unsightly ridges and a rough texture. I liberally rubbed my glazing tool with linseed oil every time it started to drag. That seemed to do the trick.

One window took about 30 minutes. I repeated the process on the other window, and left both to dry. Hopefully, I will get faster at glazing with time. This window only needed glazing on one side, not all four. That cut down on the work significantly.
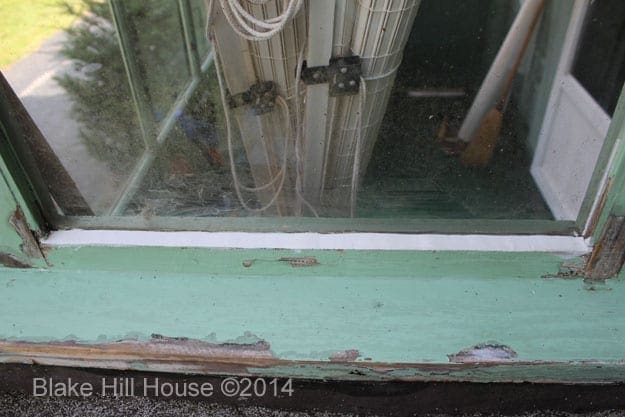
Because of the damp weather, the glazing took about three days to dry before I felt comfortable painting it. Waiting for it to dry left plenty of time to finish the “cake.” The square base was complete, but I needed to stack circles for the pillars. I didn’t need a lathe. I only needed my jigsaw.
I figured out the diameter of the pillar, and I tried to draw a proper circle with a homemade compass made from two pencils and a piece of string. That was an epic fail. Since this was already an unconventional repair, I reached for an unconventional template for the pillar. I turned to my kitchen cabinets to measure the dishes. Our bread plates had the perfect matching measurement. I traced three circles on a piece of 1-inch thick cedar, and I cut them out with the jigsaw.
I put one into place, and it worked!
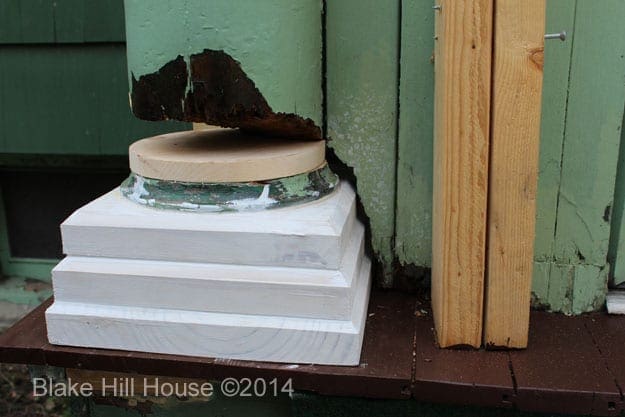

The second tier proved problematic.

With the hacksaw, I cut out another small portion of the original pillar. Then, I marked a piece of the circle tier to cut out with the jigsaw.

Once that correction was made, the whole thing slipped right into place.

At this stage the pillar looked like this.
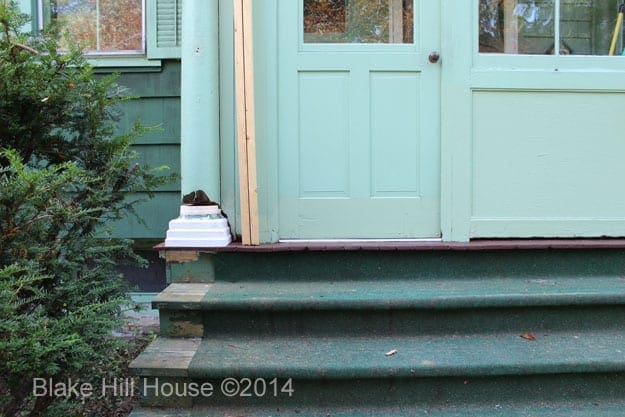
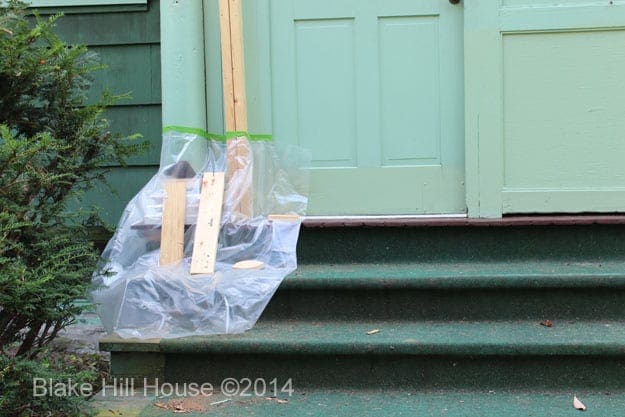
The gap between the tiers still looked too large, but it was time to take a break. I had friends coming to visit and other obligations. I covered up the whole thing with plastic, and it sat, untouched for about two more weeks. Cold weather was coming, and I was starting to feel the pressure to finish.
To be continued…
Tomorrow’s post will finish off this saga. I promise.


5 Comments
Irene
Stacy, I LOVE this step-by-step and I find it very useful. I was surprised, like you, to learn how much of renovating is trial & error! Keep up the good work. I can’t wait to see the result. Irene
stacyfg@gmail.com
Thank you so much. Sometimes I write so much, I get very tired of reading it. I also added your blog to my Feedly. I am looking forward to reading all about your project too! 🙂
Deb
I have no problem clicking over to see if you’ve posted!! This is YOUR blog!! Do what feels right to you, otherwise it’s no longer fun.
stacyfg@gmail.com
Thank you for the support. 😀
Jan Elizabeth
Very creative! And a bonus about the neighbour 🙂