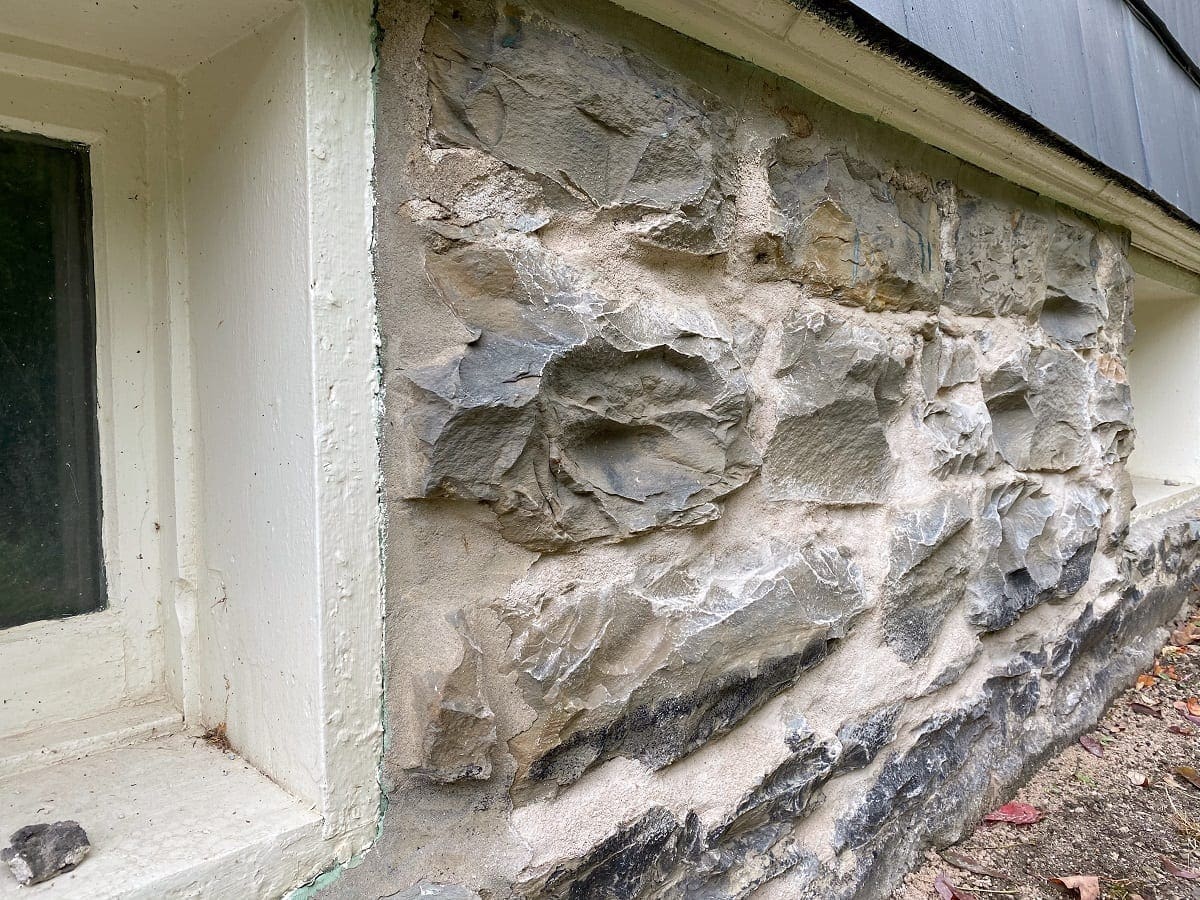
Last summer when I truly paid attention to the holes in the mortar of the foundation at Blake Hill House, I spent a couple of sleepless nights convinced that the entire house might fall down on my watch. Who else jumps too quickly to the end of a story? The foundations of our old houses do need regular inspection and maintenance, but repointing a stone foundation is a straightforward DIY task.
In the video below, I explain how to repoint a stone foundation using lime mortar, which is approved for historic restoration and recommended for use between antique bricks and stones like the ones here at BHH.
I also answered some basic questions below. However, for technical questions, please visit Limeworks and move forward with the brilliant folks there who know everything there is to know about lime mortar and historic masonry repairs. (Neither the video nor this post was sponsored or paid for by Limeworks. My opinions and experiences are unsolicited.)
This post contains affiliate links.,

Repointing a Stone Foundation Q&A
- Why lime mortar? In a nutshell, for a stone foundation or a historic brick wall, the mortar should be the sacrificial layer. Erica, a follower on Instagram who works in the preservation field, used those exact words, and it was an aha! moment. Specifically, water always seeks the path of least resistance. It has become commonplace to use modern mortars or Portland cement for repointing stone foundations. These modern products are denser than foundation stones or historic bricks. When the mortar is the densest part of historic masonry, water and moisture are forced to run through the stones and bricks instead. That improper moisture management causes spalling (flaking), which is the beginning of the end for stone foundations and historic bricks. Let me repeat: Mortar is the sacrificial layer. Repointing is maintenance. Rebuilding or replacing a foundation or brick wall from scratch is not.
- Should I always use lime mortar on my old house? Maybe not. If a past owner did some updates and replaced natural stone or historic clay bricks with modern counterparts, lime mortar may not be the right call. Compatibility is the issue, and there is not a one size fits all solution.
- How do I know if my foundation has lime mortar or Portland cement? Limeworks has a handy YouTube video that offers a quick homeowner test. If you are a research junkie, you might enjoy turning on some montage music and going down the super-sciency rabbit hole of the standard test method to examine and analyze hardened masonry mortar.
- I am still not sure about the composition of my mortar or the color. What do I do? Limeworks does offer a full historic mortar analysis so you can find the absolute perfect match.
- There are so many choices. Which lime mortar should I use? The formula you use is dependent on several factors not limited to interior vs. exterior, color, climate, and the actual location you are repointing. Limeworks offers a really neat tool for narrowing down your choices, but I suggest consulting one of their specialists before you make a purchase.

- Why were you banging on the mortar with a brush at the end? During minute 7:29 of the video, you’ll see me smacking the lime mortar with a churn brush. I glossed over this step, but Limeworks offers a video explanation. In short, using a churn brush on lime mortar opens up the texture, which allows for proper moisture evaporation and a more natural finish.
How to Remove Old Mortar
Before repointing a stone foundation, you’ll need to remove the old mortar. How far back should you go? If it’s loose or crumbly, it needs to come out. This is a dusty job, so wear a mask or respirator, especially if you are working inside.

To get the old mortar out, anything goes. We used screwdrivers, hammers, pry bars, chisels, and brushes. Work carefully in the narrow sections to avoid chipping off pieces of stone. Since some of our holes were quite deep, I used a shop vac to remove the dust and small hard-to-reach pieces.
During this stage, it can feel a little stressful. When Andy saw how deep some of the holes were, he got a little nervous. Some of them were so large that we could fit our entire hands inside.

An important thing to keep in mind is that there is likely a visible sill plate that runs horizontally on top of the foundation to distribute the weight of the wall across the entire length of the foundation and support the vertical framing. Since the foundation is vulnerable without mortar, it is essential to finish the repointing. However, in most cases, the house won’t shift and definitely should not during this stage. If you suspect otherwise, please consult a professional foundation repair company.
Best practices DIY tip: Even though the house is fairly sturdy during the repointing phase, always work on a small section at a time as a precaution.
Tool List
Here is a list of supplies that I used in repointing the stone foundation.
- Wheelbarrow
- Plastic trash bag
- Tarp
- Trowels 5 1/2 ” to apply & 10″ for scooping and mixing
- Sprayer
- Heavy-Duty gloves (similar) linked to all sizes, including size small, which is so difficult to find
- P100 Respirator
- Toothbrush & Paintbrush
- Churn Brush – Demonstrated very quickly at minute 7:29 (linked to similar brush)
Please let me know if you have any additional questions that I overlooked. Sometimes I get in the zone, and I do not realize that I neglected to expand on something important.
Also, be sure to pin this post for later. Then, when the warmer weather rolls around you’ll be ready for action.


5 Comments
Joyce
OMG this looks exactly like the foundation of our house. My husband repointed a good portion of it this spring/summer then painted it a dark gray color. I don’t think he used lime. It turned out really well. I hope it stand the test of time. Thanks for the tips.
Deb Cooper
Our foundation is large granite blocks. Does this get handled in the same way as fieldstone?
Stacy
Hi Deb, Thank you for your question. The large granite blocks would follow a similar process, but it might be helpful to you to reach out to LimeworksUS to clarify which products you need and to watch some of their videos about repointing brick. Granite blocks may require a neater and tidier mortar.
Breanna
I’m curious about re-mortaring below the ground level. We have a 1908 stone foundation and the lime mortar is totally gone below the ground level. And then the follow up is how deep to you go to address it?
Stacy
Hi Breanna, I am so sorry I never answered this! I just saw it today. I got a new website, which hasn’t functioned quite as I had hoped. Since I am not a mason, I suggest you follow up with Limesworks.US to make your final decision. However, as a DIYer, I probably would not dig down below the foundation for fear of disrupting the overall grading unless I knew there was a hole to fix. Typically, a foundation or footings go below the frost line. That said, I would absolutely repoint on the inside from the basement because it is more likely to have mortar to fix on the inside vs. what’s buried, and therefore protected, on the outside.