Finally, we are moving forward on one of our big summer projects, and this week was all about demo. When we bought BHH, we knew that repairing the sleeping porch was going to be a necessary project, but it was quite far down on the list. Finally, this DIY job bubbled up to the top of our to-do list, and I sat down to nail out the details and get to work.
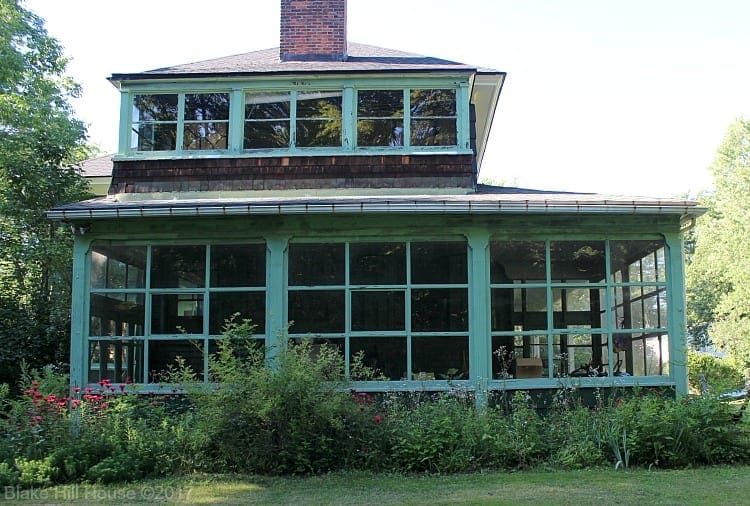
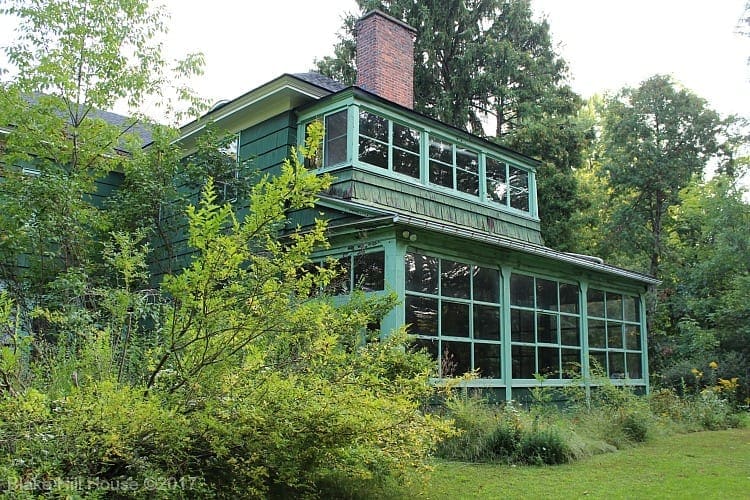
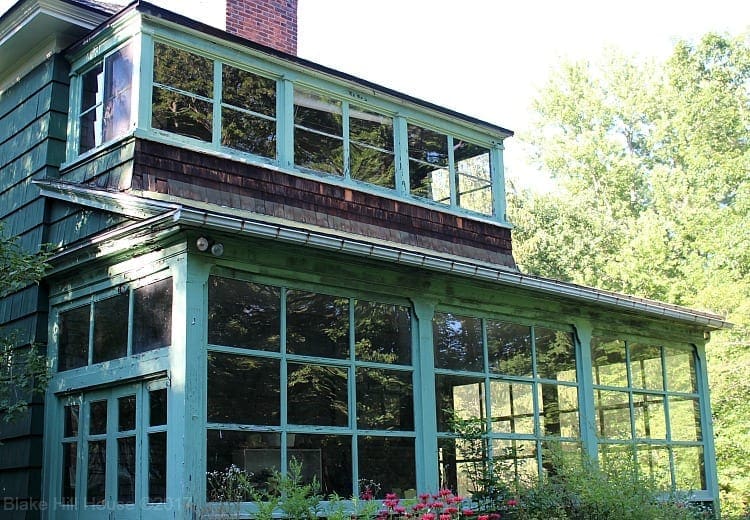
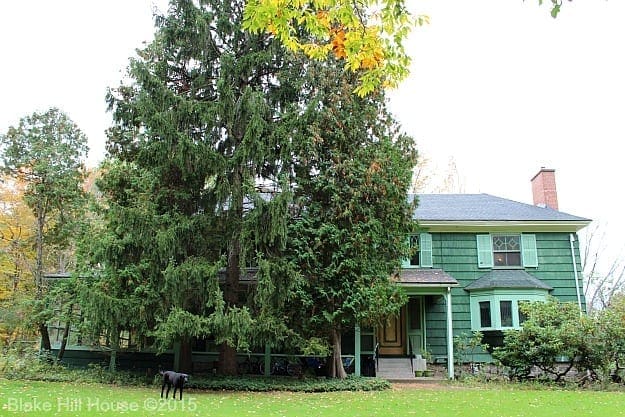
For reference, the sleeping porch is located directly off the master bedroom, right above ye ol’ Model-T garage. Decidedly, this is a project of form vs. function since currently, this little porch is uninhabitable on the inside too.
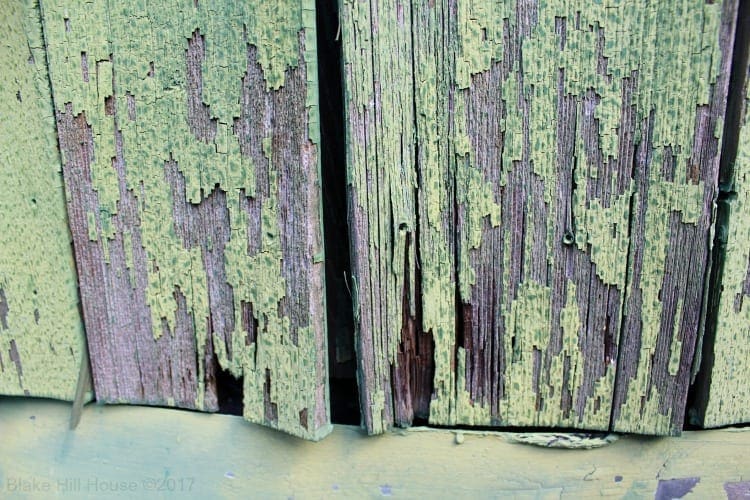
The sleeping porch, located on the south side of the house, takes a beating from the sun. The cedar shingles were curled, faded and worn.
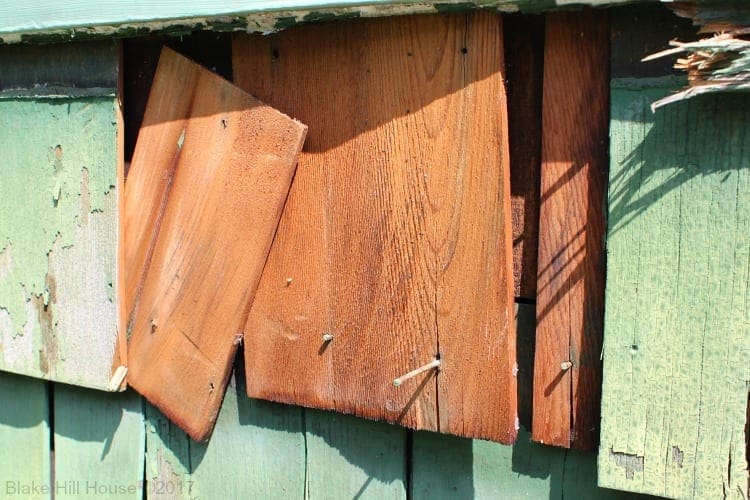
Before the painters come in August, we needed to address the issue of the shingles that were well beyond the salvageable stage. They were in such disrepair that I was able to pull most of them off by hand. I used a regular hammer to pull out the nails that were left behind.
A Surprise
Right away, I uncovered a surprise. Well, I suppose it is a surprise for all of you. I had an inkling about what I might find under that rotten mess.
Do you see what I see?
I am not talking about the unpainted shingles directly below the green ones, although they are certainly a beautiful sight.
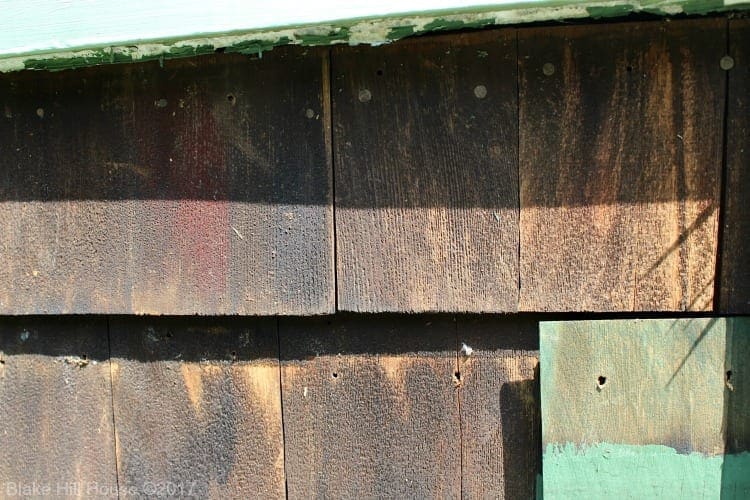
I found THIS (Yes, I am shouting):
Those are original cedar shake shingles! (Say that five times fast.)
I kept telling myself; There‘s no way the original shingles will be in good condition on this entire structure. No way.
Wrong.
So wrong.
So very wrong.
I honestly had to sit down for a few minutes and let this new information soak in. I made a silly ten-second video for my Instagram Story. (Side note: This weird face was the best of the three options that YouTube gave me for a thumbnail for this video. I think I have a face made for podcasting.)
Problems
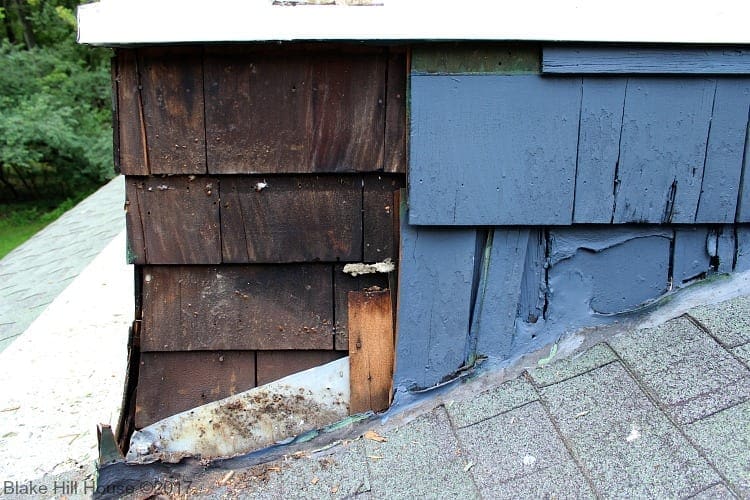
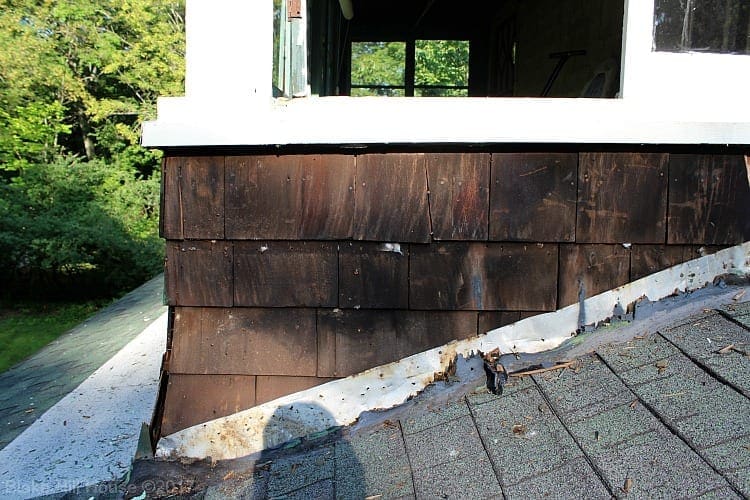
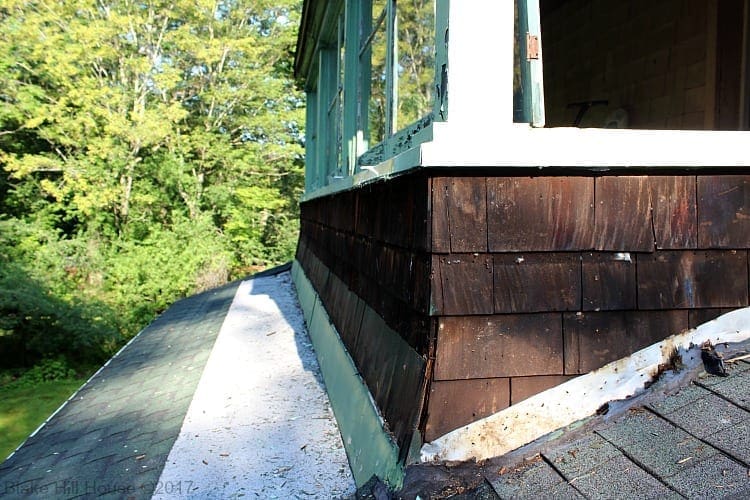
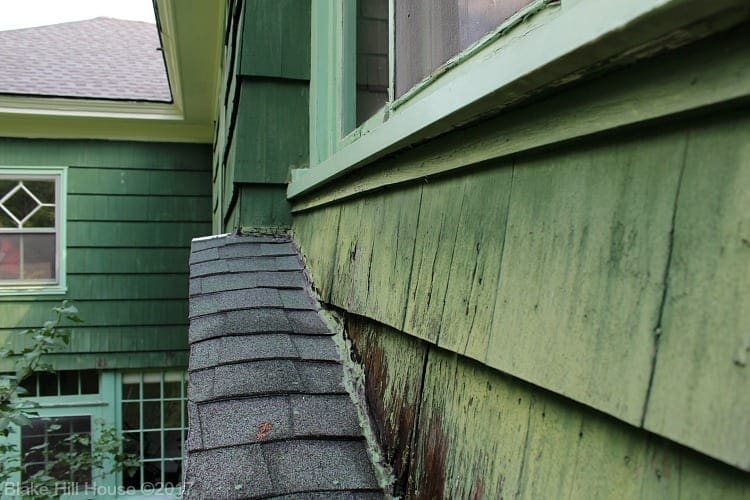
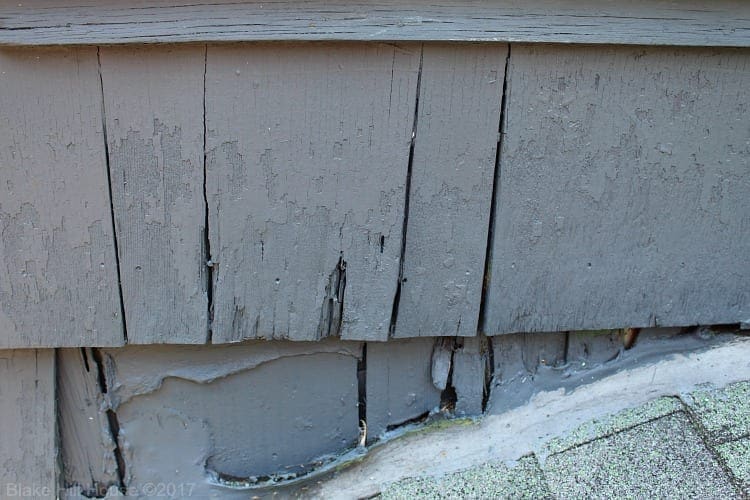
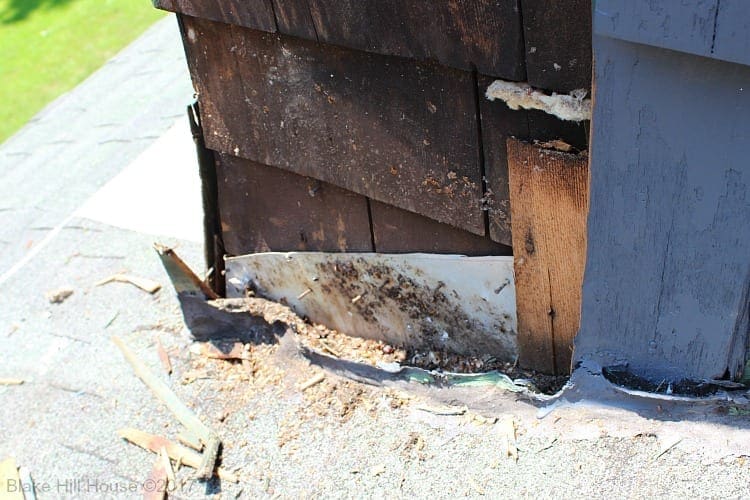
Despite the good fortune of finding near-perfect cedar siding, I did uncover some problems. The most serious issues were on the sides of the sleeping porch, and they were related to drainage…again.
Last year, at our request, the painters put good over bad on the visible side of the sleeping porch.
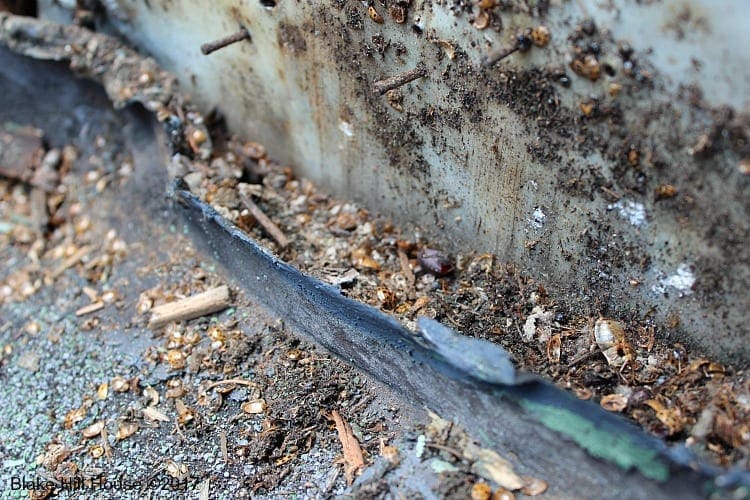
Way back when the workers put the second and third layers of shingles on the house, they placed them flush with the roof line. Then, they spread a thick layer of roof tar into the crevice. Over the years, there was probably a leak or two, and someone slathered more roof tar in that area each time. It was a temporary solution to a permanent problem.
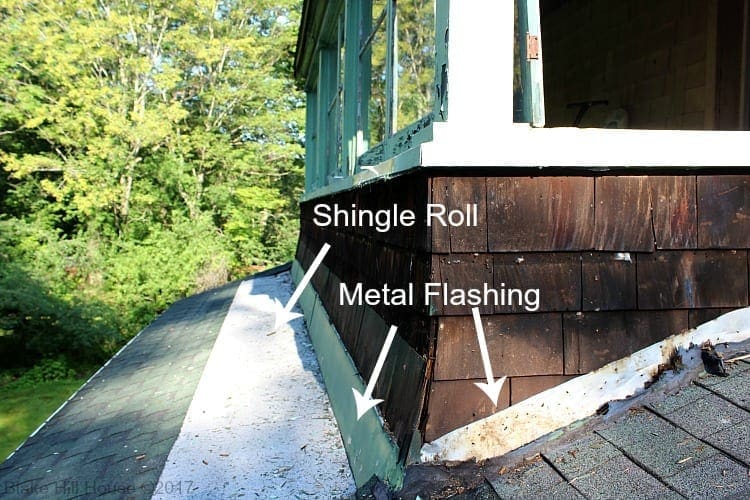
At some point, the front of the porch must have leaked because there is a weird flashing situation going on there, and the roof feels a little spongy under the shingle roll. (shingle paper? What is that product called that comes in a roll and has the surface of shingles?)
The good news is that there is flashing. I was afraid there was none. The first layer of shingles was dry. However, the second was very spongy and damp.
I found evidence of a lot of previous insect activity.
Fortunately, the layer of original shingles was bone dry.
The Dilemma
So, now I was at a crossroads. As a person with the heart of a preservationist, I wanted to expose the original shingles and call it a day. I had to take a few days to think things through. I pictured the entire house completely stripped down to the original shingles. A superficial peek under the rest of the shingles on the house showed evidence of more than one layer.
Beautiful, right?
I ruminated on a few key points:
- The square footage of shingles on the sleeping porch is less than 120 square feet.
- We are 2/3 of the way through painting the entire exterior of BHH. It has cost a small fortune, spread out over three years.
- There is no guarantee that the rest of the house has perfect original shingles underneath the existing newer ones.
- The current newer shingles are in near-perfect condition.
- An old house project, no matter how innocuous it seems, always leads to a bigger and more costly situation.
- Again, the square footage of shingles on the sleeping porch is less than 120 square feet.
The Inevitable Conclusion
No matter how I try to justify it, uncovering the entire house is just not going to happen. I have to move forward with my original plan of putting new shingles on the sleeping porch. However, to soothe myself, I have decided to simply cover the original shingles up again rather than remove them. The wall behind them is dry and stable. Everything is structurally sound. Someday, when the whole house needs to be repainted, or the current shingles start to fail, we can revisit the idea of bringing BHH back to its original state. Until then, the sleeping porch exterior will be protected with Hardie Siding Shingles, and I will smile to myself each time I think about what is underneath them.
Next week, I will talk about why we chose Hardie Siding Shingles and the ordering process. Also, I will address how we intend to work with the current flashing situation and roof issues. Even with this hiccup, It feels so good to move forward with one of the “biggies” on our summer to-do list.


16 Comments
Chad
Keeping it “preservation ready” sounds like a good plan. Though I wouldn’t have minded seeing that little bit of the original shingles unpainted and mismatched with the house anyway.
I definitely agree about leaving the existing shingles at least for the next 20 years. And I can’t imagine that you’d pull down the 50-year-old shingles and find the 100-year-old shingles perfectly intact. Why would anyone bother putting up the second layer if they were? Even if the wider lap was more stylish at the time.
Stacy
Thank you for the support. Even knowing this is the right thing to do, I still feel a little conflicted. In addition to all of the reasons that you mentioned, I would have to pay a hefty disposal fee for the current shingles. They likely contain hazardous materials. The shingles I removed do not.
Chad
I found the article I ripped the term “preservation ready” from by the way. A good read about restoring Victorian houses in a high poverty area: http://hiddencityphila.org/2014/07/in-parkside-habitat-for-humanity-takes-on-new-challenge-preservation/
Stacy
Thank you for this article.
Ame Jo Hughes
Love those kinds of surprises! I think your plan is solid and responsible. But I also agree with Chad – I think given the internal conflict (Oh, I’d have to seriously restrain myself from stripping the entire house down to the original shingles. It would be an epic struggle with myself), I’d leave the original shingles on the sleeping porch and just do the necessary restorations to them. I think it lools cool with those unpainted shingles just on that porch, above the old antique garage. It’s like an exterior accent.
The ladybug thing is… slightly disturbing :-p But, hey, they eat other bugs, so that’s great, right?
Chad
I have aluminum capping over original trim around my (shitty) front windows. I couldn’t stop myself from peeking behind it so now for years I’ve had aluminum capping bent out of the way to show what’s under it in one corner. And I did it in the most visible location possible. The whole front of the house looks horrible so this didn’t make it any worse in my opinion.
Stacy
We have this too! It is on all the window sills of the sleeping porch and the sunroom on the first floor. Next year, I might continue work on the sleeping porch and redo the windows and sills.
Chad
Oh also, that patch on your roof is asphalt roll roofing. It’s the middle option price and quality wise out of the 3 most popular materials for flat roofs. Which reminds me, I need to silver coat my (rubber) roof.
Stacy
Thank you! 🙂
Devyn
Your discovery brings up the question… Does this extra layer of shingles make our house look fat?
I think it’s great that you found original shingles, but I completely understand why you wouldn’t want follow through with the desire to tear away all of the siding on the house to reveal what is underneath. Sometimes we have to make the hard decision to leave well enough alone, at least for the time being. On the upside, this extra layer is protecting the one underneath for future generations to enjoy.
I have always held on to a basic line of thought when it comes to making changes to my home. Whenever possible, I want to do things that can be undone by a future owner (or myself) rather than permanently alter, tear out and/or replace. I suspect you have a similar viewpoint.
Stacy
Devyn, you hit the nail on the head for me. (construction pun intended) I want the next owner to be able to come in here and undo most of everything we have done if complete preservation is the goal. In many ways, that is what Dorothy and the previous owners did before us.
Julia at Home on 129 Acres
I may have missed it, but why do you have to cover up the original shingles? Is it the flashing issue? Can you not just paint them to match the rest of the house and carry on?
Stacy
There is definitely a flashing issue that needs to be addressed since there is a full 4-5 inch gap between where the old shingles were and the original shingles are now. However, the main reason that I am covering them up vs. painting them is that they are original and unpainted. If I wanted to bring the house back to its original state at some point, I would have to then strip the shingle of the blue paint. Also, cedar shake does not hold paint well at all.
Vanessa
Just my two cents here . . . what makes you think they are original? Couldn’t they have been added at some point after the house was originally sided?
Stacy
Good question. A few of things lead me to believe that they are original or near-original.
1. The size and shape of the shingles I uncovered match the size and shape of the shingles on the wall inside of the garage area and the sleeping porch. Both rooms are mostly untouched, but the shingles are painted with very old oil paint. The wall in the garage was once an exterior wall because instead of a garage, there was a wraparound porch.
2. Old photos show the house covered in shingles that are the same shape/size.
3. The current shingles on the majority of the house are from late 1950 to early 1960. Underneath that, there are two layers. That means there were about eighty years for the two layers of shingles underneath. To me, that’s a reasonable timeframe for the shingles to be replaced twice.
Vanessa
Ok, well you have really studied it so are probably right. It’s just that they are in SUCH good shape, I wondered that they go all the way back to the time the house was built. Thanks for the response!