Going into the One Room Challenge, whether or not we would need a new floor was the wild card. During those first days, I honestly thought we might salvage the old floor even though it looked awful. Optimism is my superpower.
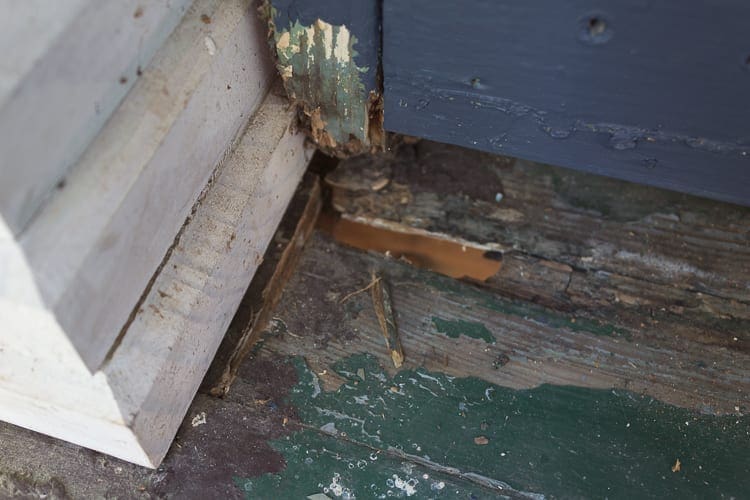
It didn’t take long to realize that starting over was the right thing to do. There were actual holes underneath many of the trim pieces.
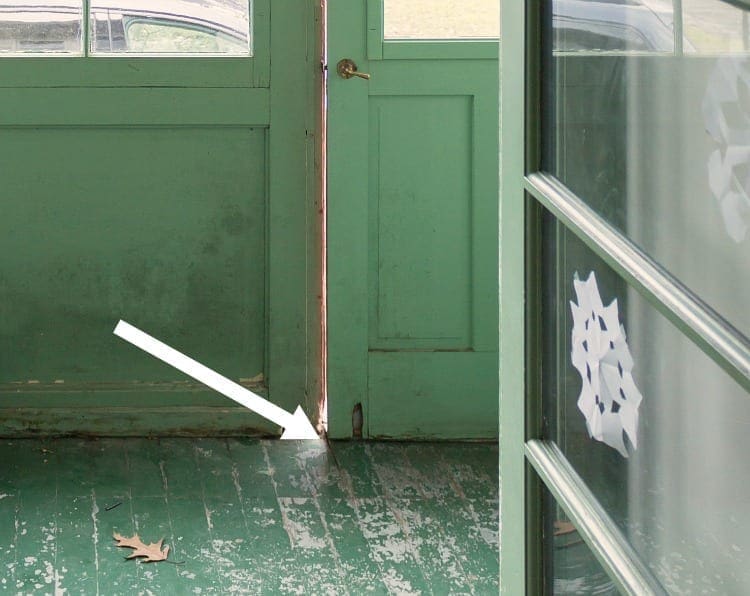
Also, a failing patch, approximately 12 inches by 24 inches, caused a deep groove on either side of the door. Moisture was seeping through that vulnerability and slowly rotting the floor underneath, a fact we would discover later during demo and rebuilding.
Before I jump into the process, I want to talk about a couple of things. First, Andy did most of the demo, and I am so grateful for that. While many sections of the floor disintegrated in our hands as we worked, the rest of the floorboards were solid and installed to stand the test of time. My hand and leg injury, as well as the fact that I have T-rex arms, made the demo of this porch a painful and arduous process. Andy saved the day and knocked it out in no time.
The next thing I want to talk about is the wood we chose for our project.
Why Cumaru?
Many of you know that I carefully consider each choice we make when it comes to making changes or updates here at BHH. Choosing Cumaru may be the most controversial choice we have made to date. Cumuru, another name for Brazilian Teak, is an exotic hardwood.
Availability
I became acquainted with Cumaru via two friends who built beautiful decks out of it. Previously, when I had sourced more authentic-to-BHH tongue-and-groove, I had no luck finding a small amount of proper 3/4″ without having it milled with a hefty set-up fee. Our porch is only 70 square feet. I was told that the turnaround time for such a small order might be as long as 8-12 weeks. The turnaround time for Cumaru, if I picked it up myself, was three days. Three days!
In-stock tongue-and-groove fell victim to that pesky nominal vs. actual size difference. (When you follow that link, scroll down to read the section titled Hardwood Lumber Dimensions.) Cumaru was sold in strict nominal sizes.
Durability
The street side front porch takes a beating every winter. Very little sunlight hits the porch, so it stays damp and wet for long periods of time. That is the perfect scenario for decay. One of the most appealing properties of Cumaru is that it is naturally resistant to rot and insects.
Another issue I had with typical modern hardwood was the maintenance. I wanted no part of staining, sealing, or painting on a regular basis. Cumaru needs to be oiled every year, but that is it–no additional maintenance required.
Harvesting Exotic Hardwoods Kills the Rainforests.
Did I ever tell you about that time Andy worked for Greenpeace in Australia? Primarily, he was a canvasser, which sounds like a truly awful job. What he describes most often, aside from that drunken morning trying to keep a kayak upright in Sidney Harbour during a shipping industry protest, is passionate people firmly attached to their purpose–no wiggle room with that bunch. When I suggested that we use Cumaru, of course, his first reaction was, “Oh, hell no!” Truthfully, I was conflicted too.
It turns out that my friend Dale is also a proponent of ethical wood harvesting and forest sustainability. He directed me to the Environmental Concerns page at Advantage Lumber where he bought his decking supplies and where I would be buying ours. According to Advantage Lumber, all of their hardwoods are harvested from specially designated and heavily regulated forests. Also, all of their lumber is FSC-certified. Now, I wasn’t born yesterday, or the day before that, and I am not so naive that I believe everything is sunshine and roses because I read it on their website. However, life is all about choices and making the best ones based on the knowledge you have at the time. Our project needs, in conjunction with Advantage Lumber’s assurance of sustainable practices, sealed the deal.
One more note about our choice: If this project had been a large wrap-around porch or similar, we would have firmly adhered to historical authenticity. We would have sucked up the maintenance requirements to preserve the overall look of BHH. The street side front porch is small and enclosed. Therefore, the Cumaru does not detract from the overall appearance.
The Process
Whew! Now that we got that out of the way, I can describe the installation.
Cutting Cumaru
I cut each board to length with a regular chop saw. To make the smoothest cut, I used a brand new 80-tooth carbide blade. After each cut, I sealed the ends with Ipe Seal which is kind of like a fast-drying wax. It prevents moisture from seeping in, and it is a required step for Cumaru.
Installing Cumaru
The first board took the longest because I had to make sure that it was square front-to-back and side-to-side so the floorboards would not end up on a diagonal. Please excuse this basic drawing that I offer as an explanation.
Once I got started, the process for each board was the same:
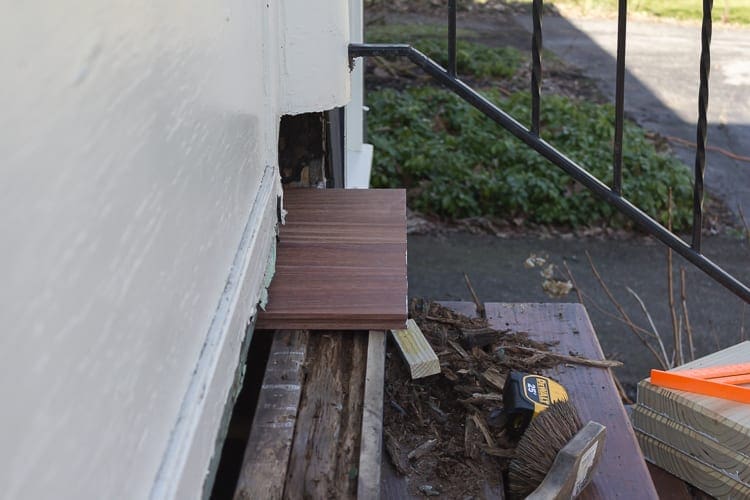
1. Place the board carefully, lining it up on the outer edge:
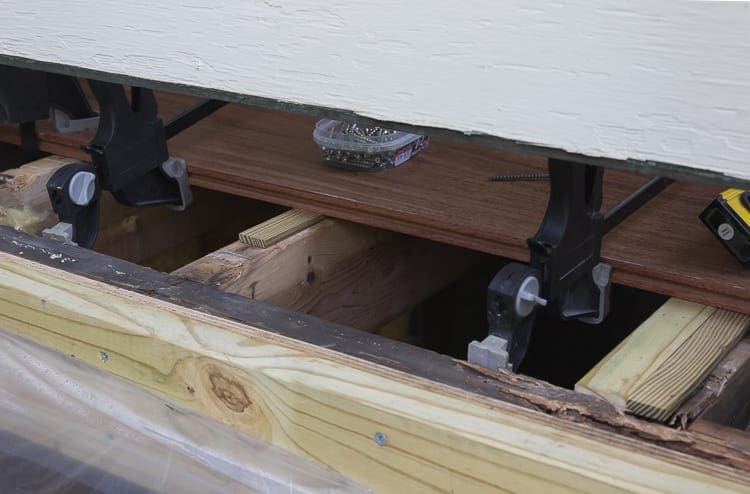
2. Tap it into place with a block, and clamp it together for a tight fit.
3. Shim as necessary:
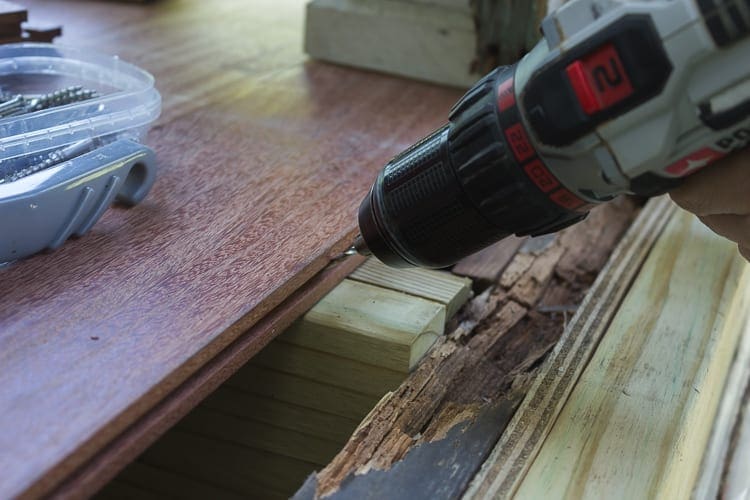
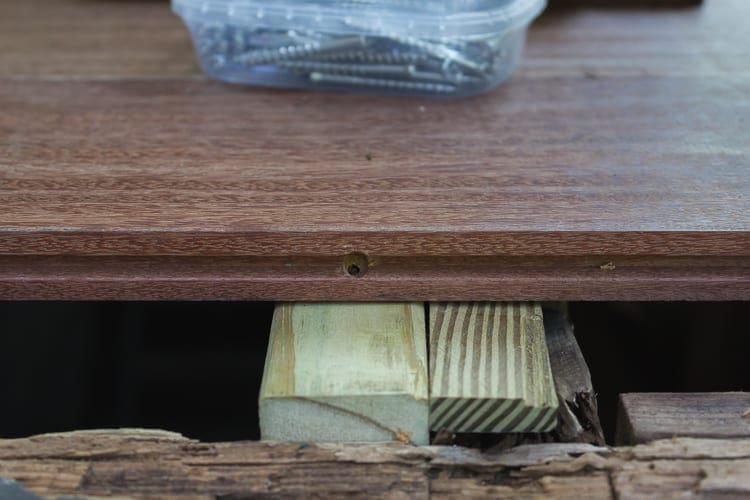
4. Pre-drill each hole (This step is required, or the wood will split):
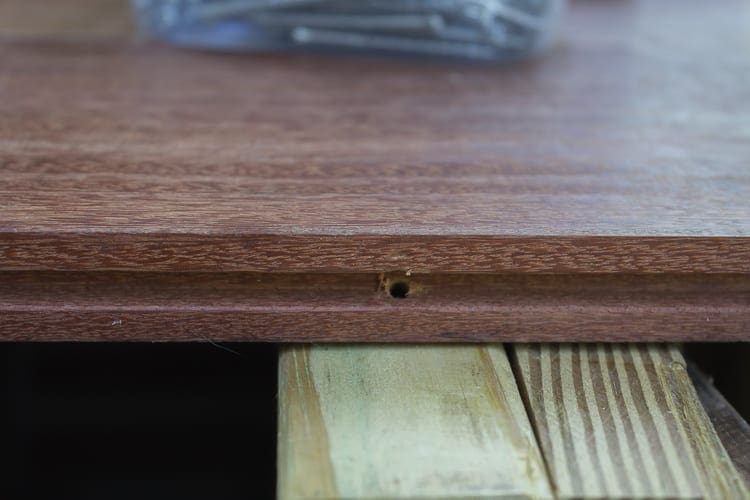
5. Pre-drill just a little with a larger bit to countersink the screw. The trim-head screws are not self-sinking:
Without this step, I had trouble getting the screws into the wood far enough to allow the tongue of the next board to rest firmly in the groove.
Important Note: The larger drill bit must not go all the way through the groove or the entire screw, including the head, will pass through the Cumaru, and it will not secure the floorboard to the joist.
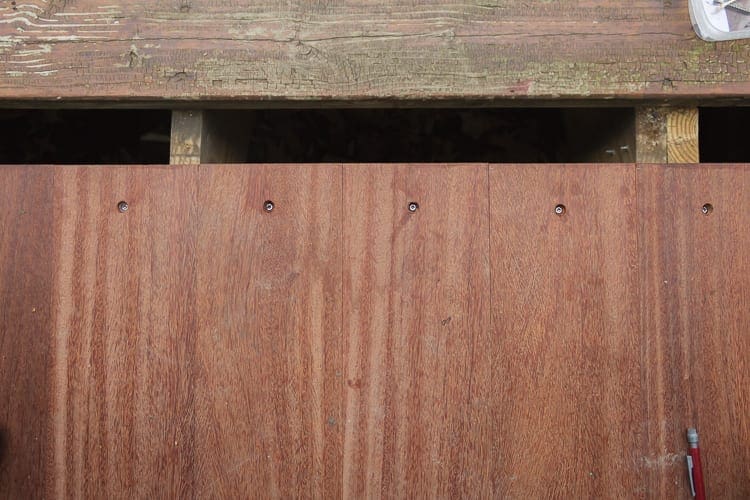
6. Secure the floorboard to each joist with a trim-head screw:
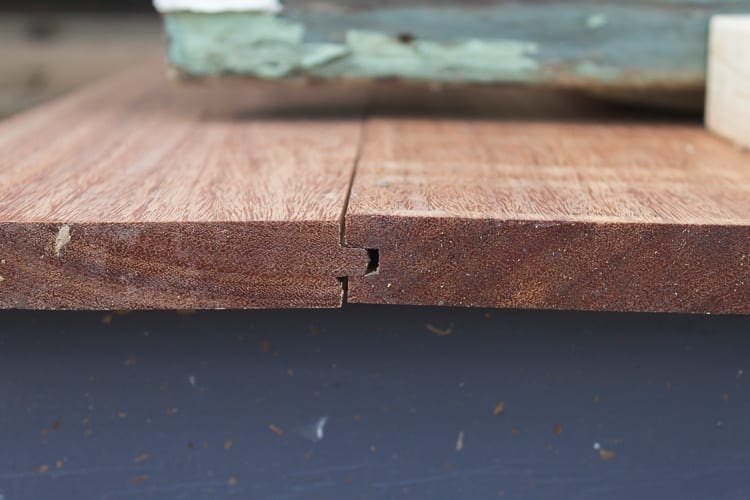
I made a few errors along the way. I was stumped for a time because I could not get the tongue-and-groove on these two boards to fit properly no matter what I tried.
Then, I realized that I had installed the board on the left upside-down, and I only needed to flip it over to solve the problem. I lost a couple of days of work while I tried to figure out that dilemma. It seems so simple now!
Every board needed a little something extra each time. This was not difficult work, but I flexed every creative problem-solving muscle that I possess.
Dale finished up the last boards with me, and I swore I took photos, but I guess not. To get the Cumaru to slip under the pillar bases, it took muscle (Dale), and some firm whacks with a hammer on a block, not directly onto the floorboard (Me).
For the last board, we ripped down the grooved edge with Dale’s table saw, so the exposed side was solid wood. I coated the new, raw edge with Ipe Seal. Then, I tapped it into place, which fell slightly under the pillar base.
Finishing the Edges
This article contains affiliate links.
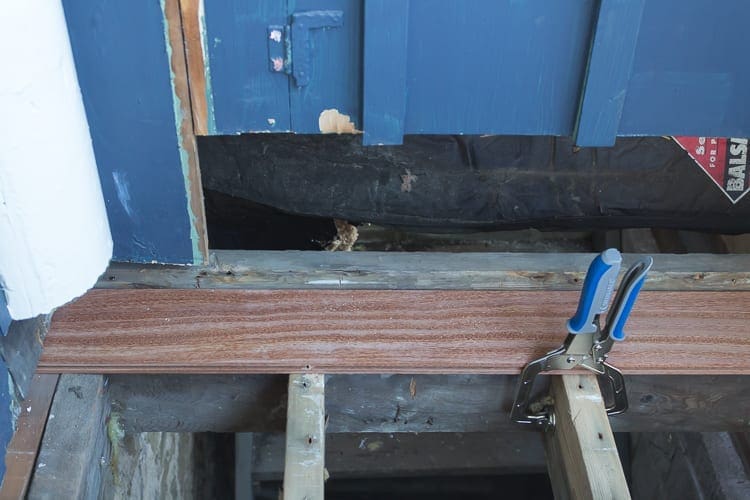
The last step was to clamp the outside edges to the new oak stair riser and screw them into place.
Clamping made a huge difference. In the photo below, you can see what some sections looked like before they were clamped. (on the right)
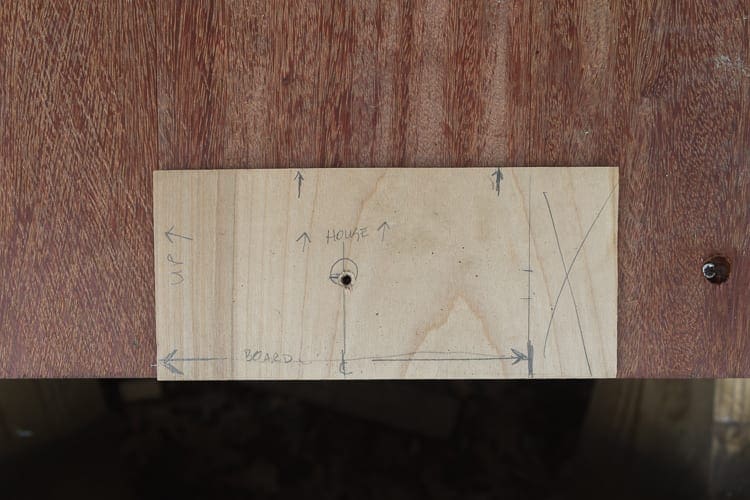
On a previous work day, Dale drew a template for me. I used it to mark each hole.
To drill the holes, I used a special counter-sinking bit that came from Advantage Lumber.
Note: That bit was too large to fit in a groove. That is why I used the two separate drill bits that I described earlier.
Then, I lubricated each screw with a bit of wax. Dale advised me that ski (or was it surfboard?) wax worked the best, but I did not have any on hand. Instead, I used Musher’s Secret which protects the pads of dogs’ paws during the winter. What can I say? I’m resourceful. Millie was not using it anyway.
Tip: Lubricating the screws makes it much easier to drive them into hardwood.
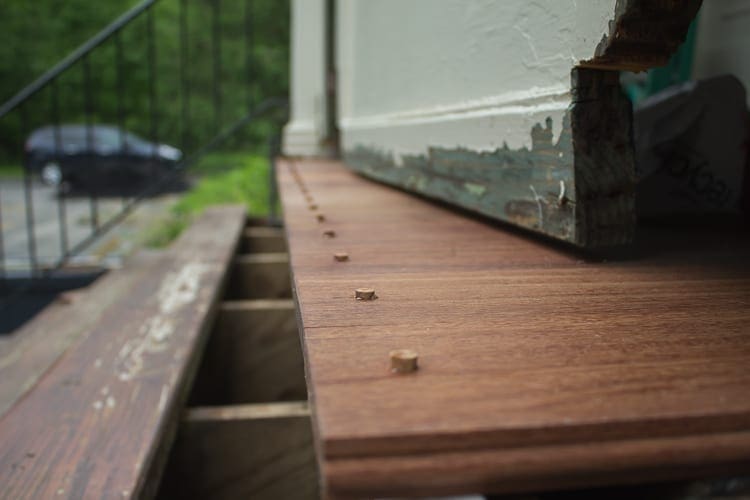
Finally, I filled the holes with small cumaru plugs that I purchased from Advantage Lumber. I placed a couple of drops of Gorilla Glue (original formula) into each hole and gently tapped the plugs in with a hammer.
After the glue dried, I sawed off the tops of the plugs and the dried glue with an oscillating tool.
Once I have completed all of the finish work, I will sand the entire floor until it is smooth and oil it with specially-designed Ipe Oil. I will show off the finished floor during the big reveal.
Through the magic of the internet, it may look like I finished this floor in one afternoon, but if you have been reading here for awhile, you know that the full install took weeks due to the condition of the porch underneath. In fact, that is why we missed the One Room Challenge deadline by a mile.
During the past few weeks, I told Dale more than once that installing the new floor was not complicated. It was just time-consuming and detail-oriented. He agreed. I am not anxious to do this kind of job again anytime soon. Fortunately, the new floor will last more than one lifetime, so I will be long dead when this new floor fails. For now, I sleep well at night knowing that the porch is in longer in danger of collapsing.
I am clawing my way to the finish line. Are you still with me?












20 Comments
Kalila
I’ve learned so much from this post. The wood you chose to use seems like a great product. We just purchased a ton of stain for our back deck and I’m not looking forward to staining it. I can’t wait to see the big reveal!
Stacy
Thank you, Kalila. I hope your deck staining project goes smoothly. 🙂
I am glad that this post was educational. It feels like I could write a second post entirely about troubleshooting. 😀
Charisma
Still with you, still impressed. I don’t count missing the deadline as a fail, because we’re all learning with you. And whatever “small” job I’ve undertaken always sprouts three more because you uncover problems as you go. Respect for the cumaru research too.
Stacy
Yay! Thanks for sticking with me, Charisma. 🙂 Small jobs on an old house are the equivalent of “free puppies.” They always cost more and cause a lot more headaches than expected. 🙂
Emily R
How did you support the walls and roof of the porch while you had no floor????
Stacy
I am glad you asked! I took pictures, but I forgot to cover this crucial topic. The right side of the porch was fully supported by the small room and window built over the basement stairs. No additional bracing was required.
The left side was the tricky one. We left it intact, installing new floorboards over towards that side until we could not go any farther.
We braced the left side corner by wedging lengths of pressure treated wood directly under the roof and screwing them into the walls. I added a third side, creating a triangle, by attaching those supports to another piece of pressure treated wood on the ground. I screwed in an additional short piece higher up, horizontally to keep the long brace from bowing. It was very sturdy. Here are a few pictures:
Please let me know if you have any additional questions. 🙂
Chad
Oh, it’s too bad you were too far away to borrow my dad’s 30 ton railroad jack. We had to replace 8 columns on their screen porch about 10 years ago and it was the best thing ever.
Holly
Optimism IS your superpower!
Stacy
🙂
SH
Still with you. Still captivated by this project and all its twists and turns. Stiiiiiill waiting for the amazing reveal! (Might that charming red mailbox be sporting any gold? Hinges? Handle?)
Stacy
You are waiting so patiently. Thank you!
The red mailbox does have a special little detail. 🙂
Jenny
It sounds like you really did your due diligence on the cumaru vs. other flooring types. The porch looks great and I can’t wait to see the wrap-up. 🙂
carolbaby
One of the reasons I adore your blog is that you take the time to do the job properly and don’t smash through to meet an arbitrary deadline!
I’m really looking forward to seeing the finished product!
Stacy
Thank you, carolbaby. That means a lot to me. I would love to work faster, but I can only do what I can do. 🙂
Ragnar
Your porch is already done but if you’ve got any future porch/deck projects and feel bad about tropical hardwoods here’s something to look into: black locust is native to the US and probably one of the most rot-resistant timbers in the world. So if you can find that you could put your mind at ease, especially since it’s even considered an invasive species in some places so cutting it down could even be considered a good deed 🙂
Stacy
Thank you so much for this comment. I am filing this information away for possible use in the future. Black locust wood sounds like a very viable option, and I am all about good deeds too. 🙂
I apologize for the time it took to write this reply. I am typically right on top of comments. However, during June, I ended up with a ton of work and family commitments that kept me away from the blog.
Miss-Apple37
Congrats Stacy!! You’ve done an amazing job day after day after day!! You’ll be so proud when this porch is 100% done!! And thank you so much for taking time to show step by step how you’re working, this is so useful!
Stacy
Thank you so much. It is comments like these that keep me going when I’m pretty burned out. 🙂
CraftsmanJunky
I love that wood. It seriously makes me consider relaxing my historical accuracy standards.
Stacy
It was a difficult decision to go with Cumaru, but we don’t regret it for this particular project.