So, week five, huh? Although I am not panicking, no time for that, I wish for a few more hours in each day. I apologize for the brevity of today’s post, but perhaps that’s for the best since there are over 200 guest participants + 20 featured designers. That is a lot of reading for those of you following along with the challenge.

Week five was all about the porch floor. During the three weeks that I was waiting for the snow to get the heck out of New York, I debated about whether or not to patch up the rough spots and repaint or replace the floor altogether. If you follow me on Instagram, you’ll know that ship has sailed.
I am about halfway done with installing the brand new Cumaru flooring, but before I show those pictures, I have a few scary pillar base photos to share.
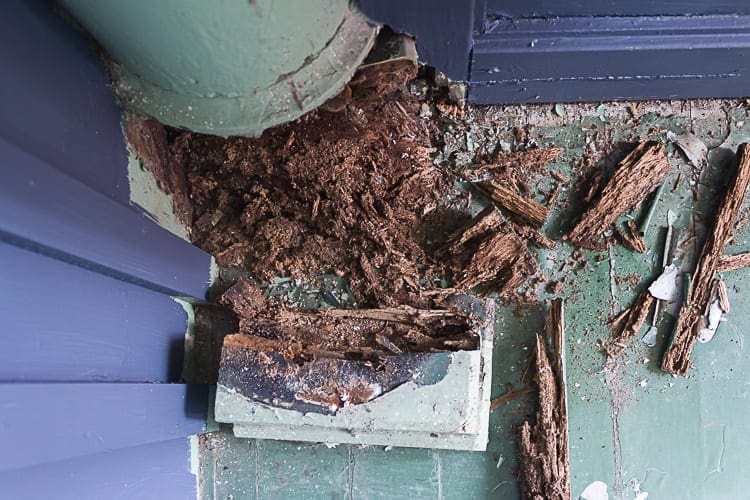
About three years ago, I replaced the pillar base on the left side of the porch, and I patched the area around it. At that time, the right side pillar base appeared to be in OK shape. It seemed intact and protected by a metal covering. Covering wood in metal was a common old-timey fix for slowing down wood rot.
Since then, the tongue-and-groove underneath the pillar continued to rot away.
All that sponginess made demo a breeze. The whole base and the floor underneath pretty much just crumbled in my hands when I attacked it from the inside.
Thankfully, the stairwell structure on the side of the house provided a solid foundation for the porch roof as that base was crumbling away through the years.

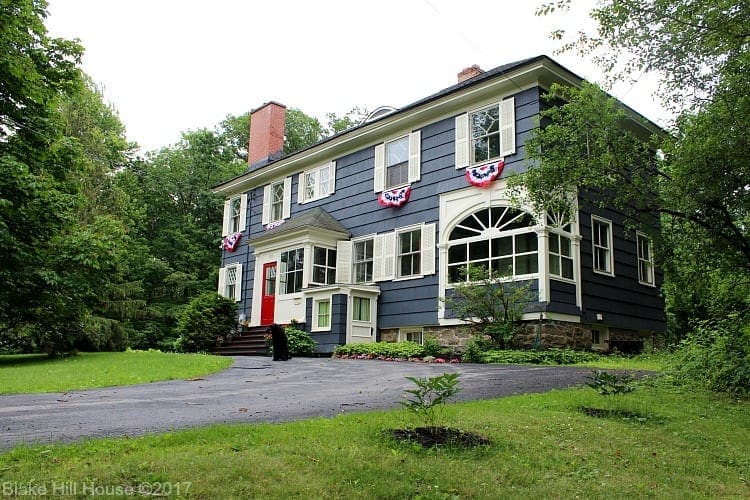
This photo was taken last summer. That little building on the right with the green shades is the stairwell cover/structure.
I have a month’s worth of content about this street side front porch, including how I built the new pillar base and how to install tongue-and-groove flooring. I promise to post more info and tutorials in the coming weeks. This challenge has been such a whirlwind. These weekly recaps cannot do it justice. I think I need to start vlogging. That seems like a more efficient way to explain a lot of this restoration and renovation work.
For now, I will leave you with a photo of the floor in-progress and the rest of the to-do list.
I love this floor so very much. I cannot wait until it is 100% finished, and I can just stand back and stare at it.
ORC To-do List
- Install the floor to the doorway.
- Repair the base frame of the doorway.
- Demo the rest of the floor past the door.
- Install the rest of the floor
- Finish work around the pillar bases
- Touch-up painting
- Repair the board and batten wall
- Scrape the paint off the windows
- Clean and dust everything
- Figure out whether or not we have a transom window – Sadly, I cannot do this before next week’s reveal. We will have to look forward to the outcome later.
- Make it pretty. (Ack! I probably should have given this part a whole lot more thought. I can’t even with this right now.)
Ok, forget what I said about not panicking. Seeing it all in writing is precisely why I hate to-do lists.
Until next time, please visit the One Room Challenge website to view the projects from the featured designers and the other guest participants like us. Good luck to everyone who is participating in this challenge. Week six will be nuts, but let’s push through so we can get enjoy the good stuff next week.
Stay Up-to-Date with BHH News
I invite you to subscribe to our blog below so you’ll never miss an update. Scroll up to the top righthand side of the page to add us to your favorite reader or get updates via e-mail. If you are an Instagram or Facebook user, be sure to follow us there as well. I will be posting real-time updates and utilizing Instagram stories on a daily basis. It is a great way to keep in touch between weekly blog posts.
Start at the beginning:
week 1 | week 2 | week 3 | week 4 | week 5 | week 6

PS: Here are the links to our past ORC projects:
Breakfast Nook | Library | Dining Room | Kitchen Pantry


10 Comments
SH
Whoa, quite a to-do list you have there. But I admire your philosophy for BHH–the best way to do it right. I’m excited for next week’s reveal, and for the final final reveal TBD. 😀
Stacy
Thanks. I need to keep my blinders on and only focus on what’s right in front of me. 🙂 If I look at the bigger picture, it is too overwhelming.
Robin
What is the little door/shelf in the wall for? I assume it’s not a milk box because it’s on the same wall as the stairwell cover?
The floors look great.
Stacy
I’m not sure about that little shelf. I think milk delivery was a thing of the past when it was built. My guess is that it was just put there because space was available. We don’t use it for anything. 🙂
Andi
I’m so glad you decided to keep going on your project! Thank goodness it sounds like it’s starting to warm up.I can’t wait for next week, but also to see how it all turns out once you are done!
Stacy
Thank you, Andi! 🙂
Chad
Well, you’ve definitely gotten it to a better place than it was in before you started!
And did the weather go all in with warming up for you, too? I’m suddenly worrying about it getting hot before I finish the brick and having to constantly take my air conditioner in and out of the window.
Stacy
It has been nuts, Chad! We are having the same immediate warm-up that you are experiencing.
Emy
Your floors are looking amazing! It’s going to look amazing.
My to do list keeps growing as I realize what’s missing. Eek!!
Stacy
Thank you, Emy. Looking forward to reading your reveal post today!