I am excited. We are taking the time to do a project that will have a greater wow factor. I enjoy almost all DIY, but I admit that it is nice to work on something that will result in a dramatic cosmetic change to BHH. Before and after photos of a big project are so satisfying.
This house has six bedrooms. Six! When we were house hunting, Andy and I were drawn to that right away. We loved the idea of each kid having their own bedroom. In our house in California, the two oldest boys shared a room, and S. shared a room with his little sister. In our rental here in NY, the two middle boys shared, and the oldest and youngest had their own rooms. We are not against siblings sharing rooms. We are a big, happy family. However, we did put 5+ bedrooms on our housing wishlist, and that wish came true with BHH.
Of the six bedrooms, only four of them were usable. At one time, there was a great roof leak on one side of the house, and two of the bedrooms suffered wall, ceiling and window damage. Dorothy had the roof repaired, thank goodness, but the rooms remained in their damaged state.
Since moving in, the two oldest boys have been bunking in together. We decided to move fixing the bedrooms to the top of the to-do list because we want the kids to feel settled as quickly as possible. Currently they are sleeping on mattresses on the floor, and most of their belongings are still in boxes. Our 11-year-old is temporarily in the smallest bedroom in the house which will eventually become the guest bedroom. We are doing some of the boys’ room projects in tandem, but we are mainly focusing on one room at a time since the repairs are pretty time-consuming. All of the photos today are from the room that our 13-year-old will move into when it is ready.
Before:
The plaster walls were full of cracks. Some of the cracks even ran from floor to ceiling. We discussed wallpaper, but we decided to repair the cracks and paint instead. I realized, too late, that this photo does not do a very good job of showing the severity of the plaster cracks.

At some time in the history of BHH, the ceiling had been “updated” with ceiling tiles. Part of the ceiling had been removed due to the roof leak. We opted not to fix the ceiling plaster cracks and paint because the tedious process of repair did not feel like a good use of our time. Instead, we will be replacing the tiles with beadboard. (Based on some simple research, we do not believe that our tiles are made from asbestos. Therefore, no special safety precautions were taken. We would have tested more extensively if any sanding or sawing was required for removal.)

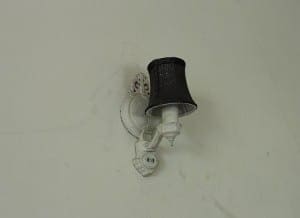
This cute little sconce stays. We will rehab it as much as possible. It is the only light in the room, and the room contains only one outlet. In the future, we will likely have an electrician add more outlets and perhaps an overhead light with a switch.
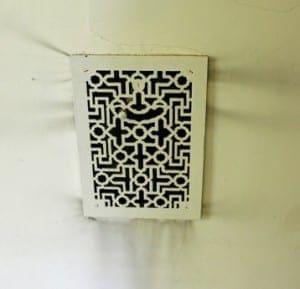
This vent cover also stays. The entire house is full of wonderful little details like this functional, yet beautiful cover.
We kept this dirty rug in place to protect the floors. We will remove it when the room is complete:

Before the demolition, I tested for lead paint using these neat little swabs.

Testing was just a formality because we were certain that the room contained lead paint. The swab revealed a positive test.

I tested all over the room, and only the woodwork tested positive for lead. The walls did not. We approached the demo project by following the protocol outlined in What Homeowners Need to Know About Removing Lead-based Paint, which is from the state of NY.
With the exception of the windows, all of the woodwork is in good condition. We will cover all of the good paint with a high-quality oil-based primer before we repaint. The windows did require some special care. The paint was peeling and cracked. We banished the children from the room, and I donned the safety gear.

I want a pair of these shapeless coveralls in every color of the rainbow. They are so fancy. The kids loved this outfit. One of them has already requested to wear something similar for Halloween. Andy, who is not as interested in safety, opted to remove the dropped ceiling, which included rusty nails, while wearing shorts, a t-shirt and socks. I was pleased that he chose to use a ladder instead of an overturned bucket.
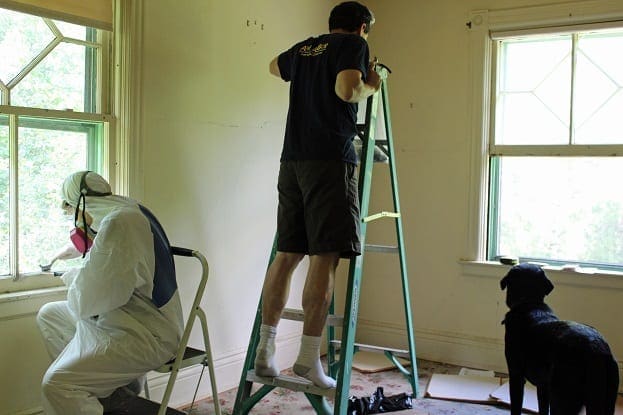
(Disclaimer: That picture was staged. We removed the dog from the room for her health and safety. I also left because I almost got hit with ceiling tiles that were falling off the ceiling. We did our projects separately. Andy and the dog were not exposed to lead, and I did not risk getting a concussion.)
After some preliminary wet scraping of the window paint, I switched to using a non-flammable paint stripper called Paint Strip NEXT. It worked very well. Even though it is labeled as non-toxic and low odor, I still recommend opening the windows for ventilation. Anything that peels paint off of a surface just can’t be good for brain cells.

By the end of day 1, Andy finished removing the ceiling and the lead paint had been removed as needed.

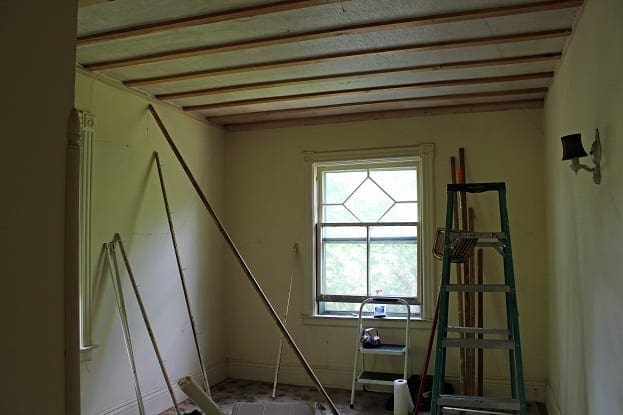
Stay tuned for Day 2 when we will reveal the Frankenwall.



1 Comment
Jan Elizabeth
Such beautiful windows! It’s going to be so nice.