(Teen Bedroom: Day 1, Teen Bedroom: Day 2, Teen Bedroom: Day 3, Teen Bedroom: Day 4)
The rough ceiling work was a very social project with our friends Don and Courtney, but doing the finish work and paint prep was a solo endeavor. Considering how little experience all of us had hanging a ceiling, it looked pretty decent in its rough state. The gaps in the unfinished ceiling looked like this:


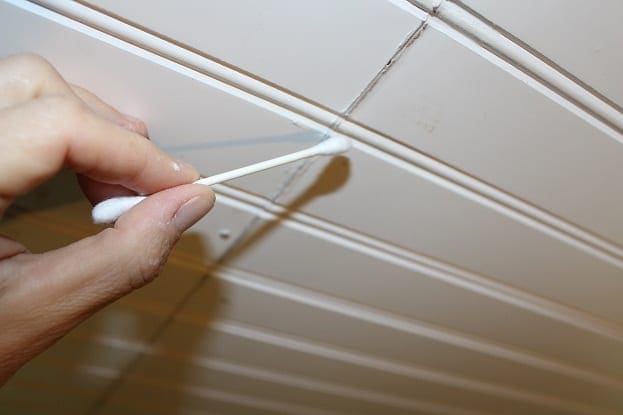
Initially, I thought I might use patch and a putty knife to cover the seams, but when I tried that, it became too difficult to work around the v-grooves in the panel. I would have been forced to do more finish work after my finish work. Nobody has time for that. I switched to paintable caulk. First, I lightly sanded each seam. Next, I spread the caulk down the entire length of the seam, and I used my dampened finger to smooth it and work it into the seam. The caulk actually filled the v-grooves, so I dampened a q-tip to smooth and remove the excess caulk:

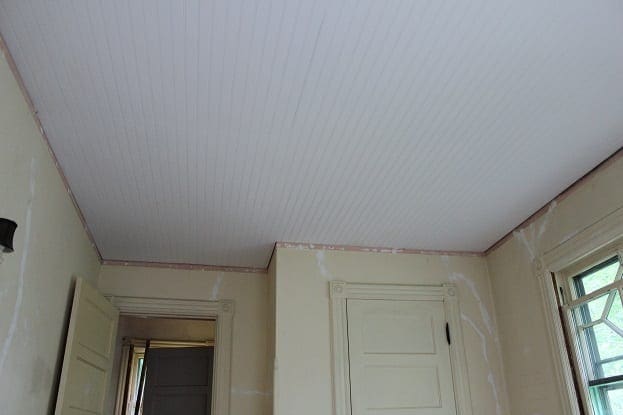
One I finished filling all of the seams and the caulk had dried, I painted the ceiling in Behr flat finish ceiling paint tinted Decorator White. Before painting, the primed panels had a low gloss sheen. Every single mistake was noticeable. Flat finish paint is non-reflective, so it is excellent for hiding imperfections. The finished ceiling looks like this:


Right now, it is the nicest thing in the room, so we see every imperfection. Once the entire room is painted, I do not think those issues will even be noticed. Overall, I am very happy with the way this ceiling looks. It is a huge improvement over the damaged tile and the rough panel work.
With the ceiling done, it was time to do a thorough clean of everything in the room in preparation for priming and painting. After using a shop vacuum on the entire room, I used two products to clean:

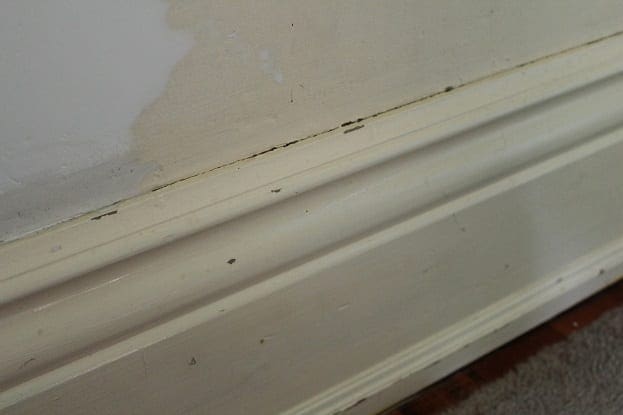
The tsp substitute worked wonders on the walls and woodwork. The baseboards had a lot of mildew spots on them from the previous dampness and water damage. The tsp substitute took them right off.


I used the D-lead paint surface cleaner on all of the window woodwork since that is where I removed paint that tested positive for lead. The D-lead cleaner had a very strong odor. I was glad that the windows were open. As I cleaned with both products, I wore rubber gloves.
Now the room is finally ready for primer and paint. We better get cracking on that too, because our son will be home from California next week! I cannot wait to give him a big hug.


11 Comments
Debbie Chmielowiec
I have become an addict! Love your updates and holy cow that is a ton of work! You might be the most patient person I know to do this. Congrats on such a beautiful “after ceiling”
stacyfg@gmail.com
Thanks for being an addict. 🙂 I mostly enjoy the work, but I wish it went by faster. I’m getting a little worried because we have to duplicate this process on the bedroom that is right beside it. I had hoped to have both bedrooms done this month, but there is no way that is happening. It certainly is satisfying when the work is done.
Diana
Looking forward for more!
I love how you’re showing the real pace of the work.
stacyfg@gmail.com
Like anyone, I wish I could move faster, but it will get done all in good time. 🙂 Thank you for reading.
Brandi morris
You might consider painting the ceiling the same color as the walls-what you guys looks great! Sometimes if you have start white ceilings it might be big contrast to the walls if you paint ceiling and walls the same color it is a great transition on the eyes/we build homes and properties for a living and our personal home we have done that-can’t wait to see the rest!
Brandi
stacyfg@gmail.com
Thanks for your input Brandi. My son has chosen a pretty dark green for his walls, and I think painting the ceiling the same color will make the room feel too much like a little box. The windows/trim, baseboards, and moulding around the ceiling will all be a glossy white. I am going to remember your suggestion when we paint our common spaces which will be a more muted tone, I am sure.
Stef
I was a little worried and overwhelmed for you at the thought of filling all those seams until I saw the panned out shot. It looks great!
stacyfg@gmail.com
Thanks! My neck was sore for a couple of days from looking up. 🙂
Deena Williams
I love the way the ceiling turned out!! We have an old house too with the ceiling tiles like you removed. I can’t stand them and now I know what I can do about it!! Thanks!! I really enjoy reading about all your adventures! Keep up the good work!!
stacyfg@gmail.com
Thanks for reading Deena. 🙂 Good luck with your ceiling too! If your house is like BHH, it has several ceilings with that tile. I remember my Grandma and Grandpa in Missouri actually putting that tile on their ceiling in the late 1970’s. Now, we are all tearing it out. 🙂
Jan Elizabeth
The ceiling looks great! And so much nicer than the tile.