Finally, I have something to report. Week six is where you start to understand how I operate. I accomplish tiny tasks for five weeks and then rush to finish during the last three. Most of the time, this crush of work is self-induced. This time, I was waiting for tradespeople, but that is totally understandable. The good ones are busy and worth the wait. Regardless, the plumber finished modifying the toilet waste pipe this week, and I hit the ground running on the waterproofing.
If this is your first time here, I invite you to catch up on the details of this project here: week 1 | week 2 | week 3 | week 4 | week 5

Unfortunately, I do not have time for a thorough update today because this blog post is due, and I still have a full day’s work to finish before the tiler arrives tomorrow. So, I’ll make it quick and plan to offer a more thorough description of the project next week.
Waterproofing the Walls

Luckily, Andy came home last weekend, mixed a bunch of mortar, and played go-fer while I waterproofed the walls. He also played the part of the designated “tall person” when I was unable to reach spots.
Before he arrived home, I had hung new drywall in the shower stall to make the walls as square and straight as possible. Of course, that’s a tall order in a crooked old house.

We embedded the Kerdi membrane directly in the drywall with thinset.


It was a very messy two-person job that we were trying to do in a one-person bathroom. When Andy and I tried to work together, we just ended up twisting around each other, narrowly avoiding dropping globs of thinset in each other’s hair.

Creating the Custom Shower Pan & Curb
After Andy went back to Utah, I was on my own for the custom shower pan and curb. First, I used a combo of a ready-made Schluter-Kerdi pan cut to size. Then, I filled in the gaps with dry pack mortar.
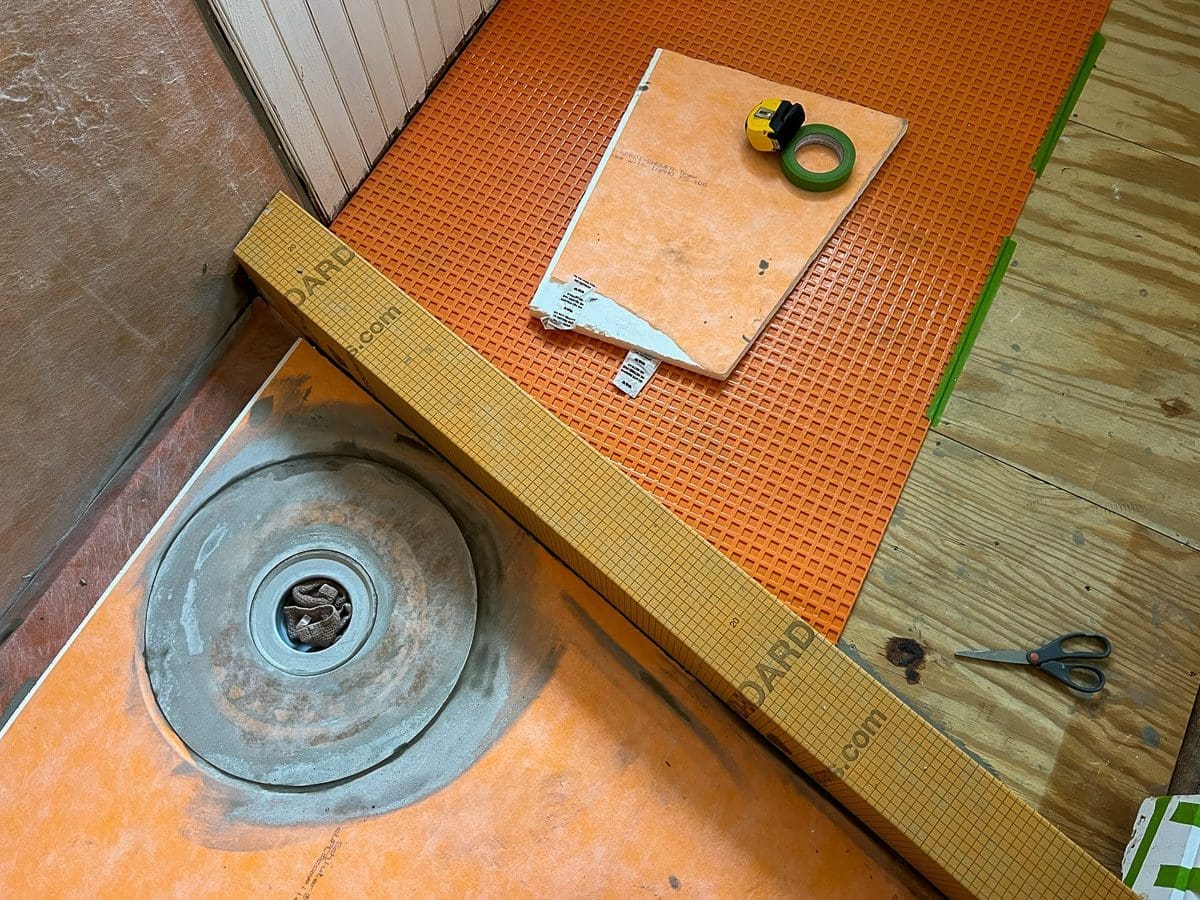
I forgot to take a photo, but the dry pack fit in the two channels you see below.

Waterproofing the Floor
I documented much of the waterproofing process on Instagram, but unfortunately, I didn’t take enough photos for the blog. Andy was the official photographer for the weekend that we worked together.
Anyway, the orange grid is called ditra. Like the Kerdi membrane, it is embedded into the substrate. In this case, the substrate is plywood. The floor tile will go directly on top of it.

I should have some tile photos to share next week, which feels very exciting. Until then, please visit the One Room Challenge blog to see the progress everyone else has made during week six.
Thank you for being here.


