Work on the enormous front door continues. The front door suffered damage during last year’s rough winter. The freeze and thaw of our ice dams followed this path from the roof:

The water seeped through the top of the door and split the seam at the tongue-and-groove joint.

Aside from being unsightly, it was also unsafe. My daughter, who is nine, could no longer open the front door. It was too heavy, and it got stuck on the threshold. Andy and I worried that in an emergency, if that was the only available exit, she would not be able to get out of the house. In order to keep everyone safe, we knew we needed to fix the door right away.
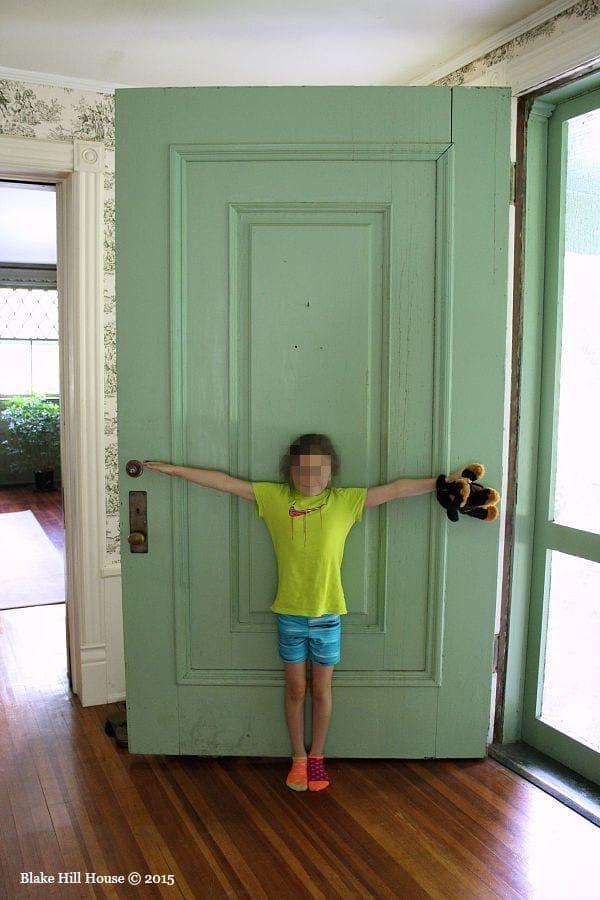
As I considered how to tackle this project, I knew that I wanted to try to avoid removing the door from its hinges in order to lay it flat. That method was the best course of action. However, the door weighs several hundred pounds, and in our experience, what comes off of BHH rarely goes back the way it was. Keeping that limitation in mind, I created the following plan:
- Remove paint and varnish down to bare wood* – exterior only at this time
- Glue the seam and pull it together with ratcheting straps and a clamp
- Sand and adjust the threshold as necessary*
- Stain and protect the door
*Warning! In an older home, be aware of lead paint abatement protocol. You can use these easy swabs to find out if the paint in your home is lead-based before you begin your project. At Blake Hill House, we follow the protocol and assume most of the underlying paint is lead-based.
Using a variety of methods including a heat gun on the low setting, natural paint stripper, a chemical stripper, and gentle wet sanding, all of the layers of paint and varnish were removed except for in the details. I am still struggling with that.

My best guess is that there was one layer of latex-based paint, two layers of oil-based paint and stain, and one layer of varnish. What a mess! What will be a surprise to no one is that one of the layers of paint was a dark green.
Even though I was still working on the details in the wood trim, it was a good time to try to repair the split. I used the vacuum to remove any loose particles that would keep the glue from holding. Then, I squeezed glue into the top of the split, letting gravity move it all the way down to the bottom, coating both sides.

We used Titebond III Ultimate which is approved for exterior use. 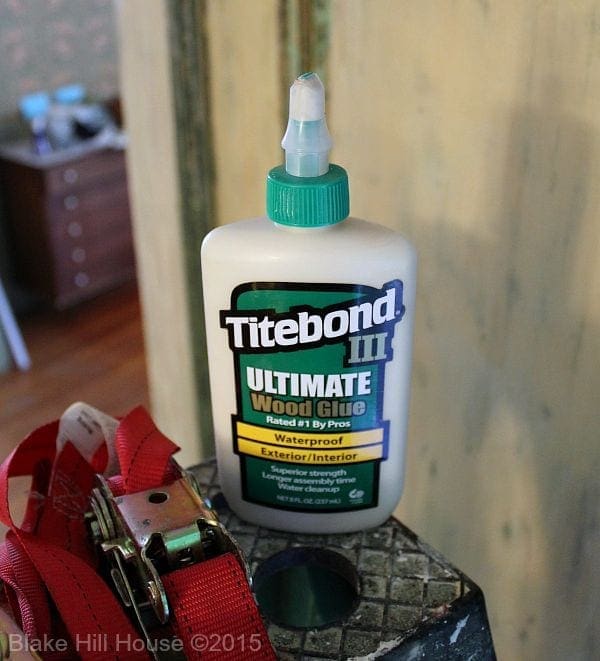
I used far more glue than necessary, and I knew that a lot of it would come squishing out of the seam once we pulled it together. However, I wanted to make sure that all of the surfaces were coated so they would adhere properly.
The next step was to use our ratcheting straps to pull it together. We used scrap wood under the straps at the compression points, so we would not damage the door once we really put on the pressure. We also clamped the top to press the tongue-and-groove joint back together. Again, we used protective scrap wood under the clamp. The entire setup looked like this:
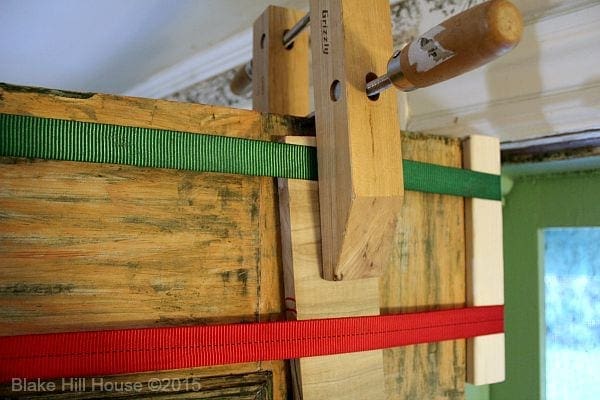
and this:
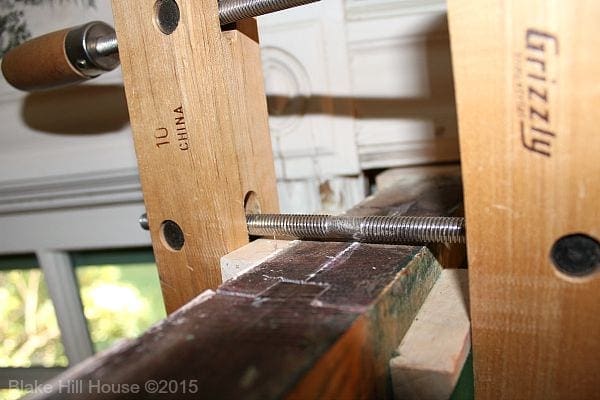
And it worked!

The split came back together beautifully. As the glue oozed out, we wiped off the excess with a damp cloth. Although the glue instructions said it would be ready in 30 minutes, we left it clamped for the rest of the day. I am hopeful this is a permanent fix, but this door is no ordinary door. It is 4.5 feet wide and over 8 feet tall! Despite its bulk, the door is only outfitted with a single standard-sized doorknob. Opening such a heavy door, with a single doorknob puts a lot of pressure on both the door and the knob. I would like to switch the doorknob for a sturdier handle someday, but I assume all the holes would have to be reconfigured in order to accommodate a new one. That idea remains in my head, and I will let my brain sort out the details.
That is where I stop for today. Now that the glue has cured, the door fits so much better in the the threshold. I will continue to work on removing the paint and finish from the crevices of the trim, and we will plane and sand the threshold to improve the fit of the door even more. The weather is turning this week, but since the door is protected by a covered porch, I will still be able to stain and protect the bare wood before the fall is over.

This post contains affiliate links.


11 Comments
Julie
This door is amazing!!!
Stacy
Thank you, Julie. 🙂
Arielle
That door is wild. So cool but I can imagine it’s a beast to deal with. Also got a bit distracted by the AMAZING wallpaper in your hallway! Love it.
Stacy
It really is, Arielle. Thank you for the compliment on the wallpaper. It is one of my favorite things about this house. It was already here when we moved in. It is definitely staying.
carolbaby
Wow! Such an ingenious idea to repair in situ!
Gorgeous door, I look forward to the end result.
Stacy
Thank you, Carol. I can’t wait to be done. Ha!
Jamie
I don’t think I’d realized just how massive your front door is. That adorable picture of your daughter with her arms outstretched really helps to put the size in perspective.
I can completely understand what you mean when you say “what comes off BHH rarely goes back the way it was.” Too true. We took down a few doors to strip them, and now that they’re rehung, they don’t close properly…we have no clue what we did wrong!!
Stacy
Ugh! That’s so frustrating about your doors. I wish I had a suggestion for you, but I would probably be just as stumped. We have a bunch of doors to work on because the paint on the hinges drives me crazy. 🙂 However, I don’t want to deal with the aftermath of removing the doors and then rehanging them.
Jamie
Yes! We have so many painted decorative hinges and we can’t figure out why someone wanted to cover all those pretty details! We thought the doors would close better after removing 15 layers of paint from the hinges (not to mention the paint on the doors). Not so!
Stacy
I agree! Our hinges are beautiful…and painted over. Who knew that doors would be one of the biggest DIY frustrations? I sure didn’t.
Stacy
I love House of Antique Hardware. I’m willing to shell out the bucks in certain situations. 🙂
I cannot believe there are only two hinges either, and I have no idea how long the screws are. They are probably not long enough. I’ll keep you posted!