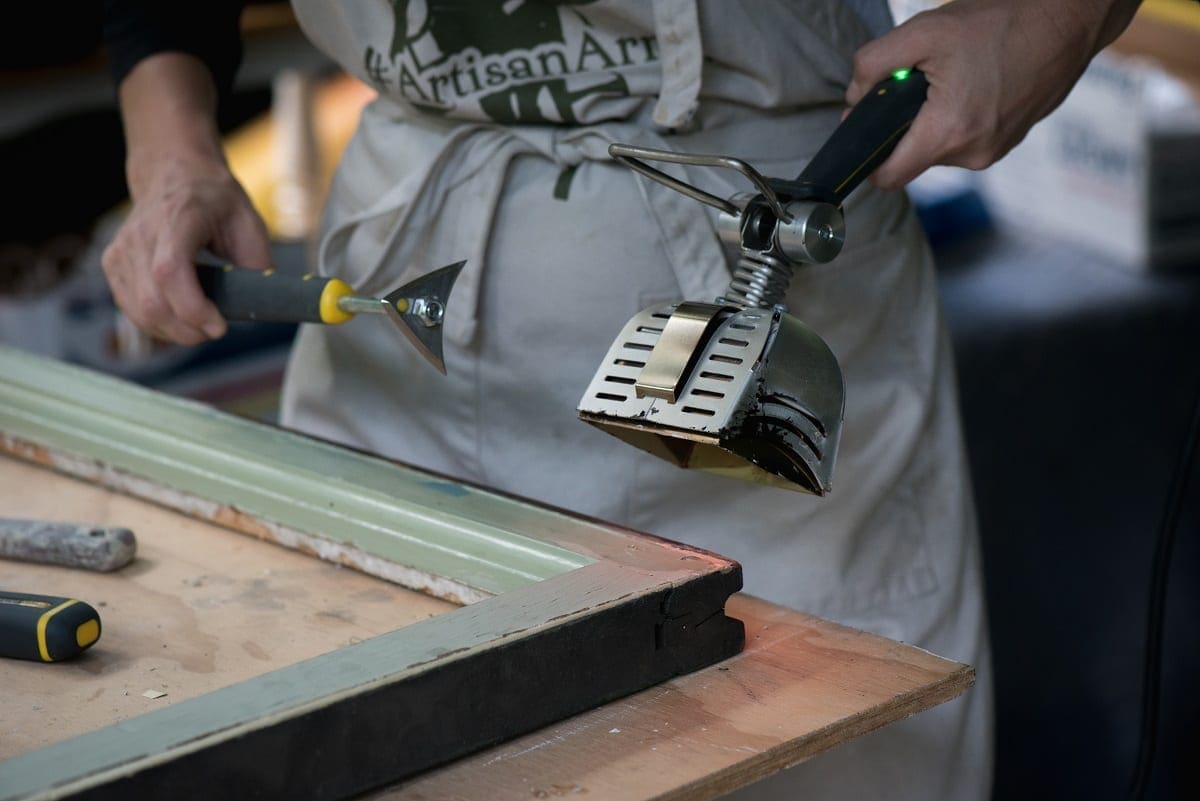
Last week, I announced that 2020 would be The Year of the Window here at BHH. It sounds like I may have some company. So many of us have window work to do. In preparation for the coming year, I’m getting my tools and the workshop in order. Today, I have a little progress update. Also, I promised to share my favorite tools for window restoration. It’s quite a comprehensive list.

Progress in the Workshop
So far, the only thing I have done is a massive clean-up in the basement workroom. Over the summer, we got lazy about putting things away. Fortunately, since we already have a basic organizational system in place, most of the job was merely putting things away. With that task complete, the room is open and ready for window work.
Currently, the contents of my outdoor workshop are in the foyer. Once I bring everything down to the basement, I will separate the window restoration tools by category. Grouping them that way should keep the work flowing smoothly. Next week, I will share my set-up.
This post contains affiliate links.

My Favorite Window Restoration Tools
Since I’ve been working on original windows for about four years, I definitely have a few favorite tools for window restoration. Although the list is long, most of the items on it are quite inexpensive. To make the list easy to reference, I have separated it by category. Although some tools apply to several categories, I am listing them where you will use them first. Multi-use tools are the best.
Tools For Sash Removal or to Open a Window That is Painted Shut
This group of tools is almost the same, whether you are working on a sticky lower sash or removing the window altogether.
- Utility Knife – to break a paint seal or to clean off the top of a flat head screw that has been painted. (Painted flat head screws are the bane of my existence!) It is also useful for cutting sash ropes.
- Hammer
- Hive tool – A hive tool is not just for beekeeping. I use one to gently pry off window stop, as a wedge between sashes that are painted shut, and also as a scraper. They are cheap, so I suggest buying several for different uses. Special thanks to Steve from Wood Window Makeover for this idea.
- Putty Knives – I use a putty knife for the same purpose as the hive tool. They work well in delicate situations. The thin, flexible metal penetrates very tight crevices.
- Ratcheting Screwdriver set – I prefer a ratcheting screwdriver with interchangeable bits because my dainty lady hands need plenty of torque. Also, if I need a flat head screwdriver, I’ll find a Phillip’s head and vice versa. A set with interchangeable bits keeps them both in one place. I use this to remove my window stop. However, some window stop is nailed in instead of screwed.
- Window Zipper – This handy little saw works well for breaking a painted seal between sashes, window stop, and parting bead.
- Heavy-Duty Sash Saw – Scott, from The Craftsman Blog, designed this tool, and he sells in his store. The Sash Saw is nice for super thick paint, and it has replaceable blades. However, it is a really aggressive tool, and I have to use both hands to control the sawing motion. The super sharp teeth can gnaw through window stop or sash if you’re not careful. I recommend adding it to your toolbox after you’ve developed hand good control with a window zipper + utility knife combo.
- Sheet metal pliers sometimes called duck-billed pliers – These are perfect for removing parting bead.
- Work Gloves in the proper size – I recommend having two pairs–one for dirty jobs like handling cast-iron sash weights and a separate pair for cutting glass and removing or installing sashes and rope.
- P100 Respirator – The P100 respirator will protect you from inhaling lead dust.
Tools For Removing Paint
After using tons of chemical and soy-based strippers and cheap tools, I upgraded everything last summer. If your project consists of just a few windows, spending a lot of money may not be worth it to you. However, if you have a big restoration project like I do, invest in better tools. You’ll save so much time and money in the long run. If you choose to use paint stripper instead, I recommend Peel Away, followed by the neutralizer for painted wood. If you intend to leave the wood natural, Smart Strip is the way to go.
- Vacuum Proscraper – Last summer, this little tool changed my life. It attaches to a shop vac, and the super-sharp blade removes the paint off flat surfaces in a flash. If you are working around lead paint, be sure to attach it to a HEPA shop vac. A regular shop vac will circulate lead dust back into your work area. There have been some supply issues with the Vacuum Proscraper. Here is a link to a very similar product: Oneida Scraper. This scraper also attaches to a HEPA vac. Tip: I attach my Proscraper to a vacuum attachment adapter with duct tape. Then, it is easy to remove or attach the scraper when necessary.
- A HEPA shop vac – It is crucial that you protect yourself and your loved ones from lead paint dust. A regular, inexpensive shop vac will not do that. I own both the DeWalt and Vacmaster Pro. The Vacmaster is cheaper but frequently out of stock.
- Various scrapers – We all have our favorites, and I’ve used a variety. I still use the putty knives linked above, but I also love the pull scrapers in the more expensive Window Tools Kit from Eco-Strip.
- An old crockpot – A crockpot is super handy for removing paint from hardware and screws. It won’t be food-safe again, so I recommend scouring the local thrift shop for a used one.
- Sandpaper – There’s nothing fancy about sandpaper. I use it on tiny bits of leftover paint if a scraper is too aggressive.
- Detail Sanding Sticks – I use these handy little sticks all the time. Recently, I used them when I wallpapered the hall. For windows, they are perfect for sanding detailed stiles.
- Speedheater™ Cobra – This is the smaller infrared paint remover from Eco-Strip. The Cobra works faster than a regular heat gun, and it does not turn the melted paint into a chewing gum consistency that sticks to everything. It expensive, but it’s worth every penny. Use the coupon code truetales1 for $20 off your Eco-Strip order.
- Small Steamer for softening putty or removing paint.
- Large wallpaper steamer for softening paint or removing paint in a steam box
- Smart Strip wood stripper – For wood that will be stained, shellacked, or varnished
- Peel-Away wood stripper – For wood that will be painted
Tools for Glass
- Push points (modern) Triangle (classic) – To hold the glass in place
- Triangle point driver tool (super handy!)
- Sarco Type-M putty (quart or gallon) – Hand’s down, this putty is my favorite. It tools nicely and skins-over quickly in a workshop setting. The Sarco Dual Glaze is recommended for outdoor use such as repairing a window sash that is staying in place. Both are excellent.
- Powdered drywall joint compound or whiting (calcium carbonate) powder – to clean the glass and help the putty skin-over faster. The powdered drywall joint compound is way cheaper.
- A large, soft paintbrush – for the drywall dust or whiting
- Putty knife or window tool – to spread the glazing putty – I prefer the window tool.
- Glass cutter – This pistol grip glass cutter is my favorite. It offers better control for beginners.
- A-Maz – water spot remover and glass cleaner
- Sparkle glass cleaner for stains and spots
Tools For Painting
- Pinless Moisture Meter – Is it time to paint yet? Find out the moisture reading of bare wood. Wood that is too damp won’t hold paint.

Tools for Installation
Once you have restored a window, you’ll find that you already have most of the tools you need. There are a just few extras to tuck in your toolkit.
- Weatherstripping – Currently, I am still developing my preference for weather stripping for our harsh winter weather climate. I have used spring bronze with success, but I’m playing around with some other options too. I suspect that the solution for our situation will end up being a hybrid of spring bronze and perhaps pile or silicone. Spring bronze pretty much never wears out. Buy a little or buy a lot. Once you install it, you won’t need to replace it for about 100 years. That’s not hyperbole.
- Nails for the spring bronze
- Tin snips for the spring bronze
- Thermal Leak Detector – This is a helpful tool to help you identify where you might have air leaking and, therefore, where weatherstripping could be helpful. The Black + Decker detector that I have seems to be discontinued. However, here is another one with a comparable price point.
- Nail setters – You won’t need these if your window stops use screws or if you shoot the nails in with a nailer and compressor or a battery-operated one. (The compressor I linked comes with a brad nailer, so no need to buy each separately. I have the Makita one too.)
- A small length of narrow metal chain – This works well for a chase for your sash cord to feed it through the window pocket.
- Painter’s tape – to secure the chain to the sash cord
- Lubricant for the pullies – I use WD-40. Purists use strained bacon grease. There’s surely a happy medium.
- Caulk and spackle. You may not need either of these, and you definitely won’t use them on stained windows. You might need them for painted windows.
- Sash Cord – 1/4 ” Samson or Buffalo
I think that is it. I know the list seems super long, but you probably already have some of these tools on hand. Also, consider one stage at a time. Looking at the entire project can feel overwhelming. To unstick a lower sash, you really only need four tools: a hammer, wedge, window zipper, and a utility knife. A full restoration requires a more comprehensive list of tools.
Do you have any questions? Did I miss anything? Once the 2020 Year of the Window is in full swing, I will address how to use all of these tools too. In the meantime, I have some low-key video in my highlights over on Instagram.
Now is an excellent time to start gathering tools for your window restoration project. Maybe Santa will bring you something that you need from this list.

Pin it for later!


4 Comments
Miranda
Thanks for the list, Stacy! When looking at a large project like I am, would doing a single lower sash first, before doing the upper sash be an easier way to break it down? Or is it preferred to do an entire window as one? Trying to determine my plan of attack.
Stacy
You’re welcome, Miranda. The answer to your question that it is your choice. There are pros and cons to both scenarios. Let me first say, that no matter what you choose, there should be at least one window or door that opens in every room for safety reasons. If you don’t have that, I would spend the summer doing a functional makeover on every lower sash until the house is safe again.
If that is not an issue, the rest is up to you. To fix a lower sash, you’ll have to remove the window stops. If you put it back and do the upper sash later, you’ll have to do that twice, but that’s not really a big deal in the scheme of things.
Both sashes open so cool air can come in the lower one, and hot air leaves via the upper one. However, it’s possible to get good airflow with only the lower sash open.
Basically, there are different plans of attack:
1. Opening the lowers (functional repair)
2. Open the uppers (functional repair)
3. Restore the lowers first
4. Restore the uppers after
5. Do both sashes, one window at a time.
No matter what you choose, I recommend that you do not try to restore more than one full window at a time until you are very familiar with the process. I’ve written this all in a rush, so if you have more questions, please let me know. 🙂 Good luck!
Sarah
Hi! Absolutely terrific list! Thank you so, so much for putting this information out there for people (me!). Question about sanding – is there an orbital sander that collects the dust that you recommend for after stripping off linseed oil paint? I ask because after using the speedheater on old linseed oil paint, there’s still some messy linseed oil left. 🙁
Stacy
Hi Sarah, I am so sorry I never answered this! I just saw it today. I got a new website, and it hasn’t functioned quite as I had hoped. Most orbital sanders have a collection bag that you can remove. Then, if you can find an adapter or adapter/duct tape combo, you can attach it to your shop vac. My DeWalt sander fits my DeWalt orbital without an extra adapter. I hope that helps! Again, I am so sorry for the delay.